Options
On the Options tab of the 2D Seismic SEG-Y form, set parameters to determine how the Input SEG Y file is processed.
Modifiers
Invert samples
Select this check box to invert the samples in the file so that a negative sample will become a positive sample (and vice versa).
Reverse direction
Select this check box to reverse the positive/negative sample direction. This can be useful if you are viewing the data from the opposite side but still want right to be positive.
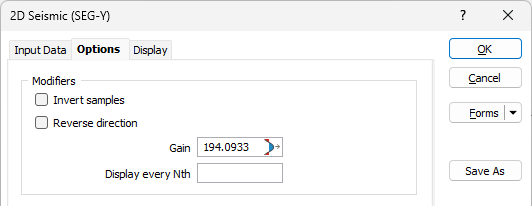
Gain
Enter a multiplier which will be applied to the sample value before calculating the offset of this point from the trace point (the wiggle).
|
|
Click on the Process icon to bring up the Generate Gain dialog. This allows you to generate a Gain value by defining a search range. |
Display every Nth
Enter a value to allow only every Nth trace to be shown. This will increase the display speed for large data sets.
Automatic Gain Control
Automatic Gain Control will modify a sample value based on the surrounding sample values in the trace.

Window length (ms)
The number of surrounding samples used is based on the window length defined (in milliseconds).
The sample will be divided by the average sample value of the surrounding samples. This will make an average sample have a value of 1 (or -1).
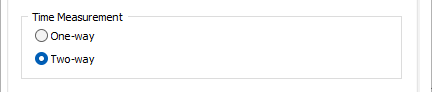
Time Measurement
Since we are obtaining the depth down the hole for a certain point, we need it in ‘One-way’ time.
Therefore, if ‘Two-way’ is selected (the default) the velocities are halved unless the ‘Depth (m)’ Vertical adjustment option is selected (see below).
Vertical Adjustment
Select from one of the following options:
Depth (m)
This value defines the length of each trace in the SEG-Y file.
Average velocity (m/s)
This is the average velocity that will be applied to the SEG-Y file to calculate the depth of each sample in a trace.
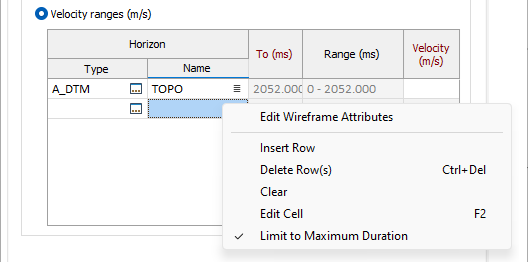
Velocity ranges (m/s)
This option allows more control over the velocities for each region within the SEG-Y file.
- Type: Double-click to select a Wireframe Type (typically DTM).
- Name: Double-click to select the name of the DTM that defines the velocity limit (e.g. Sea Floor).
- To (ms): The default time that the velocity will be used. This value is used when there is no DTM selected, or the trace does not intersect the DTM, or the trace intersects the DTM above the last calculated depth.
- Range (ms): Read-only. The range from the previous To value to the current To value. No gaps are allowed in the ranges.
- Velocity (m/s): The speed at which the sound moved during the defined time region.
The DTMs chosen to define the ranges must be DTMs in Plan view.
Limit to Maximum Duration
A limit on the maximum duration can be applied. To toggle the maximum duration Limit on and off, right-click in the grid and select the Limit to Maximum Duration option. When this option is selected, the function will read the SEG-Y file to find the maximum time that a trace takes (Sample Count * Sample Interval). The last cell in the grid will then be disabled and set to this limit.
Any existing values in the previous rows must be less than the maximum duration. If not, they will be cleared and the empty rows populated with values which are halfway between any existing values. When the Limit to Maximum Duration option is set, if a row is added, it is added before the last row and the To(ms) column is populated with a value halfway between the values it is inserted between.
Forms
Click the Forms button to select and open a saved form set, or if a form set has been loaded, save the current form set.
By design, the Forms button is not available for loaded Vizex layers (i.e. when opening the form set properties of a layer in the Vizex Layer Display pane). In Vizex, the Forms button is only available for new forms opened via the Home tab or the Vizex tab, in the Layer group (or by double-clicking on a form type node in the Vizex Layer Types pane).
Save and Save As
Click the Save button to save the changes you have made to the form set. Click Save As to save your changes as a new form set. Save As will default to the first available form set number.
Reset
Click Reset to clear the form of all values and reset the form to its default state.
Reset Tab
For tabbed forms, select Reset Tab to clear the active tab of all values and reset the tab to its default state - without making any changes to other tabs in the dialog.
Undo and Redo
Click Undo (CTRL + Z) to undo recent changes in the form. After an Undo, click Redo (CTRL + Y) to restore the last change that was undone.
Collapse
Collapse (roll-up) the form to preview a chart, or preview the results of an operation in Vizex, or obtain input values from Vizex, the Property Window, the File Editor, or the Plot Editor.