Volume
![]()
The 3D Volume layer supports processing options for in-line and cross-line sampling. Colour, 3D Shaded and 2D Slice draw styles, and layer transparency, can all be applied to the model. An option to generate isosurfaces around discontinuities detected during seismic interpretation, is also provided.
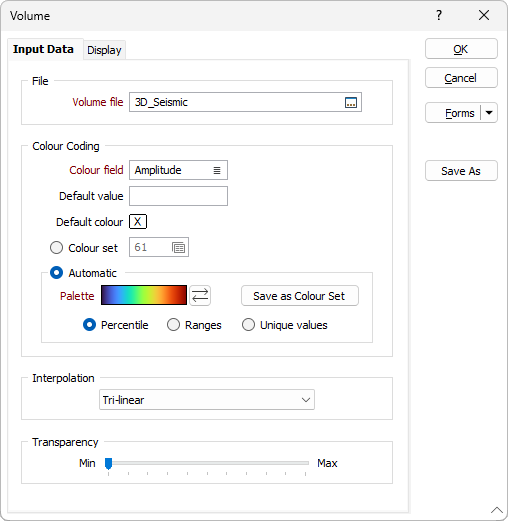
Input Data
File
Volume file
Double-click (or click on the Select icon) to select the Volume (*.mmvol ) file to be loaded. This file is an output from the File | Import | 3D Seismic (SEG-Y) function.
Colour field
Specify the name of a field which contains the values that will be used to colour-code the display. If you are mapping Colour field values to a Colour Set, the values in the Colour field must be valid RGB, HTML Hex, Hex, or Integer colour definitions.
| Format | Example | |
|---|---|---|
| RGB | 89,169,215 | RGB ordered |
| HTML Hex | #59A9D7 | BGR ordered |
| Hex | 0x59a9d7 | BGR ordered |
| Int | 5876183 | BGR ordered: RED + (GREEN*256) + (BLUE*65536) |
You can choose to select colour values directly from the Colour field without selecting a Colour set. In this case, you can also select a formatted Colour field.
You can view and edit the RGB values assigned to the Colour field in the Property Window. Click on the ellipsis to open the Colour picker:
Default value
Optionally, enter a default value to allow null cells to be replaced by the specified colour. The value you enter must be a valid RGB, HTML Hex, Hex, or Integer colour value.
Default colour
Double-click (F3) to select the colour that will be used when a Colour field or a Colour set is not defined - or when a value in the Colour field is either not valid or is not mapped in the Colour set.
Colour set
To map values in the Colour field to the colour values in a Colour set, double click (F3) to select the set that will be used to control the display colour. Right-click (F4) to create or edit a Colour set.
Automatic
Select Automatic to select a palette and automatically apply colour ranges to the data. The Save As Colour Set button provides the option to save the result as a colour set.

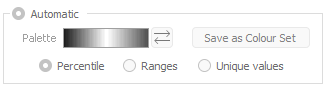
Choose a mode of calculation:
| Mode | Description |
|---|---|
| Percentile | The application will divide the data into ranges each containing the same number of values; the highest and lowest value in each bin will define the upper and lower values for each range. |
| Ranges | The data will be divided into equal ranges. |
| Unique values | A colour will be assigned to each unique value. |
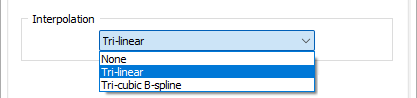
Interpolation
For 2D Slice mode, select an interpolation method which may be used to produce smoother slices. Note that the Volume display may take longer to render.
| Method | Description |
|---|---|
| None | No interpolation. |
| Tri-linear | A process of linearly interpolating points within a 3D box given values at the vertices of the box. |
| Tri-cubic B-spline | A process of obtaining values at arbitrary points in 3D space of a function defined on a regular grid. |
Transparency
Use the transparency slider to specify the intensity of the display layer. The visibility of the layers underneath the current display layer will be determined by the degree of transparency you select.
Note that the transparency slider affects all volumes except the isosurfaces, since they have their own transparency sliders (default = 0 transparency).
Forms
Click the Forms button to select and open a saved form set, or if a form set has been loaded, save the current form set.
By design, the Forms button is not available for loaded Vizex layers (i.e. when opening the form set properties of a layer in the Vizex Layer Display pane). In Vizex, the Forms button is only available for new forms opened via the Home tab or the Vizex tab, in the Layer group (or by double-clicking on a form type node in the Vizex Layer Types pane).
Save and Save As
Click the Save button to save the changes you have made to the form set. Click Save As to save your changes as a new form set. Save As will default to the first available form set number.
Reset
Click Reset to clear the form of all values and reset the form to its default state.
Reset Tab
For tabbed forms, select Reset Tab to clear the active tab of all values and reset the tab to its default state - without making any changes to other tabs in the dialog.
Undo and Redo
Click Undo (CTRL + Z) to undo recent changes in the form. After an Undo, click Redo (CTRL + Y) to restore the last change that was undone.
Collapse
Collapse (roll-up) the form to preview a chart, or preview the results of an operation in Vizex, or obtain input values from Vizex, the Property Window, the File Editor, or the Plot Editor.