Edit Text Box
On the Vizex | Annotations tab, in the Text group, click the Add Text Box tool to add a Text Box object to the Annotation layer.

This option is also available on the Plot Editor tab, in the Annotations group, when a 2D plot is open in Edit Labels mode.
A Text Box dialog is opened whenever you add or edit a Text Box object. To edit a Text Box object, double-click on the object - or select the object and then right-click and select Edit Text.
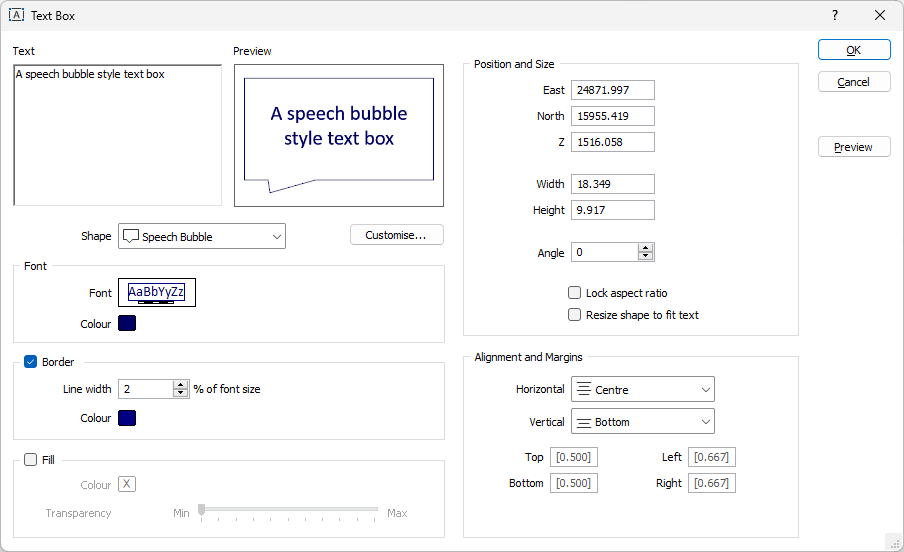
Text
Enter the text you want to display in the box. For long text, use the scroll bar or the mouse wheel to vertically scroll the text.
The text is shown in the neighbouring Preview pane.
Shape
Select from a list of pre-defined text box shapes:

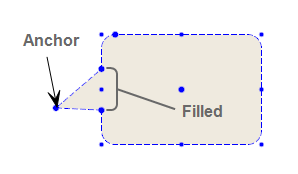
Customise
Click this button to customise the properties of the Text Box Shape you have selected. When you edit the properties of a predefined shape, the type of the shape is changed to "Custom".
Font
Double-click on the Font icon to open the Font Properties form. Double-click the Colour box to select a colour for the text.
Border
Select this check box to apply a Line colour to the border of the box. You can also specify the Width of the line as a percentage of the chosen font size.
Fill
Select this check box to apply a Fill colour to the box. You can also use the slider control to set the transparency of the fill colour.
Position and Size
The initial extents of the box are populated when you select the Text Box tool and use the mouse to interactively position and size a box.
Once the dialog is open, you can adjust the East, North and Z position of the box and the Width and Height of the box.
Angle
The angle of the box is horizontal (0) by default, but can also be adjusted.
Lock aspect ratio
Select this check box to maintain the aspect ratio of the box whenever the box is resized.
Resize shape to fit text
When this check box is selected the box is automatically resized so that a best-fit of the text is achieved. To maintain the aspect ratio during resizing, select the Lock aspect ratio option (above).
Alignment & Margins
Set the alignment and margin of the text within the box:
-
By default, the Horizontal alignment of the text in the box is CENTRE. If you want to change it, specify the horizontal (LEFT, RIGHT, CENTRE) alignment of the text.
-
By default, the Vertical alignment of the text in the box is CENTRE. If you want to change it, specify the vertical (TOP, BOTTOM, CENTRE) alignment of the text.
Top, Bottom, Left, Right Margins
Accept the defaults or set a custom margin on each side of the box.
Preview
Click Preview to minimise the dialog and view the box in Vizex or the 2D Plot. Press ESC to return to the dialog.
OK
Click OK to add the text box in Vizex or a 2D Plot.
Note: In order to see the text box in Vizex, you may need to toggle the Depth Testing setting to Layer Order rather than 3D Order (in the Vizex Layer Display Pane).