Hatch
On the Hatch tab of the Display Block Model form, choose how the model will be hatched (if at all).
Use Hatch Field
Select this option to make the hatch pattern dependent on the values in one of the fields in the input file. If this option is clear, then a single hatch pattern will be used.
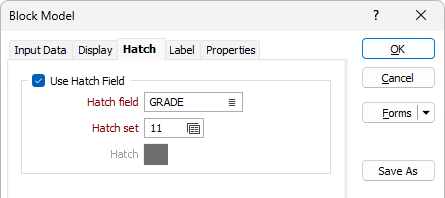
Hatch field
Enter the name of the field (in the input file) that contains the data that will control hatching. The hatch set that is associated with this field maps hatch patterns to text strings or numeric ranges. The value in this field determines which hatch pattern will be used for each record in the file .
Hatch Set
Enter the number (from 1-999) that identifies a hatch file. If hatching is associated with a numeric field, the number will refer to a numeric hatch set. If hatching is associated with a character field, the number will refer to a text hatch set.
You can double-click on the Hatch box, if it is enabled, to define the fill pattern (TrueType Font or TTF) to be used for the hatch.
Hatch Colour Coding
Select one or both of these options to control the colour of the hatch pattern using a colour set. The colours you select will be used instead of the Foreground and Backgroundcolours in the hatch pattern definition.
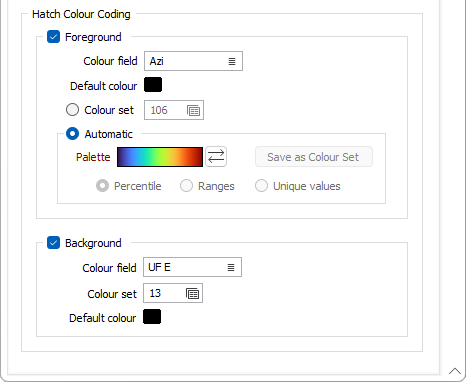
Foreground
Select this option if you want to colour the foreground based upon a colour field and either the colour values defined in a Numeric or Text colour set or the colours automatically applied form a chosen palette.
Colour field
Double-click (F3) to select the field that will be mapped to the colours you have specified below.
Default colour
Double click the Default colour box to select a colour to use by default for the foreground.
Colour Set
Colour sets are one of the most important ways of making it easy to differentiate between values, regions and other objects in the display. The tools you can use to create colour sets (including the Automatic option below) are particularly powerful. Colour sets are saved as form sets and can be used anywhere in a project and can even be exported to other projects.
Double-click the Colour Set input box if you want to select an existing colour set. Right-click in this box to edit the selected colour set or to create a new one.
Automatic
Select Automatic to select a palette and automatically apply colour ranges to the data. The Save As Colour Set button provides the option to save the result as a colour set.

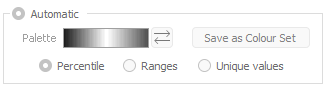
Choose a mode of calculation:
| Mode | Description |
|---|---|
| Percentile | The application will divide the data into ranges each containing the same number of values; the highest and lowest value in each bin will define the upper and lower values for each range. |
| Ranges | The data will be divided into equal ranges. |
| Unique values | A colour will be assigned to each unique value. |
Background
Select this option if you want to colour the background based upon a colour field and the colour values defined in a Numeric or Text Colour Set.
Colour field
Double-click (F3) to select the field that will be mapped to the colours you have specified below.
Colour Set
Colour sets are one of the most important ways of making it easy to differentiate between values, regions and other objects in the display. The tools you can use to create colour sets (including the Automatic option below) are particularly powerful. Colour sets are saved as form sets and can be used anywhere in a project and can even be exported to other projects.
Double-click the input box to select an existing Colour Set. Right-click in this box to edit the selected set or create a new one.
Default colour
Double click the Default colour box to select a colour to use by default for the background.
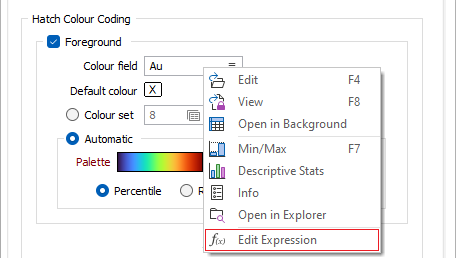
Expressions
Expressions are supported when specifying foreground and background colour values:
=[Fe_BT_Linear]-[Fe_BT_Ln]
Right-click in the Colour field response and select Edit Expression from the menu: