Import Text (with Header) Example
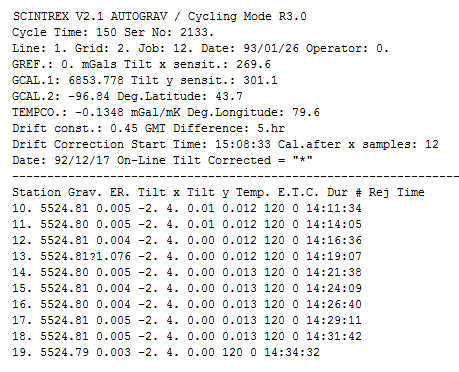
The following is example output from a gravity meter. Typical settings in the Header and Data Field dialogs are shown:
The format of this data has been altered to suit the presentation of this example. Do not use this data to calculate field widths if downloading data from similar instruments.
In example output, the header information is contained in the first 10 lines and the data in lines 13-22.
Header Field Setup
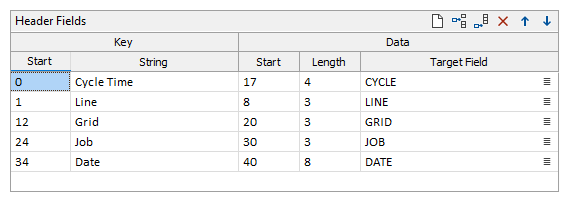
The header information required is the Cycle time, line and grid number, job number and the date of collection. The Target Fields have been named CYCLE, LINE, GRID, JOB and DATE.
The keys used for this data in the file header are Cycle Time, Line, Grid, Job and Time. (See the header field.) Enter these in the String column of the Header Fields table.
The values in Data Start indicate the columns in which the appropriate piece of information starts and the Data Length indicates the length of the data. The Target Fields contain the names of the fields in the file that will receive the header data.
The Header Fields definition should be as follows when all the required information is entered:
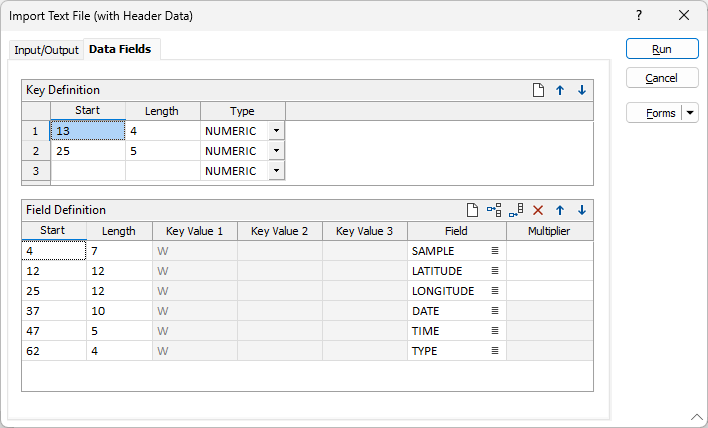
Data Fields Setup
The data to be imported is: Station, Gravity, Tilt X, Tilt Y, Temp, and Dur. All the lines that contain this information start with three blank spaces so the key definition is set to:
- Start in column 1
- Have a length of three columns and
- Have a type of BLANK.
Whenever this key is found, the data defined in the start and length columns of the field definition table will be placed in the fields of the file defined opposite. The Data Fields dialog form should resemble that in the following illustration.
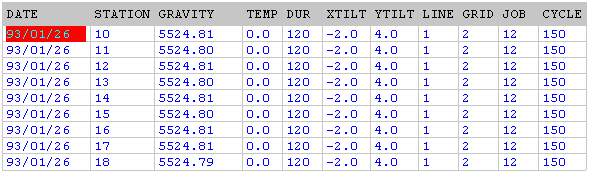
The resulting file should look like the following: