Import Text (Legacy)
![]()
The following options are provided in the Import Text form:
Input
In the Input group, click the ellipsis button (double-click or F3) to navigate to the location of the (*.csv, *.tab, *.txt) Input file. Specify the format of the file by selecting an option from the drop down list. If necessary, right-click (F4) to view the file.
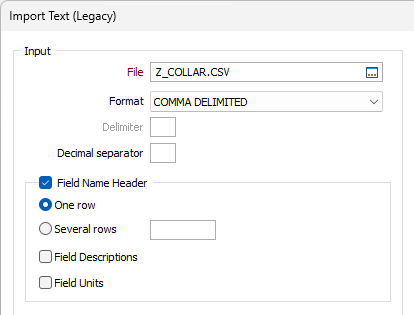
Text File Format
Select a Delimited file format or select COLUMN FORMAT.
| Input Format | Description |
|---|---|
| [...] DELIMITED | The option you choose should match the delimiters (TAB, SPACE, COMMA, SEMICOLON, PIPE) in the Input file. Alternatively, select DELIMITED to specify a custom delimiter. |
| COLUMN FORMAT | If this format is selected, the field structure of the Output file should be a match for the field structure of the Input text file. This means that Binary fields are not supported. When you select an Output file, the structure of the file is shown in the Fields to Import group. Click Preview to see how the data in the Input file will be imported, based upon the structure of the Output file. |
Delimiter
If you selected DELIMITED as the file format, enter a Delimiter character. Delimiters are ASCII characters used to separate one data field from the next.
Decimal separator
The separator that is used to denote decimal values may vary depending on locale. A decimal point is the default. If necessary specify an alternative separator.
Field Name header
Select this check box if the Input file has a field name header and specify whether the field name header spans one row or several rows. If the header spans several rows, specify how many field name header rows there are.
Field Descriptions
Information such as ppm, % ppb and more can be contained in the field descriptors from text files. When selected, this check box indicates that the contents of the Description field will be included in the import. The import process will assume that field descriptions are contained in the row immediately following the header row in your text file.
Field Units
Information on Units can be contained in exported text files. When selected, this check box indicates that Unit information will be imported to the application as part of this import procedure.
Rows to ignore

Some rows in a text file often contain labels and metadata that you want to exclude. To exclude rows from the Import process, specify the number of rows you want to ignore at the Start of file, After a specified row number, or at the End of file.
If a field name header has been specified, you can also choose to exclude rows after the field name header.
While most field name header rows occur at the start of a file, they do not always. If necessary, you can right-click (F4) in the File response box to view the contents of the Input file. If field name header lines exist make sure they are not ignored!
Select the Import empty records check box option to import files which contain empty (yet valid) records. Empty records in a file will be ignored when this option is not selected.
Output file Structure
In the Output File Structure group, specify how the structure of the Output file will be determined. There are three options:

Determine from Input file
If this option is selected, the Import function will use the delimited structure of the Input file to determine the structure of the Output file. This option is not available when COLUMN FORMAT is chosen as the Input format.
Use Output file
If this option is selected, the data in the Input file will be written to the specified Output file.
Use template file
Select this option to base the structure of the Output file on a Template file.
The width and decimal precision of each field is based upon the values encountered when the rows of the file are are scanned. Values in the Input file are mapped sequentially to the fields in the Output file and data types are converted where necessary.
Specify the Name of the template file to be used for the structure of your output.
If you know that the Type, Width or Decimal Precision properties of a field (derived after scanning the file) are incorrect, you can change them in the Preview.
If the structure of the Input file is not accurately mapped to the Output file, then data may be lost during the import process. Refer to the Report file section (below) for a list of possible errors.
Rows to scan
If the structure of the Output file is to be determined from the Input file, specify the number of rows to be scanned when determining the fields to import (See below). The default number of rows to scan is 1000.
For files where the format of the file is known to be consistent, you might choose to scan the first 100 rows of the file, for example. This will be much quicker than scanning the entire file.
Output
In the Output group, select the type of the Output file from the (Data, String, Survey, Macro, Lookup) options provided in the drop-down list, and specify a Report file.

When you click Run to run the Import process, if the specified output file already exists, you will be given the option of overwriting the file, or appending data to the file.
Report file
The details of any errors encountered during the import process will be written to the specified Report file.
Expand report to include error details
By default, the function will write a short error count for those rows that have missing, truncated, or erroneous data.
Select this check box to write a more verbose report that includes the row number and the detail of every error encountered during the import process.
The following errors are reported:
|
Error Code |
Error |
Description |
|---|---|---|
| ET_WRONG_NUMERIC_DATA = 1 | Numeric expected. | A non-numeric token was encountered in a numeric field on this row. Allowable tokens are: 0123456789.+-<> |
| ET_WRONG_PRECISION_LENGTH | Insufficient precision. | The decimal precision of a value on this row is less than the decimal precision of the field (defined in the Output file or determined during scanning). |
| ET_WRONG_DATA_LENGTH | Value truncated. 1 | A value on this row is longer than the width of the field (defined in the Output file or determined during scanning). |
| ET_LONG_RECORD | Value missing. 1 | The number of values encountered on this row is less than the number of fields (defined in the Output file or determined during scanning). |
| ET_SHORT_RECORD | Extra value. 1 | The number of values encountered on this row is greater than the number of fields (defined in the Output file or determined during scanning). |
1 Data may be lost if blank or truncated values are written to the Output file. If extra values are encountered, they are NOT written to the Output file.
Auto open file for editing
Select this option to open the file for editing in the File Editor once it has been .
Auto load in Vizex
Select this option to open the file in Vizex (if applicable for the type of Output file). Text files which contain non-spatial data will not be loaded.
Fields to import
When COLUMN FORMAT is the chosen Input format, the structure of the Output file is shown in the Fields to Import group. You cannot change the structure, but you can preview the data that will be imported.
When a Delimited format is the chosen format, you can scan the Input file and use the check boxes and buttons in the Fields to Import group to select the fields you want to import. If necessary, you can also preview the imported data and modify field properties.

Select all
Click this button to quickly select all of the rows displayed in the Fields pane.
Clear all
Click this button to clear the current selection in the Fields pane.
When selecting the fields to import, note that you can also use the SHIFT key with the mouse to select and clear multiple field selections simultaneously.
Preview
Click this button to view the imported data in a Preview window.
Scan Rows
Click this button to scan the number of rows specified in the Output File Structure group (See above).
Scan File
Click this button to scan the entire Input file rather than a subset of rows in the file.
If you click Run, and Determine Structure from Input file is selected, but no scan has yet taken place, you will be prompted to click the Scan Rows or the Scan File button.
Once you have scanned the Input file, the Scan options will be disabled. However, if you modify your Input file or Output file structure settings, you will be given the opportunity to scan the file again.
When running a macro with Determine Structure from Input file selected, the function will use the “Scan File” (ALL) option.
Forms
Click the Forms button to select and open a saved form set, or if a form set has been loaded, save the current form set
Run
Click the Run button to begin the Import. After running the Import process, check the Report file for errors. Press ESC to interrupt the process at any time.