Generate
![]()
When you run this function, the values in a reference field are checked to see if they fall within the certain range (for numeric fields), or if they are equal to a specific text string (for character fields). For those that do, the value from the associated result attribute is copied to the Result field; others get the value from the Default result field.
You can use Generate with symbols, to automatically assign symbol numbers based on the data in your file.
For example, you can assign symbol number 10, in a separate field, to all records with a gold grade of 0 - 2 grams. All those between 2 and 5 grams are given the value 25, etc. When you ensure that the numbers you assign correspond to actual symbol numbers, you can then plot the grades using symbols instead of the actual grades.
You can also use the Generate function if you want to generate some meaningful text from the numbers in your file. You can enter text strings of up to 60 characters.
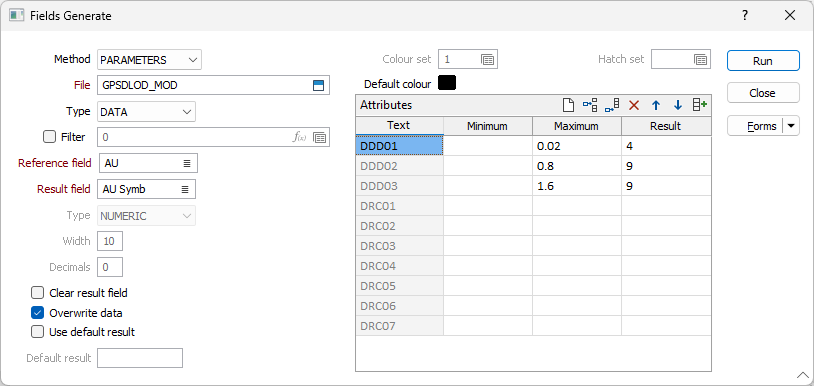
Method
From the Method list select the type of file to work with; either PARAMETERS, COLOUR SET or HATCH SET. Parameters works with any value, while Colour set and Hatch set only work with colour and hatch sets respectively.
Input file
Enter the name of the file you want to work with. Optionally define a filter to selectively control which records will be processed.
Reference field
Enter the name of the reference field that is to be checked. For Colour and Hatch sets the reference field is called Colour field or Hatch field respectively.
Result field
Enter the name of the field where the result is to be stored.
Clear Result field
Select the Clear Result field box to clear the values in the Result field before running the process.
Overwrite data
Select the Overwrite data box if you want this function to overwrite existing data.
Use default result
Enter the value to be placed in the Result field for fields that do not pass the check.
Colour set and Hatch set
If the chosen method is COLOUR SET or HATCH SET, enter the number of a set in the Colour Set and Hatch Set input boxes. For Colour set, you can also specify a Default colour. Double-click on the colour icon to select from a colour palette.
Attributes
If you selected the PARAMETERS method, type in attributes for one or more fields to be checked:
- For character fields type in Text, using Wildcards if required.
- For numeric fields type in Minimum, Maximum or both. To work with integer input values (e.g. 1 = Measured, 2 = Indicated, 3 = Inferred), set the minimum and maximum to the same integer value.
- Type a value in the Result column of the table. This will be placed in the Result field of the file for fields that contain the defined values.
Use the buttons on the local toolbar to Manage the rows in the list.
Auto fill
 Click the Auto-fill button to automatically populate the Minimum and Maximum columns. You will be prompted to Calculate ranges based on the first and last values (you enter) and either a set number of intervals or a set interval size.
The Auto-fill button is only valid when the Reference field is numeric.
An auto-fill operation will always overwrite any existing content in the targeted columns, and will adjust the number of items in the grid list to suit the current auto-fill result.
The Text and Result columns can use the same (numeric) auto-fill operations. Access this functionality from the right-click menu rather than the toolbar button. You can use this to group continuous data into numerical bins, for example everything from 0 to 10 gets labelled as 5, everything from 10 to 20 gets labelled as 15, and so on.