Output
On the Output tab of the Silhouette form, specify an output file and choose which wireframe attributes to write to the file.
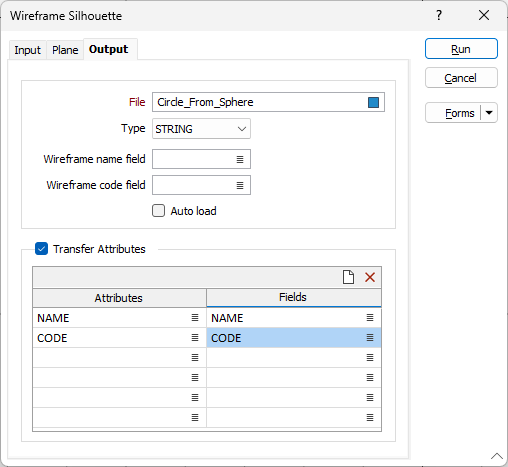
File
Select a file Type and then enter (or double-click to select) the name of the File to which the results of the process will be written. To create a new file, right-click in the file input box and select New from the right-click menu
Wireframe Name and Code fields
(Optional) Enter or double-click to select the name of the fields to which the Name and Code attributes of the input wireframes will be written.
You can also create wireframe silhouettes interactively using the Silhouette tool on the Wireframe tab, in the Editing group. See: Editing

Auto load
Select this option to load the silhouette string in Vizex.
Transfer Attributes
Select the Transfer Attributes check box and double-click in the Attributes column to select the attributes you want to write to the file. Up to 6 attributes can be written to the file.
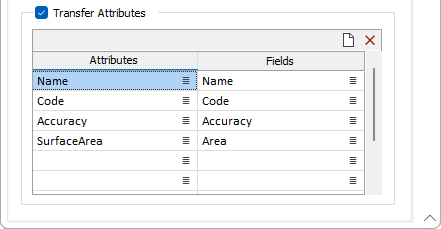
You can use the buttons on the toolbar to delete attributes or clear the attribute list.
|
|
Click to Clear all rows. |

|
Click to Delete the selected rows. |
When you select an Attribute, the attribute name appears as the default Field name in the Fields column. New fields will be created if they don't exist. If a field of the same name already exists in the file, it will be overwritten. However, you can choose to write the attribute to another field instead (see 'Fields' below).
Fields
If you do not want to accept the default field names. double-click in the Fields column to select the fields that each attribute will be written to.
Run
Click Run to execute the function.