Material Bins
At the bottom of the Elements tab of the Reference Block Model form, specify the material bins for which attributes are to be calculated.

Press F4 (or choose Edit from the right click menu) to open the Material Hierarchy window.
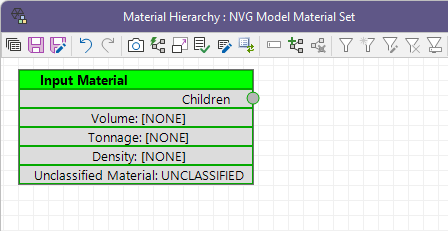
You will be presented with a canvas. A mandatory “Input Material” node is added to the canvas by default to handle any material excluded by the material bin filters that are subsequently created. If material does not fit the condition for any material bins, that material is categorised here as unclassified material.
You can add material types using the right click menu. As well as the Add options, there are two other items on the right-click menu:
| Menu Option | Description |
|---|---|
| Show Report View | Show a preview of how the bins you have setup will be displayed when a report is run. |
| Arrange | Re-arranges the view by positioning the bins to the top left of the window. |
| Add Material | Create a new material bin. |
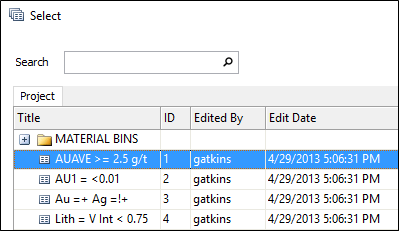
| Add Filter Materials | Create a new material bin based on a pre-defined filter |
Add Filter Materials
A quick way to create the leaf nodes of a Material parent-child hierarchy is to do the following:
- Right-click in the Editor window and select Add Filter Materials.
- To rename the material, double-click in the title bar or right-click and select Rename Material.
- Once filtered nodes have been added, you can right-click on a node and select Add Parent Material. The selected nodes will be connected to the new parent as children.
- Rather than use Add Filter Materials you can select Add Material to create the materials that will form a hierarchy and then manually add filters as needed:
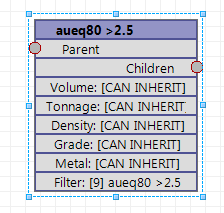
You will be prompted to select a saved form set that defines the filter:
A new Material Type, based on this filter, is then loaded into the View:
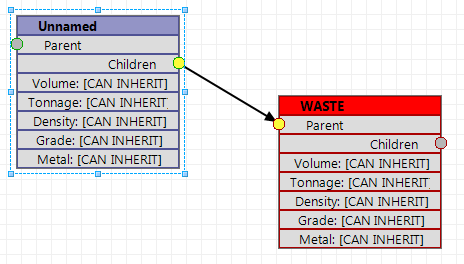
Alternatively, link the material types by using the mouse to click on and extend one Parent-Child connector to another:

To add a filter right-click on the material and select Choose Filter (F3).
To use the filter name as the name of the material, right-click and select Use Filter Name.
To delete materials, select the materials you want to delete and select Delete Materials from the right-click menu.
Filter precedence
Filters are evaluated in top-down order, moving across each hierarchy from parent to child.
If a filter is not defined for a parent, for example the volume of WASTE is not defined, then the volume of the WASTE material will be equal to the sum of the volume of its children (for example, FRESH, TRANS and OXIDE).
If a filter is defined for a parent, then the volume is the sum of the blocks that passed the filter and did not pass a previous filter.
A block can only be assigned once.
Validation
Material definitions that have failed validation are shown with a RED title. To ascertain the problem, hover the mouse over the title bar to see a tooltip. Validation may fail due to the following reasons:
| Error | Description |
|---|---|
| INVALID FILTER | The chosen filter is not valid for the input data. |
| DUPLICATE FILTER | The chosen filter is already defined as part of the same hierarchy. |
| LEAF NODE HAS NO FILTER | A child node must have a filter defined. |
| DUPLICATE LEAF NODE NAME | A child node name must be unique. |
Attributes
Once a hierarchy is in place, you can specify which attributes to report on and display when the report is run:
- Double click on the attribute to be defined or edited, or right-click on a Material and select an attribute:
- For a Child node it is usual to inherit the attribute properties from the parent. If an attribute is inherited, it will be reported and displayed in the same way it is reported and displayed for the parent bin.
- To exclude an attribute, select None.
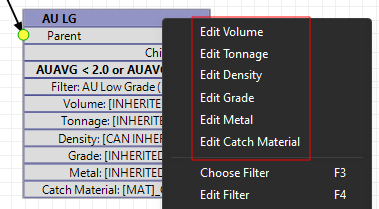
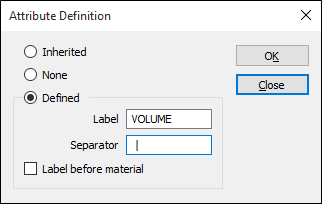
If an attribute is defined, you will need to specify a label and a separator that defines how the attribute is displayed and reported.
Label
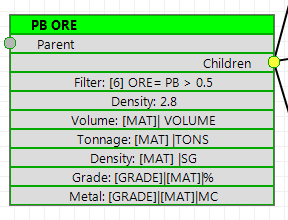
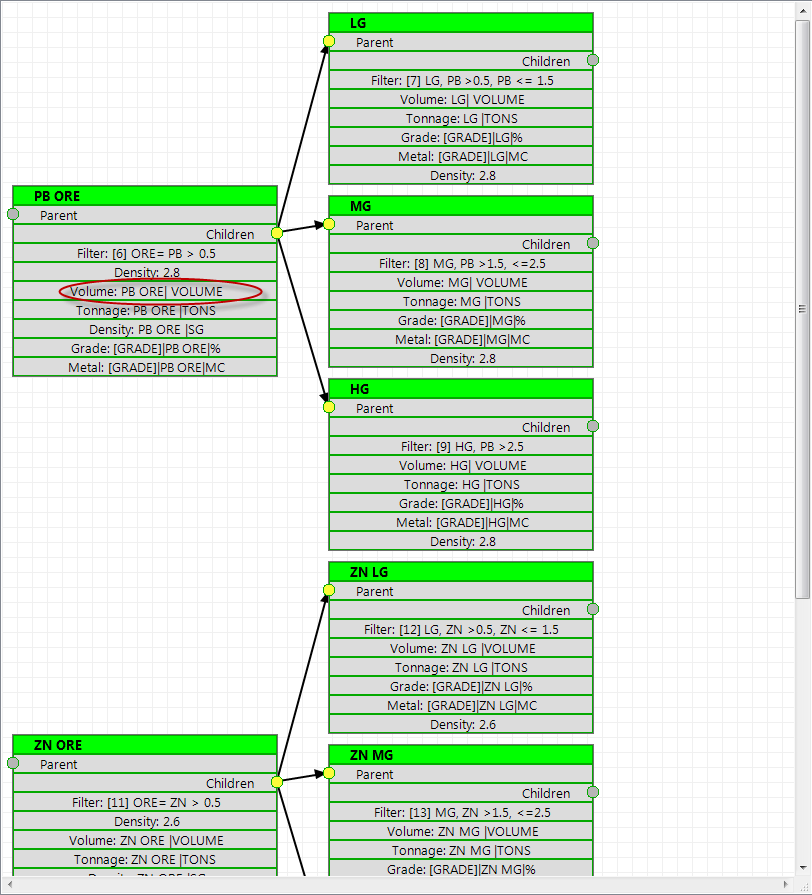
Defined attributes are given a name that has at least 2 components. For Volume, Tonnage and Density the Attribute Name will be a combination of the Material name and the user defined Label. The Label can be positioned before or after the Material name. A user defined separator is placed between the Material Name and the Label.
In Edit view the Material name is displayed as [MAT]. In Report View [MAT] is replaced with the actual Material name. The Label is used to create a unique name for the attribute and should be suitably descriptive. If the Label is a suffix, then appropriate units might be used. For example, you might use the Label (T) for Tonnage.
An example is shown below:
| The Volume attribute in Edit view: | How the Volume attribute is setup to be reported: | |
|
|
How the Volume attribute appears in Report view:
For Grade and Metal the Attribute Name will have three components. The name of the Grade field (from the block model) the Material name and the user defined Label. In Edit view, the Grade field component is shown as [GRADE]. If the Grade is bound to a single field (see below for detailed explanation on binding a grade field), then [GRADE] is replaced by the actual field name in Report view. When not bound multiple grade attributes will be created and this is indicated by maintaining the [GRADE] component in Report view.
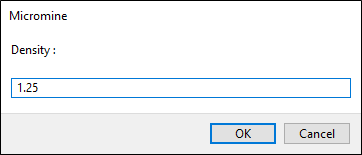
Density
Note: For Imperial projects, Density inputs are replaced with Tonnage Factor inputs and the processing of the reference block model will treat these values accordingly.
After computing an element volume for a wireframe based on a block model, for example, the element mass will be calculated as
Volume / Tonnage Factor (rather than Volume * Density).
To explicitly associate a default density value with a material:
- Right-click on a material and select Add Density from the right-click menu.
- To edit the Density value for a material, right-click and select Edit Density.
- To remove the Density value for a material, right-click and select Remove Density.
If the material is a parent, its Density value is inherited by its children (unless they also have their own Density value defined).
Show Report View/ Show Edit View
To toggle between Report View and Edit View, right-click in an empty portion of the view and select an option:
- Show Report View shows what will get written to the Report file based on the filters that are defined for the input data.
- Show Edit View will show all attributes, including those that are excluded from the Report file.
