Ring
Use the tools on the Mining | Ring Design tab, in the Ring group to create and edit, arrange, move, renumber and delete rings in your Ring Design.
-
Click Create New Ring. Before you create a ring you will need to select an existing drive in the display, or add a drive to the display.
![]()
-
Click Edit Ring to put the display into Edit Ring mode.
![]()
-
Click Replicate Ring Along Drive to copy a ring along the drive multiple times.
![]()
-
Click Arrange Rings on Drive to create rings with boundaries which are determined by the proximity of a selected ore body and arrange those rings along the drive using the specified burden distance between them.

-
Click Move/Copy Ring to copy the currently selected ring to a new location on any drive. Once in Copy mode, you can select a point on any drive (including the drive the source ring is located on) as the location for a new ring.
![]()
-
Click Delete Selected Ring Design Object (or press the DELETE key on the keyboard) to delete all currently selected (drive, ring, or hole) objects.

-
Click Arrange Rings on Drive to create rings with boundaries which are determined by the proximity of a selected ore body and arrange those rings along the drive using the specified burden distance between them.
-
Click Move/Copy Ring to copy the currently selected ring to a new location on any drive. Once in Copy mode, you can select a point on any drive (including the drive the source ring is located on) as the location for a new ring.
![]()
-
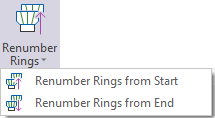
When a ring is selected (Edit Ring mode is not active) the option to Renumber Rings in both directions is provided.


-
Click Renumber Rings from Start to renumber the rings along the selected drive in ascending order.
-
Click Renumber Rings from End to renumber the rings along the selected drive in descending order.
-
Click Delete Drillholes to delete holes by selecting one or more (drive and/or ring) objects which contain the holes you want to delete. You can use this tool without necessarily entering Edit Ring mode.
