Modify File Structure
This option is also available on the File Editor tab when a file is open and the Lookup Table Editor tab when a lookup table is open. When Drillhole Validation has been carried out, it is also available on the Drillhole | Viewer tab, in the Data File group.
![]()
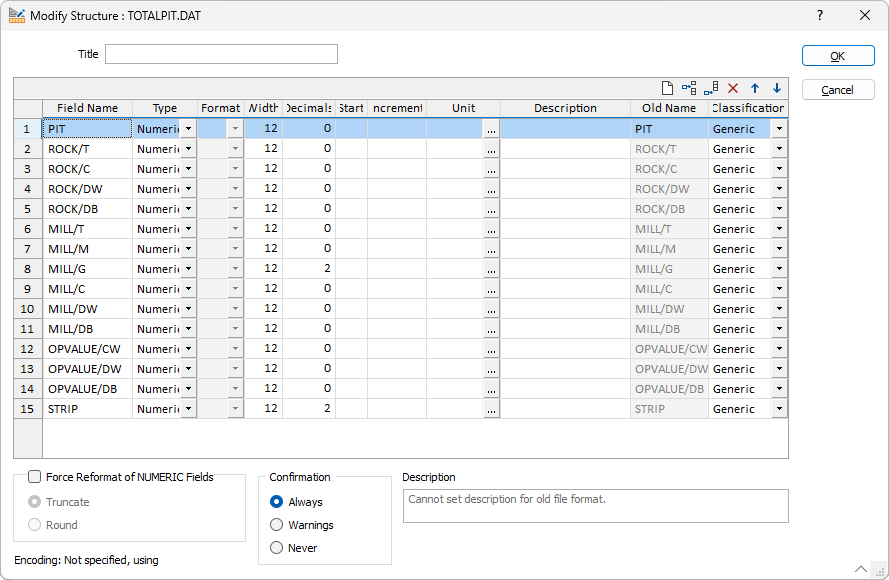
One of the strengths of the application is that a file structure can be changed even when the file contains data. Different UTF8 file formats are supported. The current file encoding is indicated at the bottom-left of the Modify File Structure grid.
To change the structure of a file, do the following:
- On the File tab, in the Edit Data group, click Modify File Structure. The Open file folder is displayed.
- Select the name of the file whose structure you want to modify and click OK. This opens the Modify File Structure grid.
-
Modifying the structure of a file in a previous version will remove any descriptions you have added in the current version.
-
Generic (the default)
-
Density
-
Grade
-
Volume
A DESCRIPTION column, on the right-hand side of the grid, allows the purpose and the content of any field in the file to be described using a maximum of 255 characters.
An OLD_NAME column, to the right of the DESCRIPTION column, provides an indication of field name changes and field additions.
The default CLASSIFICATION of any field is Generic. Optionally, apply a different classification to the field:
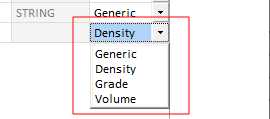
Classification allows the fields in a file to be ordered, grouped or filtered based upon a particular classification value. Fields classified as Density, for example, might be included in the calculation of weight graded averages.
Use the buttons on the local toolbar to Manage the rows in the list.
Pressing the Tab key in the last cell of the last row, creates a new row.
To select a row, right-click and select Select Record(s) from the right-click menu. If a range of cells is selected, any records within that range are selected.
You can right-click on a cell in the grid and select an option to sort that column in ascending or descending order, based on its field values.
When you add new fields using Modify, no data will be lost from the file. However, if you delete a field that contains data, that data will be lost. If you inadvertently delete a field, Undo (CTRL + Z) functionality is supported.
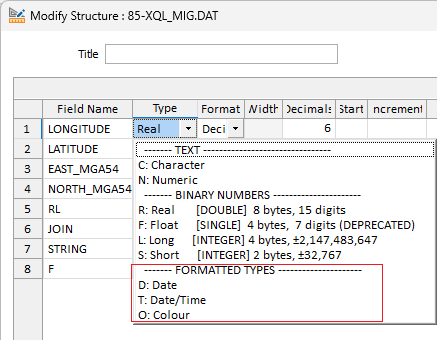
Field types
- Text (Character, Numeric), Binary (Real, Float, Long, Short) and Formatted (Colour, Date, and Date Time) field types can be selected in the Modify File Structure grid:
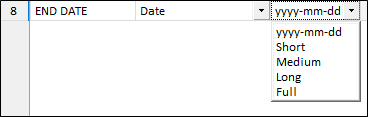
Date
Use the drop down in the Format column to select the ISO (yyyy-mm-dd) date format, or select a (Short, Medium, Long or Full) date format.
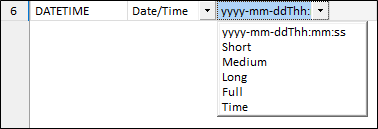
Date/Time fields
Use the drop down in the Format column to select the ISO (yyyy-mm-ddThh:mm:ss) date/time format, or select a (Short, Medium, Long, Full or Time) date format.
When you select a Short, Medium, Long, Full, or Time format, the field is formatted using the International Components for Unicode (ICU), based on the locale of your computer. For more information, see: http://demo.icu-project.org/icu-bin/locexp
The English (Australia) locale is switched to use the English (United Kingdom) locale, since the short date formats of the latter are preferred.
Colour fields
In the File Editor, the content of a formatted Colour field is displayed as a (selectable) colour patch.
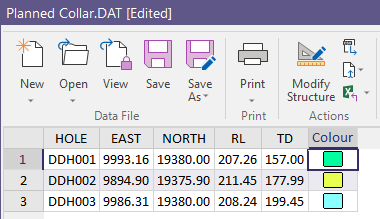
This field can be used to colour code data displayed in Vizex. However, if you are mapping Colour values to a Colour Set, the "Colour" field you select must be a field that contains valid RGB, HTML Hex, Hex, or Integer colour definitions.
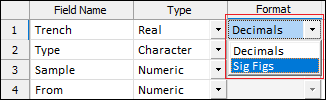
Real fields
When choosing how Real numbers are formatted, you can specify the number of decimal places or the number of significant figures:
When modifying the structure of a file and adding a Real field, the field is populated with a Decimals format and blank decimals. Unless the decimal precision is explicitly set, a default precision, based on the data in that field, will be used.
For Real fields, the valid range of precision is -9 to 9 decimals (includes 0 decimals), then the default decimal precision. Negative decimals on a Real field are rounded to powers of 10.
For Float (single-precision) fields, the valid range of precision is 1 to 9, then the default decimal precision. FLOAT fields are now deprecated in File Create/Modify and are no longer recommended. FLOATS are converted to REALs (double precision), improving precision and avoiding numerical inconsistencies.
Long fields are integer fields with a range of ± 2,147,483,647. Long fields are best suited for a count, ID number, or record number field where the numeric values are integers that are expected to exceed 32,767.
A Short field is an integer with a range of ± 32,767. Use a Short field for numerical codes and other small integer numbers.
Date fields
Select the Micromine (yyyy-mm-dd) date string, or select a (Short, Medium, Long or Full) date format.
Date
Use the drop down in the Format column to select the ISO (yyyy-mm-dd) date format, or select a (Short, Medium, Long or Full) date format.
Date/Time fields
Use the drop down in the Format column to select the ISO (yyyy-mm-ddThh:mm:ss) date/time format, or select a (Short, Medium, Long, Full or Time) date format.
When you select a Short, Medium, Long, Full, or Time format, the field is formatted using the International Components for Unicode (ICU), based on the locale of your computer. For more information, see: http://demo.icu-project.org/icu-bin/locexp
The English (Australia) locale is switched to use the English (United Kingdom) locale, since the short date formats of the latter are preferred.
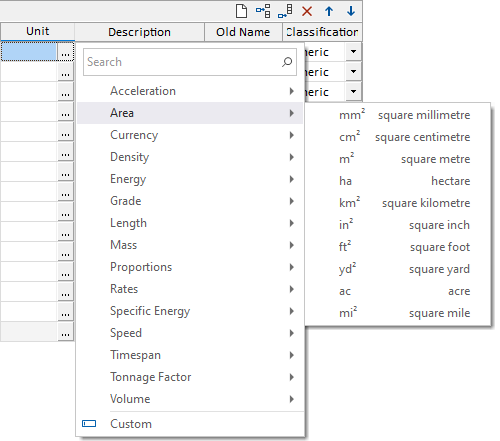
Field unit of measure
-
A column to edit the unit of measure for a field is provided. Note that setting the unit of measure of a field will bind the unit of measure to that field. Changing the unit of measure from the form will NOT perform a unit conversion. (File | Field | Calculate or File | File Transformer, etc. can be used to perform the conversion.)
-
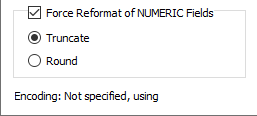
Select this check box to format numeric data in the file. The number of decimal places specified for each field, and the chosen (Round off or Truncate) formatting method, are applied. See: Force Reformat of Numeric Fields
-
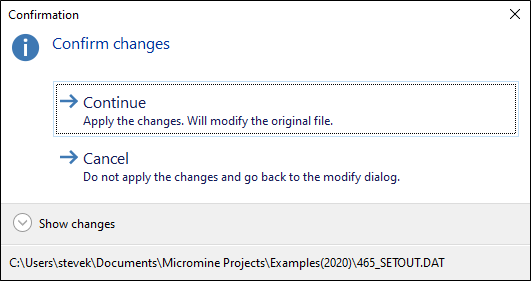
When the structure of a file has been modified, you can expand a Show changes link to view a summary of the changes you have made before applying those changes.
Force Reformat of NUMERIC Fields
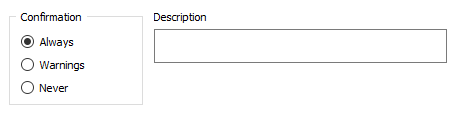
Confirmation
Confirmation settings determine whether a confirmation dialog is shown. One of three settings (levels of caution) may be applied:
There are two categories of modification that can be made:
| Cosmetic | Changes that do no cause data loss or a change in data. For example, changing field names and descriptions, adjusting the order of the fields in a file, adding new fields, and changing the decimal count. |
| Critical | Changes that may, in one way or another, alter or destroy the data in a file. For example, removing fields, decreasing field widths, formatting numeric fields, and changing the units of measurement. |
One of three settings (levels of caution) may be applied:
| Always | A confirmation dialog will be shown for ALL modifications to the structure of a file, even when those modifications are purely cosmetic. |
| Warnings | This is the default. A confirmation dialog will only be shown when critical modifications have been made to a file (however, cosmetic modifications will also be shown). |
| Never | A confirmation dialog will never be shown, irrespective of the modifications made to a file. |
Description
-
Optionally, enter a Description of the file and the modification in the field provided. This information will be displayed in the Properties for the file.

It is recommended that you create a back-up copy of the file you are modifying.
You can also modify the file structure (of most file types) by pressing F6 with the cursor over the File name prompt. If you want to modify the file structure via a macro, rather than interactively, use the New/Modify File function.