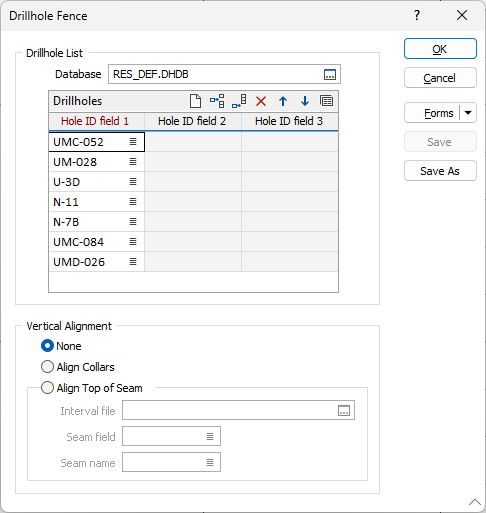
Drillhole Fence (form)
![]()
In the Drillhole Fence form, either load an existing form set, or select a drillhole Database and the required Hole IDs in the correct order for the intended section.
Drillhole Database
Double-click (F3) to select
Select the Filter check box if you want to apply a filter to the database. Enter a filter number in the adjacent response. Double click (F3) to see a list of existing filters. Right click (F4) to open the dialog box where you can create a new filter.
You can use the Drillhole Database filter to define the order in which the network is generated. For example, if the filter is on the HOLE field and the operator is "=" then the order of the holes within the filter will be the order of the holes along the network.

Depending on the database, up to three hole fields may be used to uniquely identify each hole. Use the buttons on the local toolbar to Manage the rows in the list.
Vertical Alignment
If you do not want to apply vertical alignment to the fence holes, select None.
If you want to apply vertical alignment to the fence holes, you can choose to Align Collars or you can adjust the holes to make a specific horizon (Align Top of Seam).
Interval file
To align the top of a seam, double-click (F3) to select the Interval file that will be used as input to the process.
Seam field
Double-click (F3) to select the name of the field that contains the values used to identify each seam.
Seam name
Enter the name of the seam that you want to align.
Forms
Click the Forms button to select and open a saved form set, or if a form set has been loaded, save the current form set.
OK
Click OK to create the section. Vizex will display it in a new window. All holes are drawn vertically, irrespective of their original orientation.