Tools
Tools applicable to open pit design are available on the Mining | Pit Design ribbon:
Layer
On the Mining | Pit Design tab, in the Layer group
-
Click New to create a new Pit design using a stepwise approach. Some post-processing is limited in this method.
![]()
-
Click Open to display an existing manual Pit design.
![]()
-
Click Edit Form to open the form for the selected layer.
![]()
Create
On the Mining | Pit Design tab, in the Create group
-
Click Pit Design to create and display a pit design.
![]()
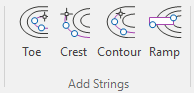
Add Strings
On the Mining | Pit Design tab, in the Add Strings group
-
Select an option (or right-click in the display) to add a new toe, crest, contour, road, or slot ramp centre line. The default String type is Toe.
Editing
On the Mining | Pit Design (Manual) tab, in the Editing group:
-
Click Replace With Curve to replace a portion of a line with a an adjustable bezier curve.
![]()
-
Select Replace With Curve | Replace String to replace a portion of a line by digitising its replacement.
![]()
-
Select Replace With Curve | Replace String to replace a portion of a line by digitising its replacement.
![]()
-
Select Replace with Curve | Replace with Spline to replace a portion of a line by digitising a Bezier spline as its replacement.
![]()
-
Click Smooth, or select a Smooth option, to smooth one or more selected strings, or segments, in Vizex.
![]()
-
Click More…
 and select Fix Crossover to
detect and highlight crossover strings so that you can resolve them. If no strings are selected, the Selection Assistant
will prompt you to select one or more strings for checking.
and select Fix Crossover to
detect and highlight crossover strings so that you can resolve them. If no strings are selected, the Selection Assistant
will prompt you to select one or more strings for checking.
![]()
-
On the Mining | Pit Design tab, in the Add Strings group, Click More…
for additional string editing options:
Generate Pit Contours
On the Mining | Pit Design tab, in the Generate Pit Contours group
-
Click the Project to Berm tool to use the batter height, slope and berm width to project the selected string. Partial string selection is supported.
![]()
- Click the Project String tool to use the batter height and slope to project the selected string. If a slot ramp centre-line has been digitised and is selected, then this tool can be used to generate a slot ramp. See: Slot Ramp Centre Line
![]()
-
Click Project to Elevation to project a string based on the elevation, slope, and (in or out) direction you specify. If no strings are selected when you click this tool, the Selection Assistant will prompt you to select the string or strings you want to project. Partial string selection is supported.
- Click the Expand String tool to use the Berm width and Expand settings in the Pit Design form to expand the selected string.
![]()
![]()
-
Click Incline Berm, to modify the incline of a berm in the active layer. If no strings are selected when you click this tool, the Selection Assistant will prompt you to select the CREST string of the berm to incline.
![]()
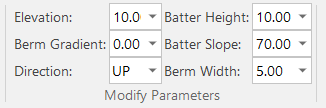
Modify Parameters
On the Mining | Pit Design tab, in the Modify Parameters group
When a Pit Design layer is the active layer, Elevation, Berm Gradient, Direction, Batter Height, Batter Slope and Berm Width parameters are shown on the Mining | Pit Design tab, in the Modify Parameters group, where they can be easily viewed and edited:
Ramp
On the Mining | Pit Design tab, in the Ramp group
-
Click Add Ramp to start a new ramp or haul road.
![]()
-
Click Edit Properties to edit the properties of a haul road or ramp.
![]()
-
Click the Remove Road button to remove the selected road or slot ramp from the pit design.
![]()
-
Click Add Flat Section to generate horizontal parts of a road for a specified distance, including the option of having flat road sections between benches.
![]()
-
Click Add Flat Switchback to automatically switch the direction of the current road from clockwise to anti-clockwise (or vice versa).
![]()
-
Click Slot Ramp Centre Line to create a new slot ramp centre line.
![]()
A list of recently-loaded form sets (if any) are available for selection on the drop-down menu. Select Other to load a less recent form set.
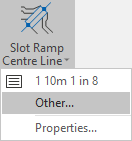
The Properties option allows you to define the Width and the Gradient of the ramp you want to build.
-
Use the Enable Switchback options to select a road point and mark it so that a switchback is generated from it.
![]()
-
Select Disable Switchback to disable Switchback mode.
![]()
Build Pit
On the Mining | Pit Design tab, in the Build Pit group
-
Click Auto Build Pit to quickly build a pit (or dump) until a target condition is reached. Auto build allows you to visualise any potential issues with the final design, and also iteratively position a haul road.
![]()
-
Click Auto Realign Strings to alter the shape of any toe or crest polygons within an existing pit design and then automatically realign the polygons that form subsequent benches.
![]()
Generate
On the Mining | Pit Design tab, in the Generate group
-
Click Slope Lines to draw a line, of variable length, between strings defining the top and bottom of a slope.
![]()
-
Click Sidewalls to generate a polygon enclosing an area within a specified distance of the selected string.
![]()
-
Click Offset Lines to generate lines that are offset from a selected string or strings.
![]()
-
Click New DTM to generate a DTM from the strings and/or points selected in Vizex.
![]()
Pin
Click the Pin icon to display the ribbon even when it is out-of-context (in other words, the Vizex layer or the editor or function it relates to loses focus or is closed). The ribbon will be displayed until you either click the icon again to unpin it, or Close it.

Close
Toggle the Pin button to close the ribbon. The ribbon is displayed automatically when it is in-context (in other words, the Vizex layer it relates to is opened as the active layer, or the editor or function it relates to is opened.
