ODBC Link
![]()
Once you have established the link, the data in the corresponding data file will only be refreshed when you right-click and select Reload ODBC link when you load the file into a form. Alternatively:
The files containing data from the linked source will work in the same way as any other project file, with the exception that you cannot change their contents. When you establish the link to a table in the external DBMS, you can:
- Specify how the linked file will be structured.
- Preview the table that will be linked and change the characteristics of the fields in the target file.
- Control which fields will be included in the link.
The link is stored in the current project as a special type of file. The most common application of ODBC Link is where data is contained in a central repository such as a company DBMS.
For more information refer to the following topic links:
Source
Select Data Source
Click on this button to open the Select Data Source dialog. Select the File Data Source or the Machine Data Source tab.
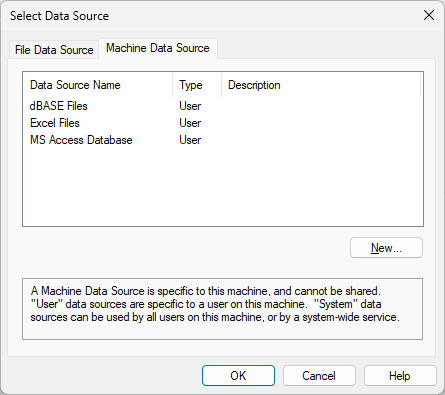
- A File data source is not specific to a user, nor is it local to a computer. The data source can be shared among all users who have the same drivers installed.
- A Machine data source allows you to connect with a data source that has a user data source name (DSN) or a system DSN. User DSNs are specific to a user on your machine. System DSNs can be shared by different users on your machine.
Select the data source you want to import from and click OK.
Select Table
In the Select Table dialog, select the table you want to link to, and then click OK. Use the radio buttons to control which tables will appear:
| All Tables | Displays all the tables/sheets in the selected database/file. |
| Compound | Only the following tables will be displayed in the selection list: SYSVIEWAssay, SYSVIEWCollar; SYSVIEWGeoChem; SYSVIEWGeology and SYSVIEWSurvey. The SYSVIEW prefix will not appear. |
| User | Displays only those tables that have a name starting with "USER". The USER prefix itself will not be displayed in the selection list. |
| Single |
Displays all tables except those starting with any of the following words: Meta, USER or SYSVIEW. |
SQL query
Select the Append a clause to the SQL statement option to append an SQL clause to allow filtering or ordering of the imported data.
Note that the added clause assumes only that a SELECT FROM statement is generated by the software. Any valid SQL clause(s), such as WHERE, ORDER BY, GROUP BY etc, or combination thereof, can be appended to this statement.
For examples, see: SQL Clauses
Target
File
Enter the name of the target file. The imported data will be saved in this file. If the file exists, you will be asked if you want to overwrite it.
Type
Accept the default file type or select a file type.
Structure
Specify how the target file will be structured. There are two options:
- Determine structure. If this option is selected, the function will read the contents of the source table to determine the most appropriate width and format for each field in the target file.
- Use database structure. If this option is selected, the function will base the structure of the target file on the structure of the source table.
Notes:
- In the case of the Determine structure and the Use database structure options, if the target file exists (i.e. you are not creating a new file) a check is made to ensure that all of the fields selected can be mapped to fields in the target file which have the same Name , Width and Precision.
Auto open
Select this option to open the file for editing in the File Editor once it has been
To create an ODBC Link:
- On the File tab, in the Data File group, select Link | ODBC.
- Click the Select Data Source button.
- Select the data source by clicking on the File Data Source or Machine Data Source tabs and then double-clicking on one of the specific data sources in the list.
- Navigate to and select the database containing the table to which you will link.
- In the Select Table dialog, select the table you want to link to, and then click OK. Use the radio buttons to control which tables will appear:
- Enter the name of the linked file. This is the data file used to store and access the data.
- Either select the Select all check box or hold the CTRL key down and click on the fields you want to include in the process.
- Specify how the linked file will be structured. There are two options:
| All Tables | Displays all the tables/sheets in the selected database/file. |
| Compound | Only the following tables will be displayed in the selection list: SYSVIEWAssay, SYSVIEWCollar; SYSVIEWGeoChem; SYSVIEWGeology and SYSVIEWSurvey. The SYSVIEW prefix will not appear. |
| User | Displays only those tables that have a name starting with "USER". The USER prefix itself will not be displayed in the selection list. |
| Single |
Displays all tables except those starting with any of the following words: Meta, USER or SYSVIEW. |
Determine structure. If this option is selected, the function will read the contents of the source table to determine the most appropriate width and format for each field in the linked file.
Use database structure. If this option is selected, the function will base the structure of the linked file on the structure of the source table.
If the linked file exists (i.e. you are not creating a new file) a check is made to ensure that all of the fields selected from the source table can be mapped to fields in the linked file which have the same Name, Width and Precision.
If one or more fields cannot be mapped (the linked file and the source table are incompatible) you will be prompted to overwrite the linked file using the structure of the source table. Click YES to continue the link process. Click NO to abort the process.
Some data types, such as Memo and Image data types, cannot be converted to a format that is compatible with Micromine file formats. Click on the following link for a list of Compatible Data Types.
- Select the Auto open check box option to open the file in the File Editor in read-only mode.
- To Preview the results of the link, select Preview and enter the number of records you want to see. Click Create and the Preview dialog will open. In this dialog you can see a sample of the records in the table to which you are linking. You can also change the structure of the table that will be created.
- Click OK in the Preview dialog and a message confirming the link has been established will appear.
- Click Create in the ODBC Link dialog to complete the process.