Animation Parameters

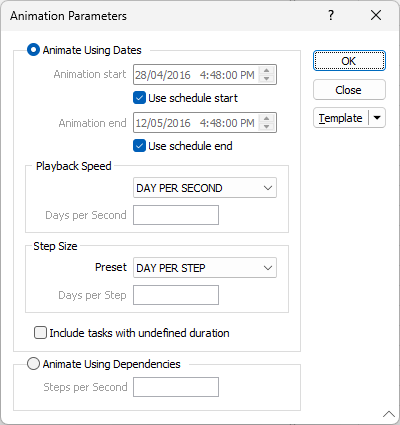
Animation Start and End
Use the spin controls to set the day, month, year and time components of the start and end of the animation. Alternatively, select the Use schedule start and Use schedule end options to run the animation -from the start of the schedule and/or -to the end of the current schedule.
Playback Speed
Select a Playback Speed that is appropriate given the granularity of the current schedule. Standard options are (DAY, WEEK or MONTH PER SECOND). To specify a custom playback speed, select the USER DEFINED option and enter the number of Days per Second.
Step Size
Set a Step Size that is appropriate given the granularity of the current schedule. Standard options are (DAY, WEEK or MONTH PER SECOND). To specify a custom playback speed, select the USER DEFINED option and enter the number of Days per Step.
Include tasks with undefined duration
Select this option to apply a default duration of 1 day to tasks with an undefined duration. This will allow tasks with an undefined duration to be included when the animation is run.
Animate Using Dependencies
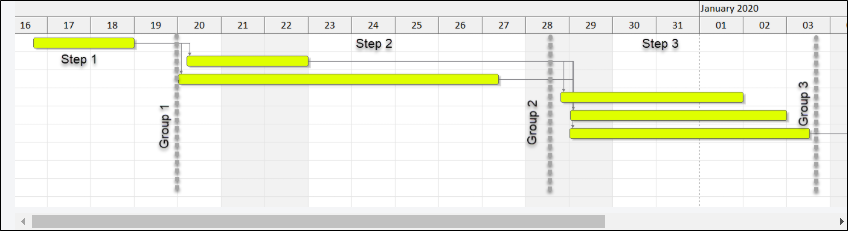
When this option is enabled, topological sorting is applied to the tasks in the schedule so that the animation demonstrates the sequence created by the dependency links between the tasks. This option ignores the Start and End dates and is ideal for visually validating the links between tasks.
Steps per second
During the sorting the links between tasks are used to group tasks. Use the Step size to control the number of groups of tasks that are displayed when playing the animation. For example, setting the step size to 5 will cause all the tasks in the below example to be included in 1 second on the animation.
Template
The Template button is only available for Template Forms. Template Forms inherit saved or previously used values.
Click the Template button to select and open a saved form set template.
Load Template
Click the Load Template button to select and open a saved template to populate the fields of the form.
Save Template
Click the Save Template button to save the details of the current form as a template that can be loaded at a later time.
Manage
Click the Manage button to open the Template Forms manager which can be used to open, save, delete, import and export the template forms for your project.
Undo and Redo
Click Undo (CTRL + Z) to undo recent changes in the form. After an Undo, click Redo (CTRL + Y) to restore the last change that was undone.
Collapse
Collapse (roll-up) the form to preview a chart, or preview the results of an operation in Vizex, or obtain input values from Vizex, the Property Window, the File Editor, or the Plot Editor.
OK
Finally click OK to confirm the properties you have set.