Sections
![]()
If selected as an option:
- the Section plane is shown as a planar surface (ribbon);
- the zone between the section plane and the projected Away plane is shown as either a wireframe solid or a planar surface (ribbon);
- the zone between the section plane and the projected Towards plane is shown as either a wireframe solid or a planar surface (ribbon);
- the section name is shown as a label on each section;
- the centre of each section is shown.
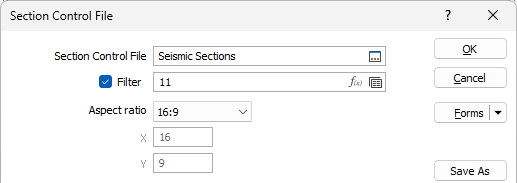
Section Control File
Double-click or click on the Select icon to select the name of the Section Control File you want to display. if required, a Filter can be applied using the field provided.
Aspect Ratio
Use the Aspect Ratio drop down to select the aspect ratio to be used when visualising or converting the Section Control File.

If Auto is selected from the drop down, the active Vizex scenes aspect ratio will be used, or 4:3 if no active aspect ratio can be used.
If User X:Y is selected, the X and Y fields are enabled and a custom aspect ratio can be entered.

Display Centre
Select this check box to display the centre of each section plane. Click on the Colour and Symbol icons to set the characteristics of the points.
Display
Choose which features to display and set the transparency, colour and line settings for each feature:
Feature
If selected as an option:
- the Section plane is shown as a planar surface (ribbon);
- the zone between the section plane and the projected Away plane is shown as either a wireframe solid or a planar surface (ribbon);
- the zone between the section plane and the projected Towards plane is shown as either a wireframe solid or a planar surface (ribbon);
- the section name is shown as a label on each section plane;
- the centre of each section plane is shown.
Type
The selection of a (Solid, Top, Centre, or Bottom) wireframe type applies only to the projected Away and Towards planes.
Colour
Choose the colour used for each Section, Away and Towards feature.
Edges
Select this option to draw a polyline around each wireframe using the defined Line Type, Line Width and Line Colour.

Transparency
Use the transparency slider to specify the intensity of the display layer. The visibility of the layers underneath the current display layer will be determined by the degree of transparency you select.
Display Section Name
Select this check box to display the section name as a label on each section plane.
Position
Select where you want the label to be positioned, either over the wireframe Centroid, or Above, Below, to the Left, or to the Right of the wireframe bounding box.
Direction
Specify the (Auto, Horizontal, Vertical) direction of the label. Auto will align the direction with the section.
The vertical position of the label is controlled by the Towards position.
Offset distance
If you have chosen a label position other than Centroid, specify an offset from the bounding box of the wireframe (in grid units). A negative offset will position the label inside the bounding box of the wireframe. A positive offset will position the label outside the bounding box of the wireframe.

Forms
Click the Forms button to select and open a saved form set, or if a form set has been loaded, save the current form set.
By design, the Forms button is not available for loaded Vizex layers (i.e. when opening the form set properties of a layer in the Vizex Layer Display pane). In Vizex, the Forms button is only available for new forms opened via the Home tab or the Vizex tab, in the Layer group (or by double-clicking on a form type node in the Vizex Layer Types pane).
Save and Save As
Click the Save button to save the changes you have made to the form set. Click Save As to save your changes as a new form set. Save As will default to the first available form set number.
Reset
Click Reset to clear the form of all values and reset the form to its default state.
Reset Tab
For tabbed forms, select Reset Tab to clear the active tab of all values and reset the tab to its default state - without making any changes to other tabs in the dialog.
Undo and Redo
Click Undo (CTRL + Z) to undo recent changes in the form. After an Undo, click Redo (CTRL + Y) to restore the last change that was undone.
Collapse
Collapse (roll-up) the form to preview a chart, or preview the results of an operation in Vizex, or obtain input values from Vizex, the Property Window, the File Editor, or the Plot Editor.