Image Frame
An Image frame enables you to position a raster image on a plot. You can use this feature to plot image files such as aerial photography. Image frames are also commonly used to display a company logo on the plot.
To add a new Image frame:
- Double-click on the Image frame type in the Plot Forms pane.
- Set the following parameters on the Image tab of the Image form:
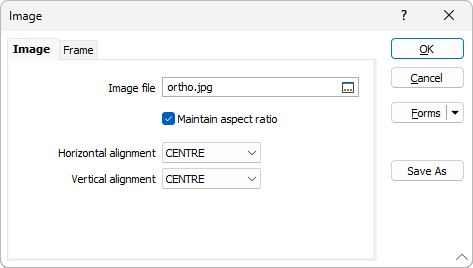
Image file
Double-click to navigate to the location of the image file you want to add to the layout.
To preview the image, right-click (or press F4) in the Image file box.
Press CTRL + V to Paste the contents of the clipboard and create an image file on-the-fly.
Maintain the aspect ratio
When you select this option, the aspect ratio of the image will be maintained even when you resize the image.
The Aspect Ratio is the relationship between the width and height. A Ratio of 4:3, for example, means that for every 4 units wide, the image is 3 units high (4 / 3 = 1.33).
Horizontal and Vertical Alignment
Alignment options can be set to position the image with respect to one of the corners of the frame or the centre of the frame.
- Set the fill, border, and margin properties of the frame in the Frame tab.
- Finally, click OK to add the Image frame to the layout.
Another way to add a new frame to the layout is to use the New Frame tool on the Plot Editor toolbar. Click and drag the mouse in the layout window to define the size and position of the frame. When you release the mouse button, you will be prompted to select the frame type.