Tunnel Wizard
On the Tunnels tab of the Setup Tunnels dialog, the Tunnel Wizard can be used to create tunnels based on the unique values of a selected attribute. If an attribute value exists without a tunnel of the same name, a tunnel of that name is added to a list of tunnels in a Preview pane.
When the Accept button is clicked, new entries are created on the Tunnels tab of the Setup Tunnels dialog with the same names as the attribute values shown in the Preview list. The tunnels defined on the Tunnels tab are subsequently used to populate the Tunnel property of the Centrelines in the Development Network, based on their corresponding tunnel names/attribute values.
![]()
-
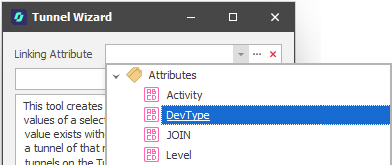
In the Tunnel Wizard dialog, select a Linking Attribute:
-
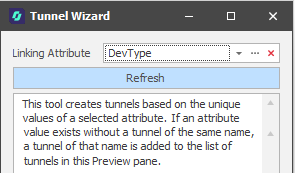
Click Refresh:
-
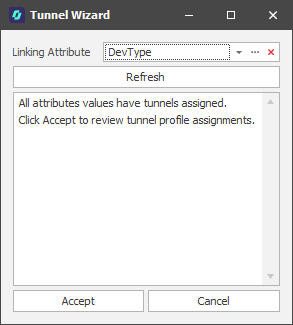
If all unique values of the attribute values are already assigned a tunnel, a message is displayed in the Preview pane. Click Accept (Go to Step 5):
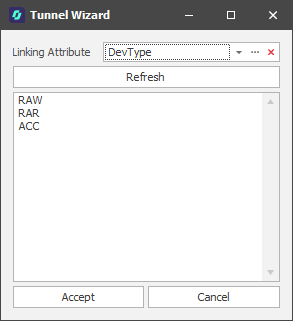
If attribute values have yet to be assigned to a tunnel, a Preview of those attribute values is shown:
-
Click Accept to add a tunnel for each listed attribute value.
-
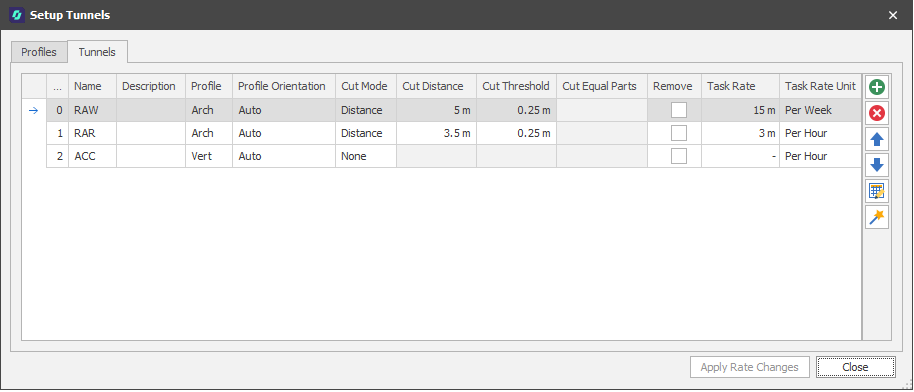
On the Tunnels tab of the Setup Tunnels dialog, review the tunnel profiles and parameters that are assigned per attribute value:
You can also Manually Assign Tunnels to Centrelines