Constraints
In the Add Dependency topic we looked at how to make one Task or Range of Tasks wait on the completion of other Tasks. This helps to control the specific order of events regardless of when they appear in the eventual schedule but what if you have something that is time dependent such as environment approval on a new area to work?
Or what if you have a commodity target per month that you don't have the processing resources to exceed? That is when you apply a Constraint.
![]()
There are four kinds of Constraint currently implemented in the application:
| Type | Description | |
|---|---|---|
|
|
Capacity | Applies a limit to any value over a certain period of time. For example, if you didn't want to exceed more than 50,000t of Coal per month, or needed to limit the amount of waste heading to a certain dump every day you could apply a Capacity Constraint. It can be based off of your Calendar Table, or manually entered at whatever time frame suits your scheduling. |
|
|
Time | Applies a limit to the times that a Source or Destination Task is available to be worked. |
|
|
Proximity | Applies a limit to the number of pieces of Equipment that can work a Leaf or group of Leaves at any one point in time. |
|
|
Inventory | Creates a virtual container that can be added to and removed from. Once a container is full it can no longer be added to (thus constraining the adding Tasks) and once empty it can no longer be removed from (constraining the removing Tasks). |
|
|
Quality | Applies a (lower bound - upper bound) constraint on Quality field values over a certain period of time. For example, if you need to restrict the waste heading to a certain dump every day based on grade values, you could apply a Quality Constraint. It can be based off of your Calendar Table, or manually entered at whatever time frame suits your scheduling. |
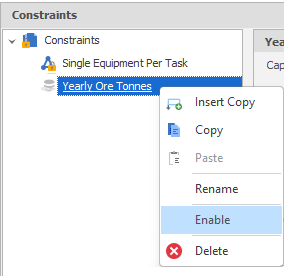
Enable/Disable
You can right-click in the left-hand pane to enable or disable the constraints you have added (as well as Copy, Insert Copy, Rename and Delete a constraint).
Disabled constraints are not applied to the tasks of the schedule and are shown as greyed-out, however you can still edit those constraints.
For examples of constraints, see: Examples
To add a Capacity Constraint, right-click on "Constraints" and select Add - > New Capacity Constraint. ![]()
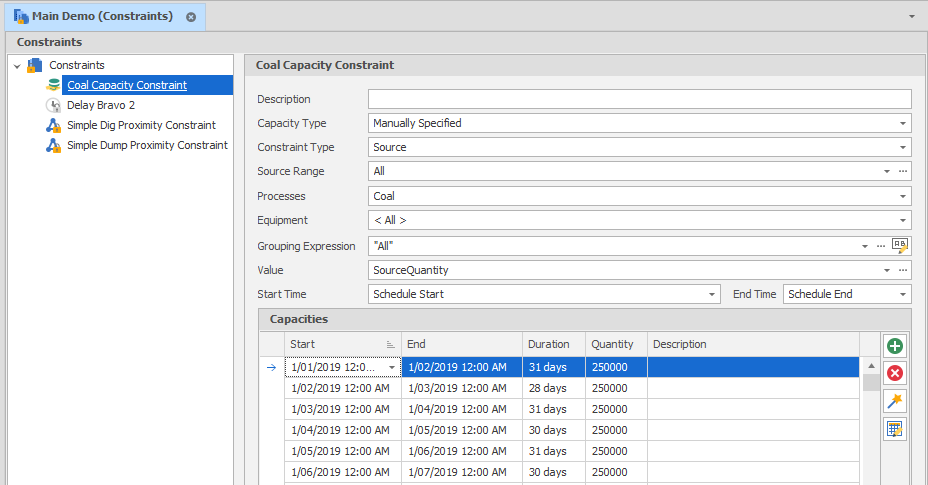
- Capacity Type: Either Manually Specified, based on your Calendar, or based on Reporting Period.
- Constraint Type: Source, Destination or Both.
- Source/Destination Range: The ranges across which the Constraint will be applied. Note that a Source and Destination Range will combine their filters.
- Processes: Select Processes to Filter the Tasks that the Constraint Applies to.
- Equipment: Select Equipment to Filter the Tasks that the Constraint Applies to.
- Capacity Field (Calendar Only): The Calendar Table Field to draw the limiting Quantity from.
- Aggregation Level (Calendar Only): A common Calendar setup involves Year and Month. By selecting any level above the lowest Level, the application will attempt to aggregate the values and apply them over the longer period.
-
A Grouping Expression is used to combine Tasks into groups. The usual expression syntax is Text(SourceX) + "." + Text(SourceY) etc.
In Capacity Constraints, the Grouping Expression further defines what the Constraint applies to.
- Value: Generally SourceQuantity or DestinationQuantity but can be any value that is calculated internally by the application (check the Variables in the Expression Editor)
- Start Time/End Time: Sets the dates the Constraint applies to.
- Capacities (Manual Only): Use either the Add button
 or the Wizard
  to create Start and End Dates and a Quantity to limit by.
|
|
Use the Bulk Editor to make bulk modifications to the items in the list. |
Create a new Time Constraint by right-clicking "Constraints" and choosing Add - > New Time Constraint. ![]()
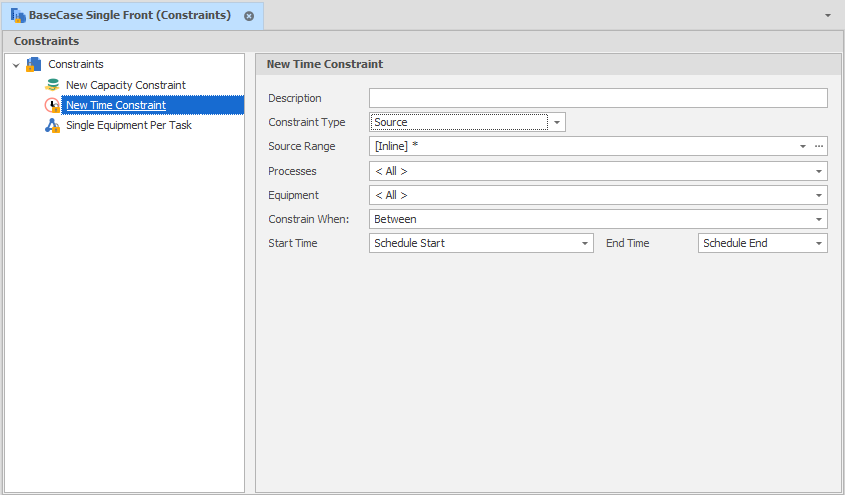
- Constraint Type: Source, Destination or Both.
- Source/Destination Range: The ranges across which the Constraint will be applied. Note that a Source and Destination Range will combine their filters.
- Equipment: Select Equipment to Filter the Tasks that the Constraint Applies to.
- Constrain When: Between, Before, After or Before & After. Sets how the Constraint is applied regarding the dates in the following field.
- Start Time/End Time: Sets the dates the Constraint applies to.
Create a new Proximity Constraint by right-clicking "Constraints" and choosing Add - > New Proximity Constraint. ![]()
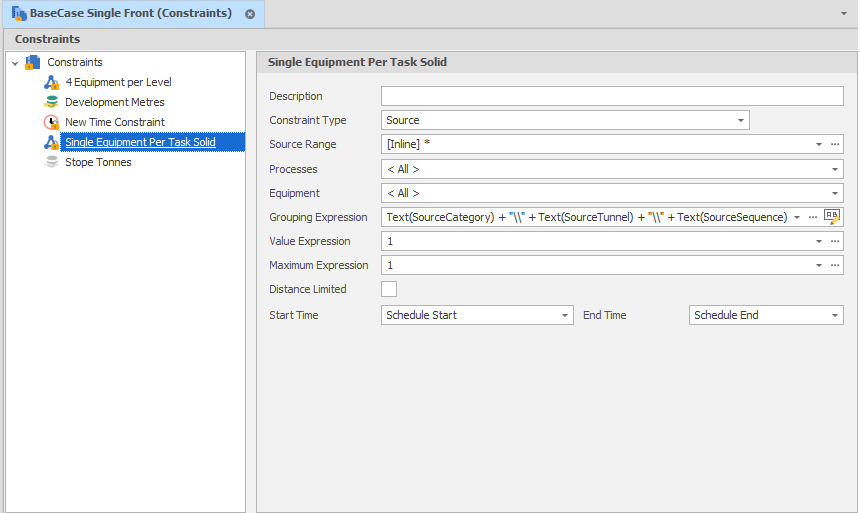
- Constraint Type: Source, Destination or Both.
- Source/Destination Range: The ranges across which the Constraint will be applied. Note that a Source and Destination Range will combine their filters.
- Processes: Select Processes to Filter the Tasks that the Constraint Applies to.
- Equipment: Select Equipment to Filter the Tasks that the Constraint Applies to. Whether or not a proximity constraint is in effect is determined per-equipment at the task select phase, in order of equipment priority, then by alphabetical order of equipment.
-
A Grouping Expression is used to combine Tasks into groups. The usual expression syntax is Text(SourceX) + "." + Text(SourceY) etc.
In Proximity Constraints the Grouping Expression defines what the Proximity is. For example Text(SourceStrip) would indicate that each Strip is its own Group.
-
Value Expression: A Value Expression sets the "weight" of your Equipment (as a number).
-
Maximum Expression: Sets the Value total that can be working a group of Tasks at any one time. For example, a Value Expression of 1 and a Maximum Expression of 3 would allow 3 pieces of Equipment per Proximity group.
-
Distance Limited: Additional inputs are enabled when you choose to make the Proximity constraint distance limited by XY and/or Z distance.

-
Start Time/End Time: Sets the dates the Constraint applies to.
Create a new Inventory Constraint by right-clicking "Constraints" and choosing Add - > New Inventory Constraint. ![]()
Before assigning settings, Inventory Constraints will almost always involve the creation of new Positions, Leaves, Fields, Processes AND Equipment to manage the Inventory. For example, if you wished to create a Coal Stockpile that processed Coal at a fixed rate, the steps involved might be:
- Create a new Position (normally at the highest Level) called Stockpile.
- Create a new Field on your Source table called Stockpile.
- Create a single Leaf on your Table against the new Stockpile Position
- Unlock the Table and manually enter a value in this new Leaf that is at least a large as your Coal Source Quantity
- Create a new Process that references the new Field
- Create a new piece of Equipment that works your new Process at your desired Hourly Rate (* Source Path)
- Ensure that your Dependencies and Constraints ignore the new Process
The reason for this setup is that in this example you already have a Process set up to add to the virtual container (Inventory) but you need some way to take Inventory away which you haven't done yet.
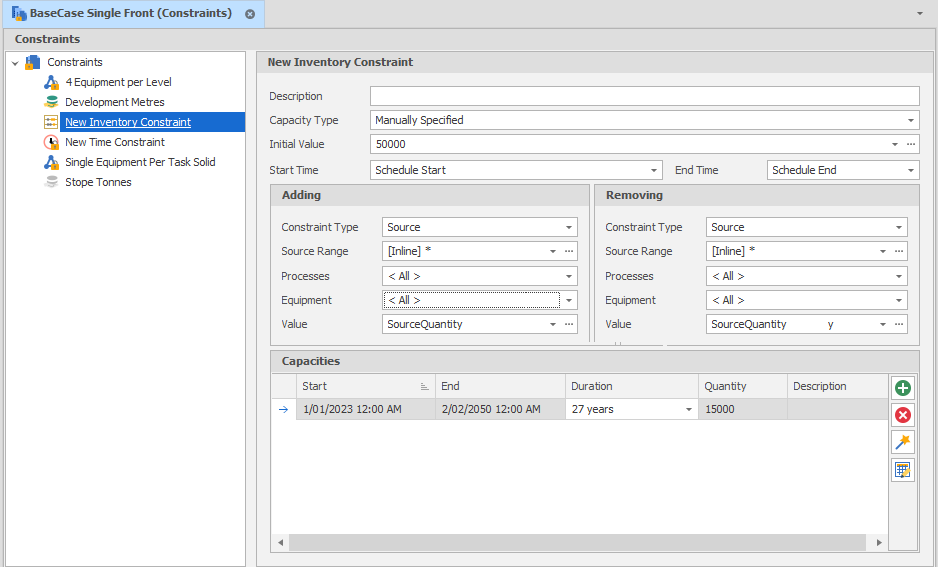
- Capacity Type: Either Manually Specified or based on your Calendar.
- Initial Value: How much is in the Inventory container to begin with.
- Capacity Field (Calendar Only): The Calendar Table Field to draw the limiting Quantity from.
- Aggregation Level (Calendar Only): A common Calendar setup involves Year and Month. By selecting any level above the lowest Level, the application will attempt to aggregate the values and apply them over the longer period.
- Start Time/End Time: Sets the dates the Constraint applies to.
Adding
- Constraint Type: Source, Destination or Both.
- Source/Destination Range: The ranges across which the Constraint will be applied. Note that a Source and Destination Range will combine their filters.
- Processes: Select Processes to Filter the Tasks that the Constraint Applies to.
- Equipment: Select Equipment to Filter the Tasks that the Constraint Applies to.
- Value: Generally SourceQuantity or DestinationQuantity, but can be any value that is calculated internally by the application (check the Variables in the Expression Editor).
Removing
- Constraint Type: Source, Destination or Both.
- Source/Destination Range: The ranges across which the Constraint will be applied. Note that a Source and Destination Range will combine their filters.
- Processes: Select Processes to Filter the Tasks that the Constraint Applies to.
- Equipment: Select Equipment to Filter the Tasks that the Constraint Applies to.
- Value: Generally SourceQuantity or DestinationQuantity, but can be any value that is calculated internally by the application (check the Variables in the Expression Editor).
Capacities
- Capacities (Manual Only): Use either the Add button or the Wizard to create Start and End Dates and a Quantity to limit by.
|
|
Use the Bulk Editor to make bulk modifications to the items in the list. |
To add a Quality Constraint, right-click on "Constraints" and select Add - > New Quality Constraint. ![]()
- Quality Type: Either Manually Specified, based on your Calendar, or based on Reporting Period.
- Constraint Type: Source, Destination or Both.
- Source/Destination Range: The ranges across which the Constraint will be applied. Note that a Source and Destination Range will combine their filters.
- Processes: Select Processes to Filter the Tasks that the Constraint Applies to.
- Equipment: Select Equipment to Filter the Tasks that the Constraint Applies to.
- Min/Max Fields (Calendar Only): The Calendar Table Fields to limit the Quality by (lower bound - upper bound values).
- Aggregation Level (Calendar Only): A common Calendar setup involves Year and Month. By selecting any level above the lowest Level, the application will attempt to aggregate the values and apply them over the longer period.
-
A Grouping Expression is used to combine Tasks into groups. The usual expression syntax is Text(SourceX) + "." + Text(SourceY) etc.
In Capacity Constraints, the Grouping Expression further defines what the Constraint applies to.
- Quality Expression: Enter a Quality value or specify an Expression that sets the allowable (lower bound - upper bound) range of values.
- Weighting Quantity Expression. Enter a Weighting Quantity value or specify an Expression that sets the weight average of the Quality field.
- Start Time/End Time: Sets the dates the Constraint applies to.
- Specify a Reentry Quantity which is the minimum tonnage that must be mined before material that was previously excluded by the quality constraint can be selected again.
- Establish Without Constraining allows the schedule to mine an initial quantity of material before applying the quality limits, enabling blending and preventing the schedule from stalling.
- Capacities (Manual Only): Use either the Add button or the Wizard to create Start and End Dates and a Quantity to limit by.
|
|
Use the Bulk Editor to make bulk modifications to the items in the list. |