Minex
The Minex reserves importing process has two components and the second has two different options:
-
Generate a reserves CSV (qualities, volumes etc) from the Minex menu option ReservesDB | Reporting | Detailed Report. Import the result using the Import | Data menu option. This will NOT include 3D/Solids.
-
Do the following:
-
Import the Solids directly from the dbr.dat file using the Import | Solids menu option. This method works well for most source reserves (especially for complex geology) but does not produce a surface that is cut to topography.
-
Use roof and/or floor polygons to import lower detailed Solids (faster performance, lower detail) using the Import | Solids | Roof & Floor Polygons menu option. This works well for dump reserves as well as dig reserves with simple geology. Export the polygons from Minex using the menu option ReservesDB | Export | Pit Polygons option.
-
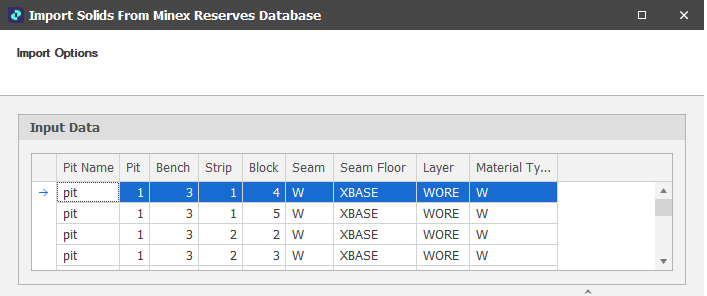
Input Data
A preview of the data in the file(s) you have selected is shown in the Input Data pane:
Solid Options
In the Solid Options pane, accept the defaults or set options that determine how the solids will be triangulated.
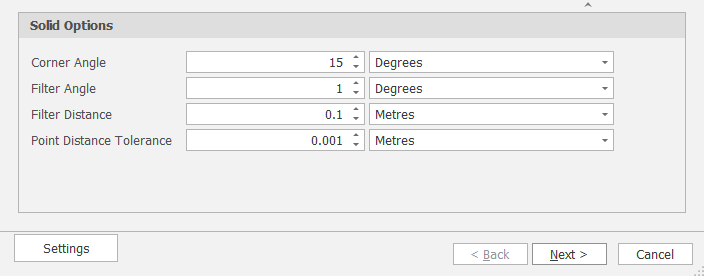
Click Next to continue.
Import Options
On the Import Options page, choose how the solids will be generated. There are two options: Table and Files.
If you are importing directly into the table, you will need to map the fields in the file to the levels defined for the table:
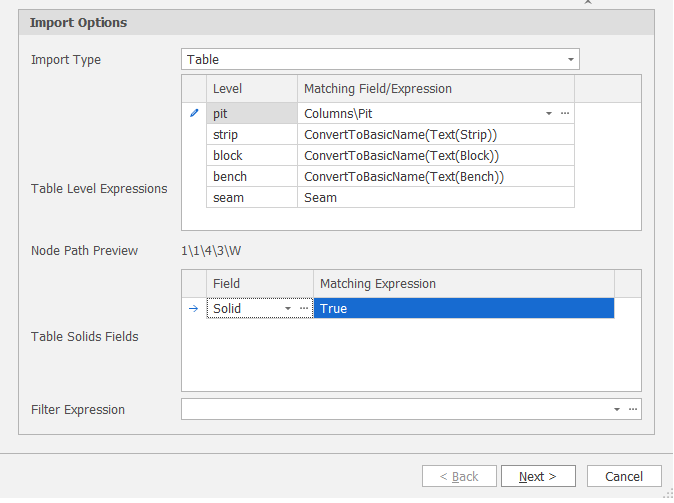
Import Options: Import to Table
Table Level Expressions
Level
Use the Level Mappings table to map the level structure of the attributes in the imported solids to the levels in the table (i.e. Pit, Stage, Strip, Block, Seam, Bench).
Matching Field/Expression
When you click in a Matching Field/Expression cell, there are two ways in which to match the attributes you want to import to the Levels in the table.
-
Click the drop-down and select the Fields tab to select a field to match to the level:
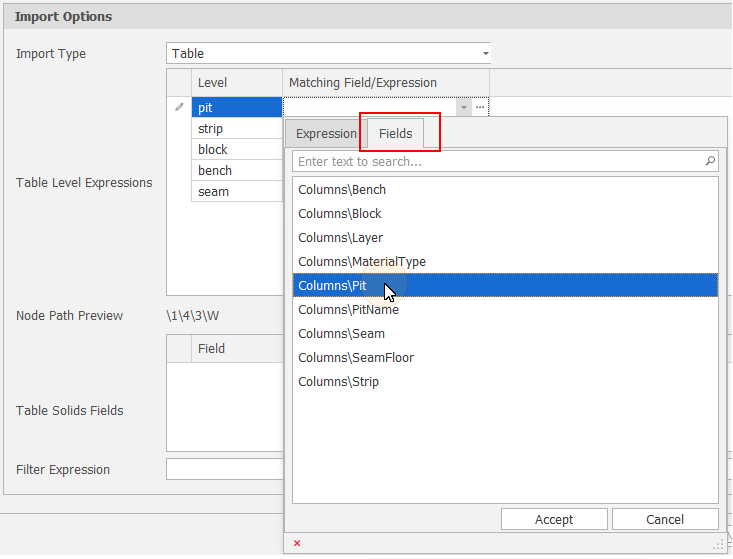
Select a Level field
-
Click the drop-down and select the Expression tab to build a field expression.
For number attributes, replace integers with text, Text(Identifers\Strip), Text(Identifers\Block), etc.
(You can also click the ellipsis button to build a field expression in a separate Expression Editor window.)
Node Path Preview
Based on the mapped levels, a preview of the node path is shown.
Table Solids Fields
Click the drop-down to build a field expression that will match the columns you want to import to the Solid fields in the table. (You can also click the ellipsis button to build a field expression in a separate Expression Editor window.) You must match at least one Solid field.
Filter Expression
A Filter Expression can be used to define something you don't want to generate. For example, you don't want to generate solids for anything beyond Strip 17.
Next
Click Next to begin the Import.
Suppose a Seams level has been defined in the data table but you don't have seams defined in the reserves file. In this case, you can write the reserves out to files and then prepare the files for Import. In this case, you will need to setup a File Name Expression, optionally apply a Filter Expression and specify an Output Folder for the generated files.
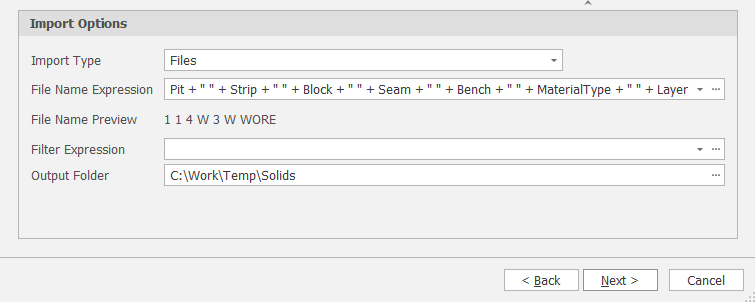
Import Options: Import to Files
File Name Expression
Click on the drop-down to specify a File Name Expression which will be used to generate the solid files to be imported. For example:
Pit+" "+Strip+" "+Block+" "+Seam+" "+Bench"+" "+MaterialType+" "+Layer
File Name Preview
Based on the File Name Expression, a preview of the File Naming convention is shown.
1 1 4 W 3 W WORE
Filter Expression
A Filter Expression can be used to define something you don't want to generate. For example, you don't want to generate solids for anything beyond Strip 17.
Next
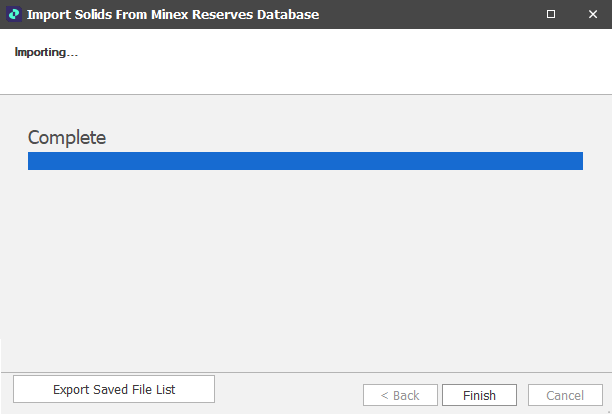
Click Next to begin the Import. The polygons are generated and the files are written to the Output Folder you have specified.
Click Export Saved File List to save the list of generated files to a CSV file.
In Excel you can then format the file to match the level hierarchy in your data table.
-
Mapping Solids
Watch a video here