Section Window
A Section Window can be used in a Section + Plan Plot to annotate the plan view so that it is clear which data in the plan view is shown in the section plot.
You can display labels and lines at the section coordinate and the extent of the data corridor defined by the Window Towards and Window Away parameters of the Section plot. The labels and lines can be coloured differently. You can also choose the style and the width of each line and the style and height of each label.
To add a section window:
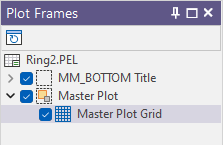
- Select the Plan plot frame in the layout window or the Plot Frames pane.
- Right-click on the Plan plot frame and select the Add Section Window menu option. Alternatively, double-click on the Section Window form set type in the Plot Forms pane

- Set the following parameters in the Section Window form:
- Select a Line style from the drop-down list of (SOLID, DASH, DOT, DASH DOT, DASH 2 DOTS) line style options.
- Use the up and down toggles to specify a Line width in pixels.
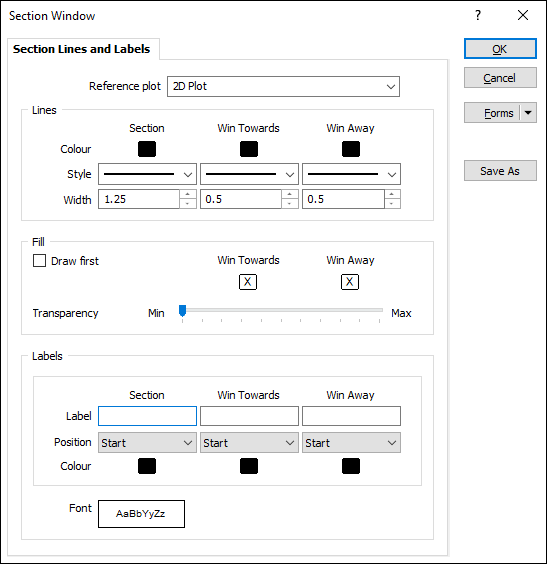
Reference Plot
The Section Window is used to show section information on a Plan plot and therefore needs to reference a Section plot.
Set the Reference Plot property of the Section Window to Section plot.
Lines
Double click to specify the Colour of the lines drawn to denote the Section, the Window Towards, and the Window Away.
For the Section, the Window Towards, and the Window Away lines:
Fill
Select the Draw first check box to generate the fill for the section before the lines and labels. This is so that all lines and labels will be visible above the fill.
Double click to specify the Colour of the fill drawn to denote the Window Towards, and the Window Away.
Use the Transparency slider to set the transparency level for the fill.
Labels
Specify substitutions or enter the text that will be used to annotate the Section, Window Towards, and Window Away lines.
Use the drop down list for each label to select the display Position of the text - None, Start, End Middle or Both Ends.
Double-click each Colour box to select the colour in which the corresponding label will be drawn.
Font
The label text will be displayed as a true type font on the plot. Double-click to select the name of the font and specify whether it will be displayed in Bold, Italic, or Underlined.
- In the case of a section window, there are no common (fill, border, and margin) frame properties to specify, since the window is a child frame of a parent (plot) frame. Click OK to add the Section Window as a child of the Plan plot frame.
In the case of a Section Window there are no common (fill, border, and margin) frame properties to specify, since the Section Window is added as a child of the parent plot frame.
You can only select the section window in the Plot Frames pane.