Video
When the Animation Window is open, from the Import/Export menu on the application window title bar, select Export | Video.
![]()
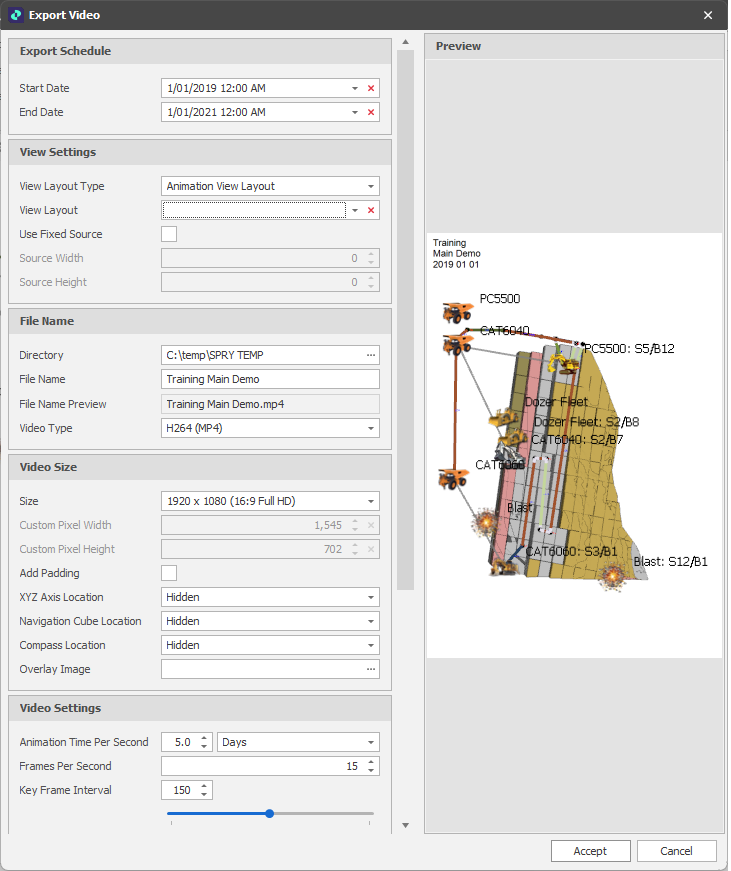
Export Animation Video Preview
From here you can control the dates, image type, resolution, and the title that appears as the video progresses.
Export Schedule
Start/End Date
Accept the default (the current point in the animation or the Schedule Start Date defined in Settings) or select a "Start Date".
Accept the default (the Schedule End Date defined in Settings) or select an "End Date" to define a Date/Time Range for the recorded animation.
View Settings

View Layout Type
Use the drop-down to select an (Animation View Layout, Design Layout, Animation Layout, Sectional View) View Layout Type.
View Layout
Select a layout of the chosen type.
Use Fixed Source
The selection of a View layout ensures that a consistently sized image is exported, irrespective of the current window size. As an alternative, select this check box to specify the Source Width and Source Height of the image to be generated from the Animation/Design Window.
File Name
Directory
Click on the ellipsis button to select a folder destination for the exported image file.
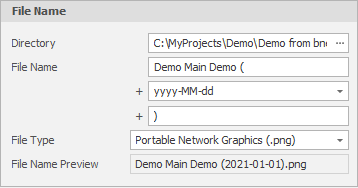
File Name
Specify the name of the image file. The option to add a formatted date, plus a further suffix, is provided.
File Name Preview
A preview of the file name is shown here.
Video Type
Choose a Video Type. The options available are a combination of containers (file types) and Codecs (compression methods).
These are container files that hold the actual video and audio data:
|
Setting |
Description |
|---|---|
|
WMV |
(Windows Media Video) A container format developed by Microsoft. |
|
MP4 |
(MPEG-4 Part 14) A widely compatible container format based on Apple's MOV, ideal for sharing and streaming online. |
|
AVI |
(Audio Video Interleave) An older, versatile container that can hold various codecs, including lossless ones for high-quality archiving. |
|
FLV |
(Flash Video) Primarily used for streaming video on the web, though less common now with HTML5. |
|
WEBM |
An open-source format developed by Google for HTML5 web use, offering good compression. |
|
MKV |
(Matroska) A flexible container format known for its ability to hold multiple audio, video, and subtitle tracks. |
These are used to encode and decode video data within a container:
|
Setting |
Description |
|---|---|
|
H.264 |
(AVC) A highly efficient and widely supported codec that provides excellent compression with minimal quality loss, ideal for most devices and web streaming. |
|
H.265 |
(HEVC - High Efficiency Video Coding) A more advanced and efficient codec than H.264, offering even better compression and quality, but may have less broad compatibility. |
|
MPEG4 |
Refers to a standard that often uses the H.264 codec, but can also be used to describe the older MPEG-4 Part 2 standard. |
|
MPEG2 |
An older standard that offers less efficient compression compared to H.264 and H.265, often used for DVDs and older broadcast television. |
|
Lossless |
Refers to a method of compression where no data is lost during the encoding process, resulting in the highest quality but with very large file sizes. |
Video Size
Accept the default or choose a Video Size. The default 1920 x 1080 (1080p) is excellent for large screens and balances quality with file size.
Alternatively, Select the Custom option and specify a Custom Pixel Width and Custom Pixel Height.
Add Padding
Select this check box to add padding around the edges of the image(s).
XYZ Axis Location
Choose to hide (Hidden) or select a (Top Left, Top Right, Bottom Left, Bottom Right) location for the XYZ Axis.
Navigation Cube Location
Choose to hide (Hidden) or select a (Top Left, Top Right, Bottom Left, Bottom Right) location for the Navigation Cube.
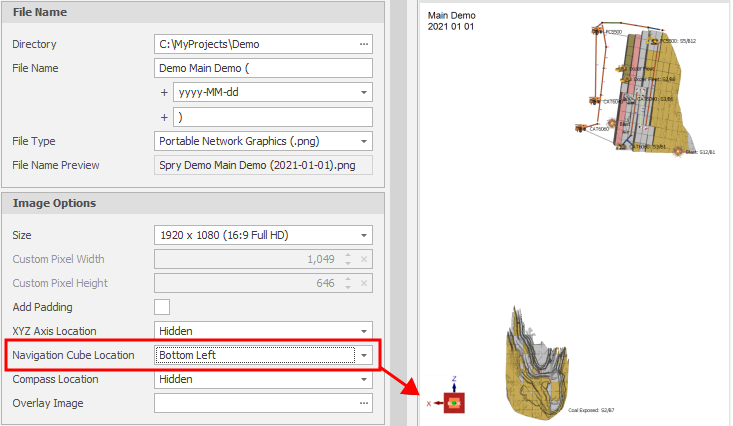
Navigation Cube Bottom Left
Compass Location
Choose to hide (Hidden) or select a (Top Left, Top Right, Bottom Left, Bottom Right) location for the Compass.
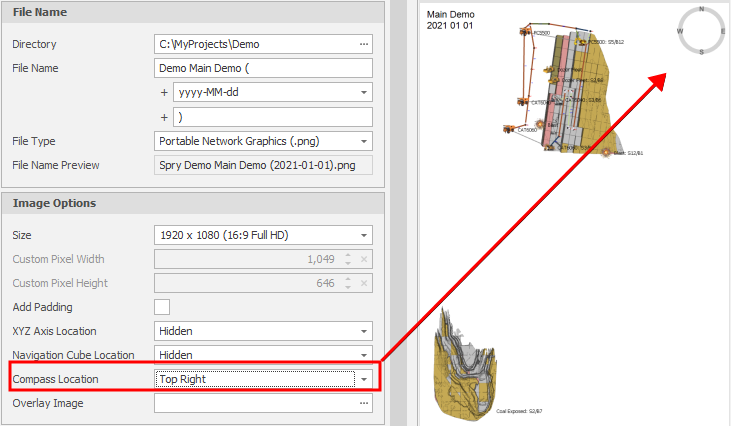
Compass Top Right
Overlay Image
Click on the ellipsis button to add an Overlay image. An Overlay image might be used to set a company logo or a watermark.
It is recommended to make the overlay image size the same as the output image size.
Video Settings
Animation Time Per Second
Accept the default or use the spin controls to set the animation time in (Days, Weeks, Months, Quarters, Years) per second.
Frames per Second
Accept the default or use the spin controls to set the number of frames per second. The Frames per second setting controls how many frames per second are displayed during playback.
Key Interval
Use the slider (or use the spin controls to adjust) the key frame interval. The key frame interval is the number of frames between each complete image (key frame), which acts as a full reference point for encoding the subsequent frames. A shorter interval means more key frames, resulting in higher visual quality and larger file sizes, while a longer interval means fewer key frames, creating smaller files but with a potential impact on video quality and playback stability.
Title
Location
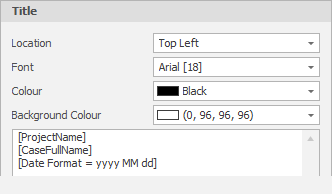
Click on the drop-down control and then use the mouse to select a (Top Left, Top Right, Bottom Left, Bottom Right) location for the Title.
Font
Click on the drop-down control to set the Font Characteristics of the Title text.
Colour
Optionally select a Colour for the Title Text. The default is Black.
Background Colour
Optionally, set a Background Colour for the Title text. The default background is Transparent (selectable on the Web tab of the Colour Selection dialog):
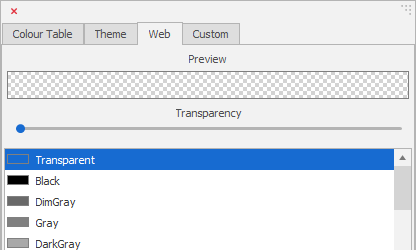
Web Colour Selection
Title (Metadata)
Click the drop-down control to the left of the Insert button to specify a Title. The ability to insert project metadata is provided.
System variables such as [Project Name] and [CaseFullName] are available for selection. Click the Insert button to insert the variable you have selected.
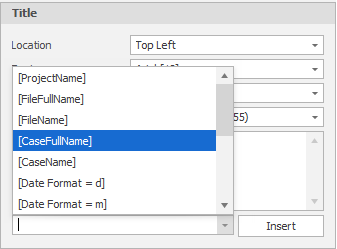
Title Metadata