Vulcan Triangulations
To import triangulations and their attributes from one or more Vulcan Triangulation (.00t) files: In the Design Data pane, right-click on the Layers node or the name of a layer and select Import | Vulcan Triangulations.
Attribute Preview
In the Import Wizard, the attributes for up to the first 10 files you have selected are shown in the Attribute Preview pane for review. It will also notify you if there have been any issues with importing the file. An option to view the attributes for all of the imported triangulations is available.
![]()
Import Options
Set Import options and map fields to the attributes of the input file you want to import.
Divide Percentage Values by 100
The application expects percentages to be in 1 based. If your data stores percentages in 100 based, select this check box to convert them to 1 based. For example, 50% in 100 based is 50, whereas 50% in 1 based is 0.5.
Create and Load Unmapped Attributes
Select this check box to create and load attributes for any attributes in the Input file that have not been mapped to existing fields.
Clear Existing Layer Elements
When importing into an existing layer, select this check box to clear all design elements (Shapes, Triangulations, Text) already in the layer. Leave the check box unselected to append to the layer.
To import to a new layer, right-click on the Layers node and select Import from the right-click menu.
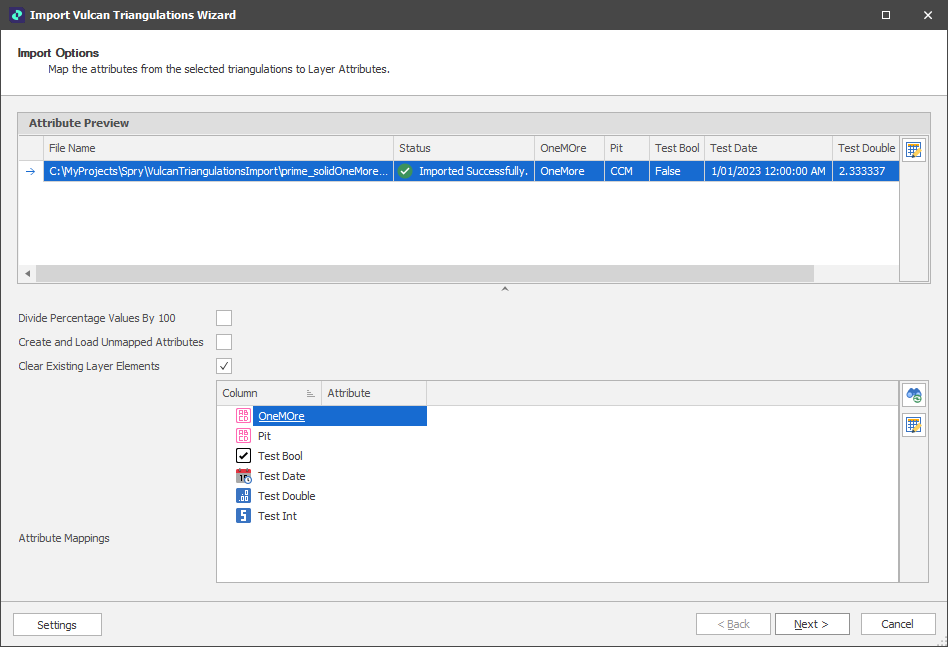
Attribute Mappings
Use the Attribute Mappings table to map the attributes you want to import to layer attributes.
 Click the Map Attributes icon to allow the application to auto map fields to the attributes in the source file, based on Name.
![]() Click the Bulk Editor icon to make bulk modifications to the attribute mappings.
Click the Bulk Editor icon to make bulk modifications to the attribute mappings.
Settings
Select Settings | Export to export mappings and other settings to an XML file. This file can subsequently be used to import the same data into other projects/models.
Click Next to proceed with the Import.
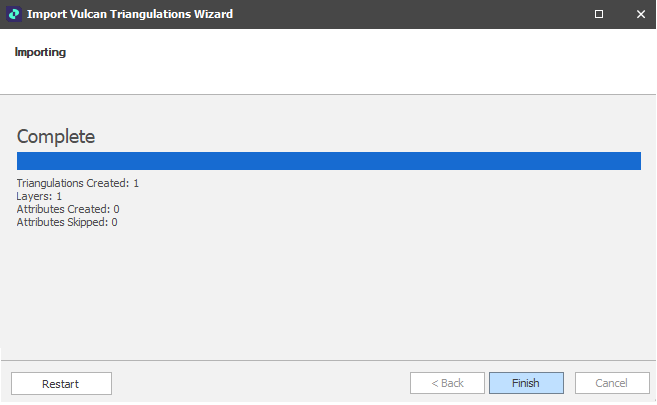
If you imported by right-clicking on a layer, the imported data is appended to or overwrites that layer, depending on the state of the Clear Existing Layer Elements check box.
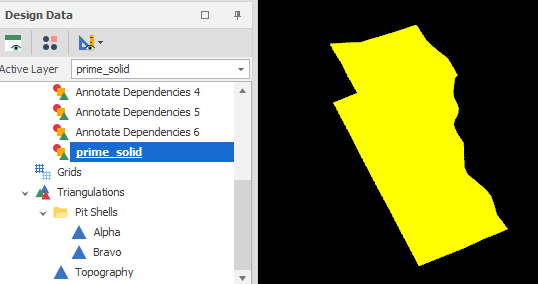
If you imported by right-clicking on the Layers node, a new layer is created:
Settings
Select Settings | Export to export mappings and other settings to an XML file. This file can subsequently be used to import the same data into other projects/models.
Click Next to proceed with the Import.
Restart
Click Restart (at the lower left of the Wizard window) to proceed with another import and return to the Import Options page. From there you can adjust your import settings and re-import if needed.