Design
Use the Design Settings page of the Micromine Spry Settings window, to apply the following settings to the Design Window:
Design > Display Settings
Lighting
In most cases you can accept the defaults, however the following settings may be useful when a particular lighting effect is required.
|
Setting |
Description |
|---|---|
|
Ambient Level |
Use the slider to adjust the ambient lighting of the scene. The default setting should provide soft and even lighting. |
|
Diffuse Level |
Use the slider to adjust how bright the scene appears when lit directly by a light source. |
|
Direction |
Accept the default or use the drop-down to define a vector or a bearing that defines the direction of the light source. |
Mouse
|
Setting |
Description |
|---|---|
|
Invert Scroll Wheel |
Select the check box to invert the behaviour of the mouse scroll wheel from its default setting from "Down motion scrolls down" to "Down motion scrolls up". |
|
Mouse Sensitivity |
You should not need to adjust the default settings, however sensitivity settings may be adjusted if you have particular mouse movement/digitising requirements. |
|
Snap Radius |
Changes the radius of the snap circle size. |
|
Select Radius |
Changes the radius of the selection circle size. |
|
Rotate Mode |
Sets the (Z-Up or Arc Ball) rotate mode. |
|
Rotate in Empty Space |
Defaults to True. Deselect the check box to restrict rotation to display objects. |
Graphics Card
The most important component of a graphics card is the amount of memory. Similarly to RAM, your application will either have enough or it will not. Unless you really know what you are doing, accept the default settings.
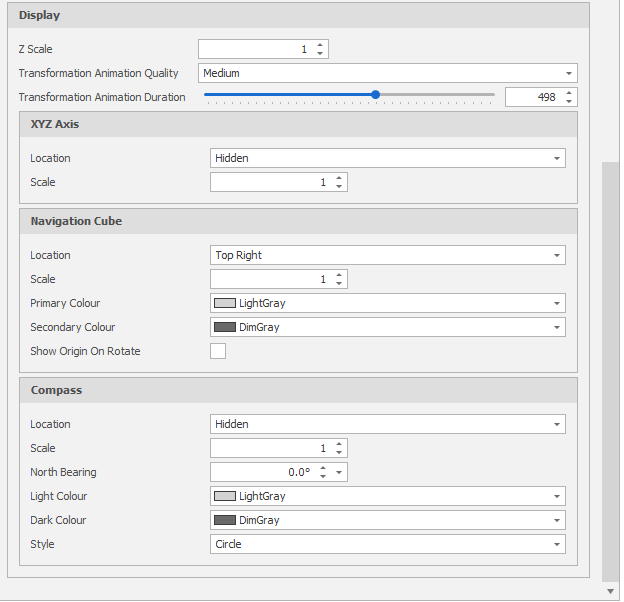
Display
Settings that control the view transformation (translation, rotation, and the scaling of objects):
|
Setting |
Description |
|---|---|
|
Z Scale |
The scale of the Z axis. Defaults to 1. |
|
Transformation Animation Quality |
Has options Off, Low, Medium (the default), High. |
|
Transformation Animation Duration |
Duration goes from 0 to 1000 ms. Defaults to 500 ms. |
XY Axis |
Hide or set the (Top Left/Right, Bottom Left/Right) location of the XY rotation axes and set the XY scale. |
|
Navigation Cube |
Hide or set the (Top Left/Right, Bottom Left/Right) Location of the Navigation Cube. You can overlap a (Circle Style) Compass by choosing the same location for each. Accept the default Scale (1) or use the spin controls to increment or decrement the scaling precision. In some cases you may want to adjust the scale of your design elements when the design space is smaller or narrower than usual. Set Primary and Secondary Colours. The cube will rotate about the last selected rotation point (this point will show momentarily if the Show Origin On Rotate check box is enabled). If no rotation point has been set (Reset Camera) then a point of rotation will be created at the origin of the data extents (this origin will always be in the centre of the screen until rotation is initiated with the mouse. |
|
Compass |
Hide or set the (Top Left/Right, Bottom Left/Right) Location of the Compass. You can overlap a (Circle Style) Compass with a Navigation Cube by choosing the same location for each. Set a contrasting Light Colour and Dark Colour for the cardinal points of the compass. Accept the default Scale (1) or use the spin controls to increment or decrement the scaling precision. In some cases you may want to adjust the scale of your design elements when the design space is smaller or narrower than usual. If necessary, use the spin controls to adjust the default (zero degrees) North Bearing. Choose a (Circle or Four Point) Style. |
ui_solid_preview_show_xyz, ui_solid_preview_show_navcube, ui_solid_preview_show_compass settings can be set via All Settings and default to True.
All Settings
You can also view settings in Debug mode by clicking All Settings at the lower-left of the Settings window. Non-default (user-defined) settings can be quickly identified. Each setting can be referenced by name in scripts and expressions.