Shift Planner
The Shift Planner application is designed to assist shift supervisors in organising the upcoming shift. All mines, both underground and open pit, perform a planning process for the upcoming shift. There may also be any number of plans per shift, one for development, one for production, one for charge up etc.
The basic building blocks of a shift plan are the tasks that need to be completed during the shift. When you create a shift plan, you create tasks that need to be completed by equipment, or be completed at a location.
Planned tasks can be tracked against actual tasks and alerts can be raised whenever there is a deviation from plan.
Create a Shift Plan Panel
In the Panels pane:
- Right-click on Shift Plan and select New Panel from the right-click menu.
- Enter a Name for the panel.
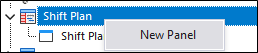
A new Shift Plan panel will be created.
Open a Shift Plan Panel
- Click on the plus/minus box to expand and contract the Shift Plan node in the Panels pane.
The panel you have created will be listed underneath.
- Click the mouse on the name of the panel and drag and drop it onto an open Canvas.
- To view the panel in future, simply open the canvas.
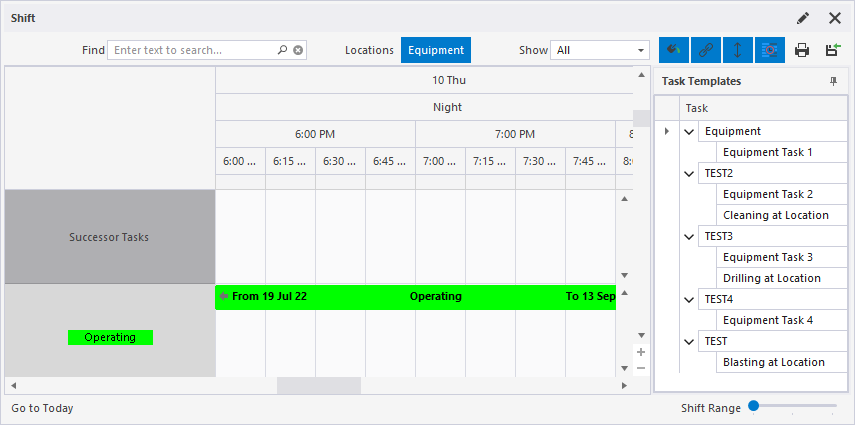
In the Shift Plan panel, an Equipment-centric or a Location-centric view of the shift plan can be opened. The primary function of these views is to display current tasks and highlight those tasks that are behind schedule.
An Shift Plan of the shift plan can be used as an input into the Dispatch system for an open pit. A Location View may be more appropriate for an underground mine, where it is important to keep track of location face development, for example.
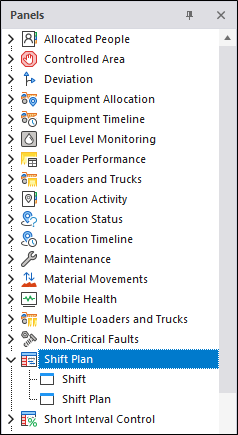
Shortcut Menu
Both equipment-centric and location-centric view displays can be configured and navigated using the right-click shortcut menu. If you right-click in the shift plan, the shortcut menu is displayed.
-
The New Task option is used to create Tasks.
-
If you have copied a task to the clipboard, you can Paste it using the option provided.
-
The Go to Today option will navigate the shift planner to the current date at the current time.
-
The Go to Start of Day option will navigate to 0:00 at the beginning of the current day.
-
The Go to First Shift option will navigate to the start time of the first shift of the current production day.
-
The Go to Newest Task option navigates to the most recently defined task.
-
You can use the Go to Date option to navigate to any date in the shift planner. The option will open the Go to Date dialog:
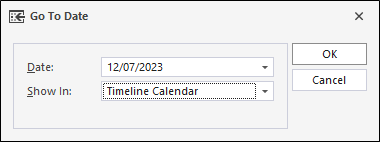
The Date drop-down will open a calendar from which you can navigate to the date you want to display in the shift planner.
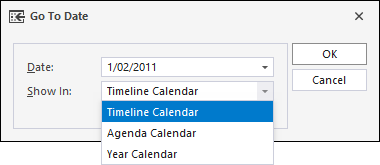
From the Show in drop-down, you can select the calendar in which to show the selected date.
-
The Time Scale option is used to select the time scales to be added to the shift planner.

The time scales you select are displayed in the shift planner headers in blue:

-
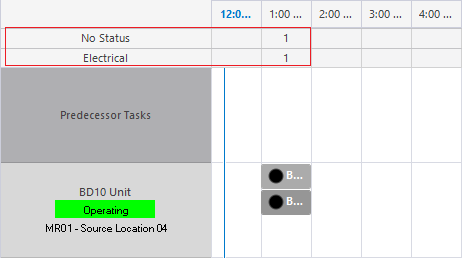
If you enable the Display Task Type count option, a count of the task types for the tasks in the shift planner is displayed above the shift plan:
-
The Print Task List option is used to print the task list for the shift planner. See: Print Task List
This can also be achieved using the Print button in the Panel Toolbar.
Setup Profiles
The location states and the active list you select for equipment and locations, will correspond to the location states and active lists configured for Data Acquisition. These are available for selection when you set up your profiles in the Shift Plan panel.
A profile might be created, for example, to show the availability and the utilisation of the primary loading fleet, or an auxiliary fleet of water carts.
When you create a profile, you must associate the profile with a shift plan. See: Configure a Shift Plan.
Create Tasks
Once a shift plan panel has been created and one or more profiles established, the next task will be to create Tasks for the equipment units and locations that are active during the shift.
Certain activities in the mine can be defined as a sequence of tasks. Configure a task template are configured to allow a common sequence of tasks to be quickly added to the plan.
The development of a face, for example, could be defined as a sequence of Drilling -> Blasting -> Loading tasks etc. The task sequence is configured via an XML file.
Allocate Tasks
When you start a shift and a Shift Plan panel is open in Data Acquisition, you can allocate the tasks to equipment and locations.
There are two stages in the task allocation process:
- An equipment unit (or location) is allocated to a task.
- The task is allocated to the equipment unit (or location).
(As an attribute of that task)
When a task is allocated to an equipment unit (or allocated to a location where an equipment unit is working), the details of that task are communicated to the operator via the mobile screen.
Since a task is associated with a unit of equipment and/or a location, a task may be allocated automatically depending on the status of that equipment and/or location.
Furthermore, the events recorded for that equipment (or that location) may be used to automatically trigger a task status change.
When the status of a task is explicitly changed (i.e. the task is set as Suspended, Resumed or Completed in Data Acquisition or via a Mobile screen) the status change is recorded as a Task Status Change Event .
Monitor Progress
The progress of the shift plan can be tracked against what is actually being achieved during the shift. If necessary, corrections and operational adjustments can be made to get the shift back on track.
By default, the Shift Plan panel is sorted by Start time. In order to show those tasks that are behind schedule at the top of the view, it is possible to sort the view by Planned Versus Actual Progress. View a task summary (Planned Versus Actual) is also shown for each task.
By right-clicking on a task, the (commenced, suspended, resumed, or complete) Task status can be changed.
Other views are available in Data Acquisition which allow the progress of tasks to be tracked during the shift. A Short Interval Control can be configured, for example, which provides a tabular view of the tasks you have created, together with a graph of task progress.
Generate Reports
A number of (Operator, Equipment, Location, Variance) Reporting can be generated.
The information obtained as a result of the shift planning process, contributes greatly towards a better understanding of operational capabilities, and can be used to plan subsequent shifts.
Quick Find
The Find box on the Shift Planner task bar allows a specific location or a unit of equipment to be quickly located. A partial search, and a drop-down list of possible search string matches, is enabled when a search string is entered in the Find box:
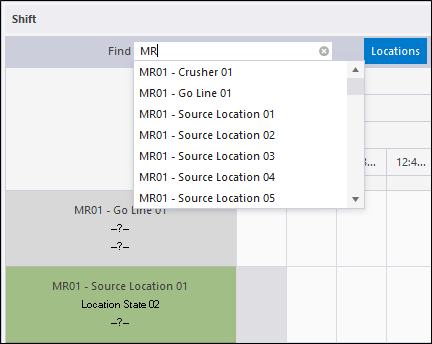
The list of matches is filtered by Location or Equipment, depending on which view and which profile are currently active. You can use the mouse (or the Up and Down keys) to scroll the drop-down list of matches.
Use the mouse (or press the Enter key) to select an item in the list. The Shift Plan view will jump to that item.
Import
The Import Tasks button in the Shift Plan panel toolbar is used to import Equipment or Location tasks to the Shift Plan. For information on the import procedure, see Import Task List.