File Selection
With the Workflow Options screen configured, click the Next button at the top left to proceed to the File Selection screen.
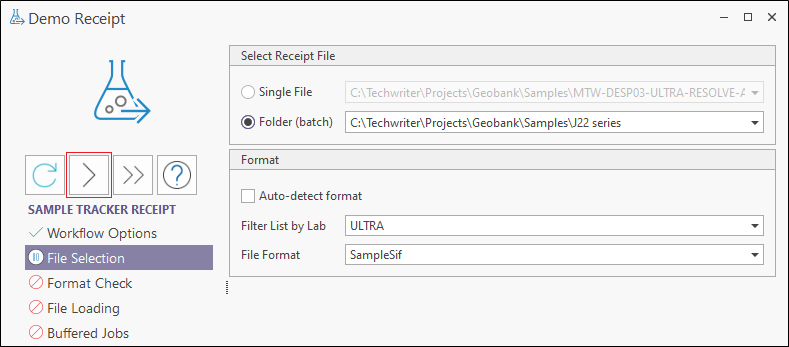
The options in the Select Receipt File panel are as follows:
Single File
You can select an individual file - the laboratory results file for the receipt - to process using the Single File option. Use the drop down to select the file.
Folder (Batch)
Use the drop down in the Folder (Batch) field to select a folder that contains batch result files you want to process for the receipt. Sample Tracker will load all the lab files in the folder as a batch load process.
In the Format panel of the File Selection tab, the following options are available:
Auto-detect format
Select this option to auto-detect the format of the specified file or files. If you have chosen not to auto-detect the format, you can select from a list of Input File Formats.
Auto-detect will compare the lab results file to the configured formats to find a match; If more than one match is found, the user will be asked to select a format to use; If no matched are found, an error message will be displayed, the relevant format should be configured, and the Receipt process run again.
Filter List by Lab
To limit the file list by lab, select the lab from the Filter List by Lab drop down list.
File Format
This option is disabled if you have chosen to auto-detect the format.
A receipt is configured for a specific laboratory and file format. These formats must be pre-configured in the Sample Tracker Metadata. In other words, once it is configured, a receipt can only be used to process result files from a specific laboratory and an associated lab file format.
Sample Tracker is able to process laboratory result files in standard interchange file (*.sif), comma separated values (*.csv) and Excel (*.xls, *.xlsx) format.
Use this option to instruct Sample Tracker to receipt the lab result files based on the chosen format. The file name and the file format are displayed at the top right of the Receipt window.
When the File Selection screen has been configured, click Next to proceed to the Format Check screen.