Reconciliation
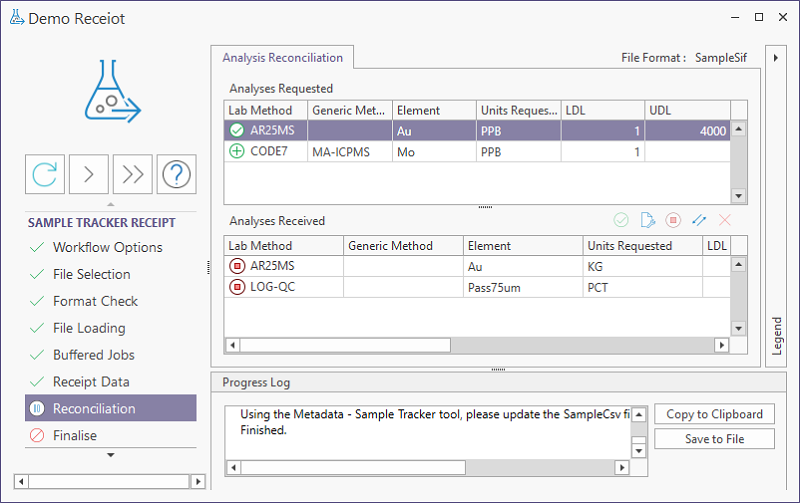
Click Next to proceed to the Reconciliation screen. There are three tabs on the screen.
| Column | Description |
|---|---|
| Lab Method | Laboratory method code. |
| Generic Method | Generic method code. |
| Element | Element code. |
| Units Requested | The units for the calculated value (nominated units for this element) |
| LDL | Lower detection limit. |
| UDL | Upper detection limit. |
| Resolved As | Usually as original request. |
| Comment | Lists the contents of the Comment field for the request. |
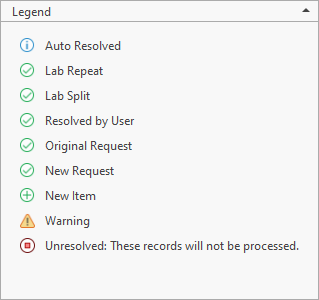
A Legend can be opened with the button at the right, describing each status for analysis elements. The Legend can be closed using the arrow at the top right.
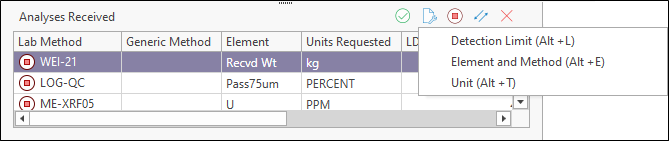
The Resolve tools at the top right of the Analyses Received panel allow you to manually resolve samples. You can correct reconciliation errors by choosing an option from the Modify Receipt Details button.
For more information, see Resolving analyses requested with analyses performed.
The Sample Reconciliation tab shows the samples received from the lab and the sample results returned. The main aim of this page is to preview the results and to ensure that all the samples have been reconciled with the original despatch details.

A Legend can be opened with the button at the right, showing the status for each returned sample. The Legend can be closed using the arrow at the top right.

Sample Tracker will check that each sample received is in the list of despatched samples. Conversely, it will also check that each despatched sample has been received. If a sample is not present in the Receipt file, a warning icon is displayed and the sample is flagged as unreceived.
It is not unusual for the samples list to contain invalid or unresolved entries. They might be:
- Element/method combos that were requested in the original despatch, but have not been received, or
- Element/method combos that were not requested in the original despatch, or
- Element/method combos that cannot be identified, due to spelling mistakes, or
- Element/method combos whose metadata does not match the content of the laboratory setup table (that is, changes have been made to the laboratory metadata since the creation of the original despatch).
For example, check samples or standards have been introduced by the laboratory. In this instance, the sample tag assigned by the laboratory will not match any of the despatched samples.
Conversely,
It is important to resolve inconsistencies wherever possible, because any unresolved samples are ignored during further processing.
Despatch Samples
The Despatch Samples panel displays the Tag Name and QC Type for the samples in the file.
Charts
The Charts menu is used to select an R Chart or Shewhart chart to display.
If you select Shewhart Chart from the menu, the Shewhart chart for the selected samples will be displayed.
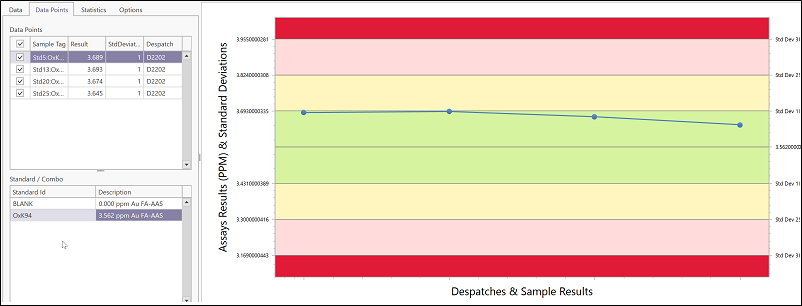
Conversely, if you select the R Chart option, the R Chart will be displayed.
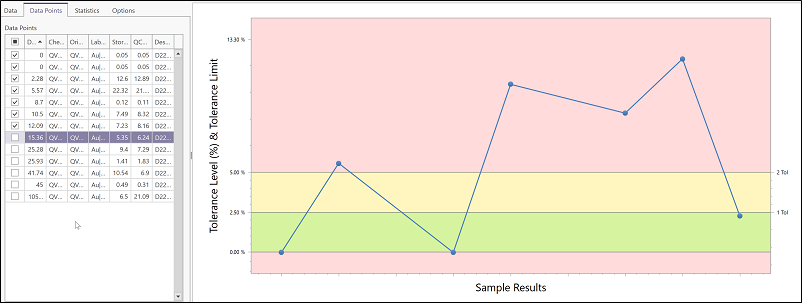
These charts are outlined in more detail in R Chart and Shewhart Chart.
Received Samples
The Received Samples panel of the tab displays the following information on the samples received:
| Column | Description |
|---|---|
| Tag Name | The name of the sample tag |
| Tag Qualifier | The Qualifier for the sample tag on the row |
| QC Type | Type of result. |
| Source | "F" if the sample originated in the field; "L" if introduced by the lab |
| Original | The matching sample from the original despatch. |
| Status | Indicates whether the link to the original sample has been resolved |
| Related Sample | The name of the sample related to the tag |
| Comment | Warning messages displayed for unresolved or invalid samples. |
Analytical Results
This panel shows the results retrieved from the input file for the sample currently selected in the Samples Received list:
| Column | Description |
|---|---|
| Tag Name | The name of the sample tag |
| Tag Qualifier | The Qualifier for the sample tag on the row |
| Element | The element for the sample. |
| Method | The parameter used to identify the analyses required from the lab (usually an element/method combination) |
| Lab Result Text | The text entered for the result from the lab. |
| Lab Result | The result value as reported in the results file. |
| Lab Units | The Units used by the lab for the analysis. The units for the stored value. |
| Store Result | The value that will be stored in the STORE_RESULT column in the ST_RESULT or ST_RESULT_STANDARD table. |
| Nominated Units | The units for the calculated value (nominated units for this element). |
| Status | Indicates whether the link to the original sample has been resolved |
| Comment | Warning messages displayed for unresolved or invalid samples. |
Resolve
The best way to resolve samples is to open the file format editor in a separate tab, and add new rules to resolve them. This ensures that they will auto-resolve on the next receipt.
Once you have added an appropriate rule to the file format, save the format and then click the Refresh button on the ribbon. This will re-apply all rules and should resolve the samples in question. Repeat this process for each type of unresolved sample.
For one-off situations, a number of options on the Resolve tool menu allow you to deal with lab checks, lab standards,
and invalid sample tags.
You can also identify and resolve invalid QC results and deal with lab splits or repeats. See: Resolving analyses requested with analyses performed.
Filter
Click the Filter button above the Received Samples grid to filter the list of samples received by sample tag or by sample status, or both. The list can also be filtered on sample type or QC type. For more information, see: Filter Samples

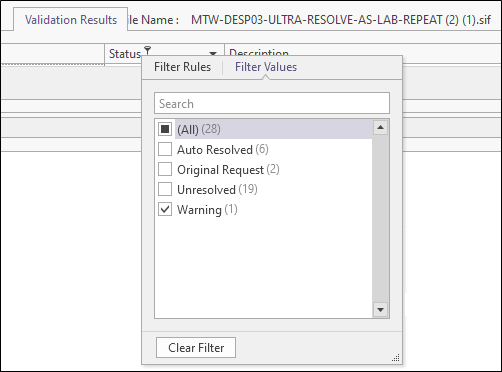
The Validation Results tab shows the results of validation. To validate the unresolved samples in the list, you will need to move back to the Sample Reconciliation tab and use the Resolve Tools at the top of the Received Samples pane - see Dealing with Unresolved Samples.
 \
\
You can filter the results using the Filter icons available for each column. For example, set the Status column to filter for warnings:
Once the Validation is resolved, click Next to proceed to the Finalise screen.