Editing
On the Design tab, in the Editing group :
-
Select Copy Strings to Active Layer (or right-click on the strings in Vizex and select Selection | Copy Strings to Active layer) to copy the selected strings to the active layer.
![]()
-
Select Copy Points to Active Layer (or right-click on the points in Vizex and select Selection | Copy Points to Active layer) to copy the selected points to the active layer.
![]()
-
Select Replace with Curve to replace a portion of a line with an adjustable Bezier curve.

-
Select Replace With Curve | Replace String to replace a portion of a string by digitising its replacement segments.

-
Select Replace with Curve | Replace with Spline to replace a portion of a line by digitising a Bezier spline as its replacement.

-
Select Angle | 3D Angle / Distance to specify a bearing (azimuth) and a distance for the next segment when digitising a string. The distance is measured using the actual 3D distance (taking into account the elevation).
![]()
-
Select Angle | 2D Angle / Distance to specify a bearing (azimuth) and a distance for the next segment when digitising a string. The distance is measured using the horizontal (projected onto the plan) distance.
![]()
-
Click the Clip tool, or select an option from the Clip tool menu, to clip the open or closed strings in a Vizex display layer.
![]()
-
Click the Close String tool to close a selected (open) string. The start and end point of the string will be connected by a new segment.
![]()
-
Click the Condition String tool (or select Condition String from the Vizex right-click menu) to prepare a string for wireframing by setting the allowable length of string segments.
![]()
-
Click the Curve tool to extend the selected string by appending a curve to the end point.

-
Select Curve | Insert Curve at Point to fillet an edge of a string by replacing an existing point with a curve.

-
Select Curve | Create Curve at Junction to insert a curve at a junction intersection.

-
Select Curve | Connect Strings by Curve to create a curved string between the end points of two existing strings.
![]()
-
Select an option from the Delete tool menu to delete selected strings or delete selected segments or points on a string.

-
Select Drape | Drape on Wireframe to drape strings or points onto a wireframe. The strings or points are dropped vertically onto the wireframe. In the case of strings, points are inserted wherever a string crosses a triangle boundary.
![]()
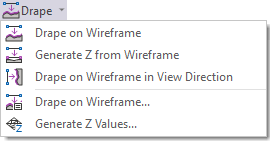
-
Select Drape | Generate Z Values to replace the Z values for all points with the wireframe Z value at each XY location. In the case of strings, no (new) intermediate points are generated. Draped Z values are written to the Input file.
![]()
-
Select Drape | Drape on Wireframe in View Direction to drape strings or points onto a wireframe, based on the current view direction. In the case of strings, points are created where a string crosses a triangle boundary.
![]()
-
Click the Expand String tool to expand the current string in an inwards or outwards direction based upon a specified expansion distance. Partial string selection is supported.
![]()
-
Click the Extend String tool to append points to one end of a string. Points are appended to the last point on the string. Alternatively, right-click on the end point you want to append to and select Extend from the Vizex right-click menu. As you drag and move the appended point, a new string segment is displayed (rubber-banded).
![]()
-
Click the Flatten String tool, or select Flatten from the Vizex right-click menu, to flatten selected strings or points. Points are projected onto the currently defined Section Plane. If no Section Plane is defined, then the points are projected onto the current screen plane.)
![]()
-
Click the Gradient tool to set the gradient (and Gradient Units) for a selected string or segment.
![]()
-
Click Insert Points to insert multiple points along a selected string or segment (when you right-click on the segment of a string and Insert Mode is active).
![]()
-
Select Intersect | Generate Point at Intersection to generate a point where two lines intersect.
![]()
-
Select Intersect | Insert Section Plane Intersections to insert points where selected strings intersect the current projection plane (clipped view).
![]()
-
Click Join Strings join two or more strings (or select the Join Strings option from the Vizex right-click menu).
![]()
-
Select Join | Coalesce to interactively coalesce strings selected in Vizex.
![]()
-
Click Mirror Strings to create a mirrored copy of selected strings by defining the plane of the mirror.
![]()
-
click Rotate Strings (Interactive), to rotate the strings and/or points you have selected in Vizex around a pivot point.

-
click Rotate Strings (form) to rotate selected strings around a pivot point. When you select the form-based tool, you can enter parameters to rotate selected strings to a specified angle around a pivot point and optionally move, copy or replicate those strings.

-
Click Copy/Move Strings (or select Copy/Move Strings from the Vizex right-click menu) to copy, move, or replicate selected strings.
![]()
-
Select Copy/Move Points (or select Move Points from the Vizex right-click menu) to copy, move, or replicate selected points in a specified direction and distance.
![]()
-
Click Cut Polygons to split a polygon into multiple polygons using one or more cutting strings. The Cut Polygons tool can be used to create ore and waste parcels for grade control, or to subdivide a bench into blocks for scheduling.

-
Select Cut | Polygon Networks to generate a network of closed polygons from the intersection of selected polylines and polygons.
![]()
-
Select Reverse
![]()
-
Click Project | Project String to project a string to a fixed distance, or to a specified elevation at a given slope angle. If no strings are selected when you click this tool, the Selection Assistant will prompt you to select the string or strings you want to project.
![]()
-
Click Project | Project to Surface to project a selected string to a defined elevation and drape it along a given slope onto a specified surface. If no strings are selected when you click this tool, the Selection Assistant will prompt you to select the string or strings you want to project.
![]()
-
Click Replicate String to replicate a string. If you have not already done so, you will be prompted to select the string(s) you want to replicate. Partial string selection is supported.
![]()
-
Select Reverse | Reverse String to reverse the order of the points on a selected string or strings.
![]()
-
Select Reverse | Regularise Polygon Directions to change the point order of the selected polygons where necessary, so that point order (clockwise or anti-clockwise) is the same for all polygons. The point order of all selected polygons will match the point order of the first polygon in the selection.
![]()
-
Click Simplify String to reduce the number of data points in selected strings, while keeping those points which fall within a specified tolerance.
(You can also specify a tolerance value, or select a Simplify … (form) option from the tool menu.)
![]()
-
Click Smooth, or select a Smooth option, to smooth one or more selected strings, or segments, in Vizex.
![]()
-
Click Split String to split an open string or a closed string (polygon) into two strings.
![]()
-
Click Split Polygon to split a closed string (polygon) into two closed polygons.

-
Select Split String | Multiple Split String (or select the Multiple Split String option on the Vizex right-click menu) to split selected strings or a segment using either a specified point spacing or a specified number of points.
The Split function can be applied to a segment (if invoked by right-clicking on the segment of a selected string).
![]()
-
Click Validate String to validate strings prior to using them as inputs to a function, or to run validation after being prompted by a function that has detected invalid data.
![]()
Pin
Click the Pin icon to display the ribbon even when it is out-of-context (in other words, the Vizex layer or the editor or function it relates to loses focus or is closed). The ribbon will be displayed until you either click the icon again to unpin it, or Close it.
