Maintenance Delays
Overview
Maintenance delays, listed in the Maintenance Delays step, are delays which are applied to individual pieces of equipment.
Lists of Equipment units and their Types are filled in automatically based on the data from previous setup steps.
Delays can be created manually for each piece of equipment, see:
Alternatively, delays can be imported. For more information, see:
Adding Maintenance Delays
-
Select a piece of equipment from the Equipment list.
-
In the Delays panel, click the blue plus icon.

-
In the Type column, choose a delay type from the drop-down list.

Adding a delay and selecting its type
-
Configure the delay as required. Configuration options are explained in the following sections:
Configuring Delays
In the Configure dialog, choose from the following configuration options:
Recurring Delay
-
If the delay is a singular occurrence, un-tick the check box and specify a Start time and an End time or a Duration for the single delay.
-
If the delay happens more than once, tick the check box and set the frequency and the time range of the recurrence:
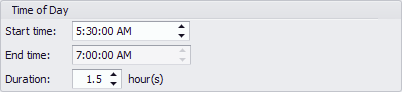
Time of Day
Set the Start time of the delay and the End time or the Duration of the delay.
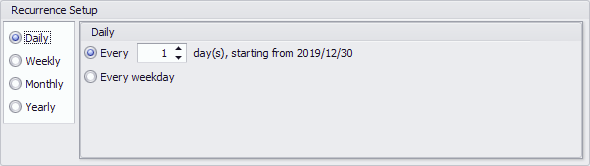
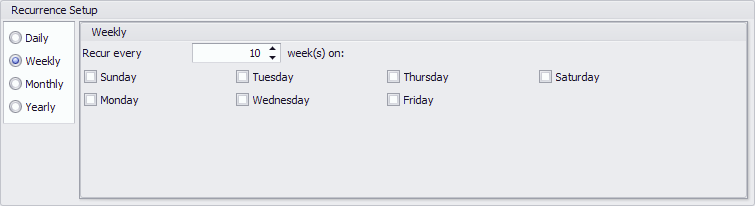
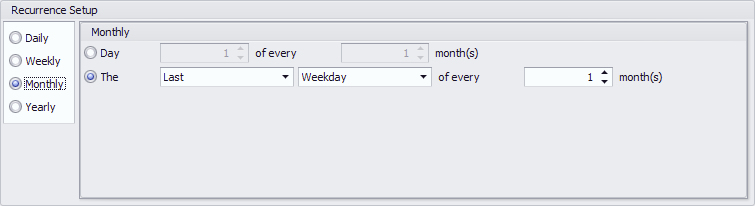
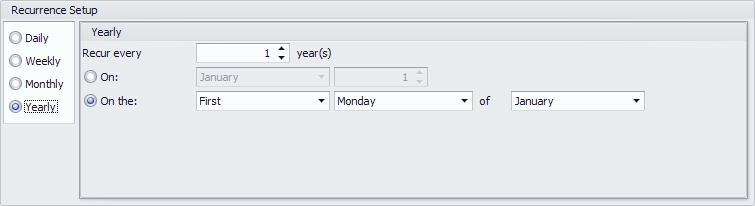
Recurrence Setup
If the Recurring Delay check box is ticked, specify the granularity of the delay recurrence:
-
Daily - specify the recurrence at a daily granularity.
-
Weekly - specify the recurrence at a weekly granularity.
-
Monthly - specify the recurrence at a monthly granularity.
-
Yearly - specify the recurrence at a yearly granularity.
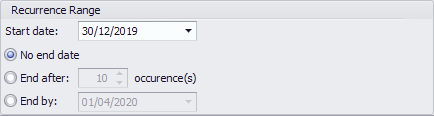
Recurrence Range
If the Recurring Delay check box is ticked, specify the overarching duration for which the recurring delay will be applied.
Start Date
-
Specify the start date from which the delay will take effect.
End Date
-
No end date - the delay will continue throughout the schedule.
-
End after - choose to end the delay after several occurrences.
-
End by - hard end date for the delay.
Maintenance Delays (Top)
Importing Delays from Excel
Configuring the Excel template
To import Delays from Excel, it must be organised in Excel into 3 columns at least:
| Column | Data | Example |
|---|---|---|
|
1st column |
Equipment Name. The name should be the same as specified in the Site Lists > Crushers/Loaders/Other Equipment, otherwise you'll get Invalid Data Copied error message, informing that certain equipment name doesn’t exist in the project. |
|
|
2nd column |
Start Time |
|
|
3rd column |
End Time |
|
|
4th column (optional) |
Delay Type. The Name of the Delay should be the same as specified in the Delays setup step, otherwise you'll get an Invalid Data Copied error message, informing you that a certain delay type doesn’t exist in the project. |

Importing the Maintenance Schedule
-
Click the Import from Excel button on the toolbar.
-
Add a new source by pressing the blue plus icon.
-
Click the Paste from Excel button.
-
If no data has been copied to the clipboard, the error message appears: “The data copied needs to be in three or four columns: Equipment name in the first column, the start date in the second column, and end date in the third; optionally, with Delay Type in the fourth column.”
-
-
Change the Delay Type, if required.
-
Set whether or not the delay will be used.
-
The imported schedules will be automatically filled-in for the equipment specified in Excel and shown in bold blue.
-
Once the delays have been imported and OK has been clicked, the delays can no longer be edited. To make adjustments in the time or type, return to the Excel Sheet or the Import Maintenance Schedule window and make the necessary corrections there.
-

Import Schedule > Paste from Excel > Imported data will be populated for each piece of equipment specified in Excel and appear in bold blue.
Maintenance Delays (Top)
Importing Delays from CSV
To import Delays from a CSV file, data must be organised in columns and contain the information described below:
| Data | Description |
|---|---|
| Equipment Name | The name should be the same as specified in the Site Lists > Crushers/Loaders/Other Equipment, otherwise you'll get Invalid Data Copied error message, informing that certain equipment name doesn’t exist in the project. |
| Start Time | Delay Start Time |
| End Time | Delay End Time |
| Delay Time (Optional) | The Name of the Delay should be the same as specified in the Delays setup step, otherwise you'll get an Invalid Data Copied error message, informing you that a certain delay type doesn’t exist in the project. |
Importing the Maintenance Schedule
-
Click the Import Schedule button on the toolbar.
-
Add a new source by pressing the blue plus button.
-
Click the Import from CSV button:

Import Schedule > Import from CSV.
-
To select the source file, click the ellipsis button at the far right of the File input box.
-
Add a New CSV mapping using the blue plus icon, if required. The UI allows for multiple mappings to be saved to support inputs from different data sources.
-
Map fields from the CSV file to the fields in APS.
-
Click OK to process the data.

Import from CSV: User Interface Example.
-
Change the Delay Type, if required.
-
Set whether or not the delay will be used.
-
The imported schedules will be automatically filled-in for the equipment specified in the CSV file and shown in bold blue.
-
Once the delays have been imported and OK has been clicked, the delays can no longer be edited. To make adjustments in the time or type, return to the original data file or the Import Maintenance Schedule window and make the necessary corrections there.

Import Schedule > Import from CSV > Imported data will be populated for each piece of equipment specified in the CSV file and appear in bold blue. -
Maintenance Delays (Top)