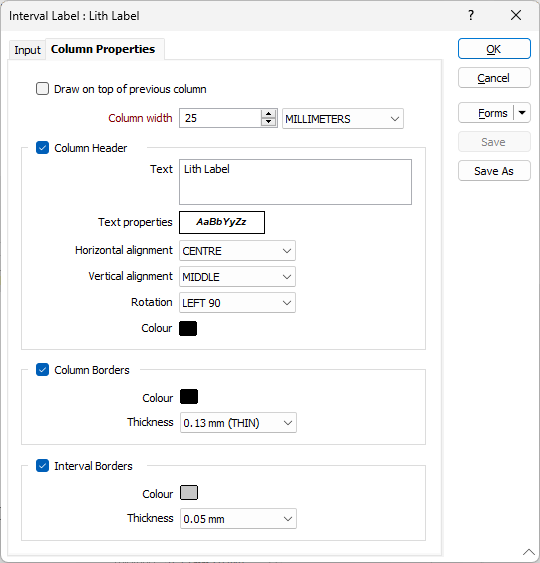
Column Properties
The properties of the text that is shown in the column header for each column is defined on the Column Properties tab when you edit the properties of a column (on the Drillholes tab of the Drillhole Log form, or via the Vizex Layer Display pane).
Here you can turn (column header, column border, and interval border) display options on or off for each column.
The column width is defined here, but the position of a column, in relation to other columns, is defined by the order of the columns in the Columns grid list on the Drillholes tab of the form.
To set the location of headers and footers, or exclude them completely, use the Column Header settings on the Header and Footer tabs of the Drillhole Log form.
The Column Header refers to the text used to identify the column name:
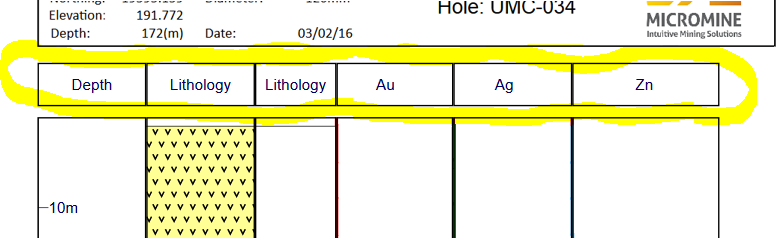
So the vertical position and height of the Column Header is defined on the Header tab, but the title text for each column is defined as part of the column definition.
Draw on top of previous column
The two most likely scenarios are:
- To draw two (or more) lines.
- To write descriptive text on top of a hatch pattern.
Select the Draw on top of previous column check box option. This forces the width to match that of the previous column (so the Column width parameter is now disabled).
Column width
If you are not overlaying the current column onto the previous column, specify the Column width. The MILLIMETRES or INCHES units you specify here should be consistent with the units you have set on the Page Setup tab.
Column Header
Text
You can edit the label text here.
Text properties
Double-click on the Text Properties Preview box to select a font and set text properties.
Horizontal alignment
Specify the horizontal (RIGHT, LEFT, CENTRE) alignment of the text relative to the frame.
Vertical alignment
Specify the vertical (TOP, MIDDLE, BOTTOM) alignment of the text relative to the frame.
Rotation
Optionally, select a (NONE, LEFT 90, RIGHT 90) option to rotate the text 90° relative to the header or footer frame.
For example, an entry of 0 in this field will position the label parallel to the Y axis of the paper. Any angle between the cardinal points is also acceptable.
Colour
Double-click the Colour box to select the colour of the text from a colour palette.
Column Borders
Select the check box to display a border. “Column Borders” refers to the outer border of both the actual column and the column header.
Double-click on the icon to set the colour for the frame border. This input is disabled when a NULL fill colour is selected.
Select a line thickness value (in millimetres) for the border of the frame. THIN, MEDIUM, THICK, or a Custom thickness can be selected. This input is disabled when a NULL fill colour is selected.
Interval Borders
Select the check box to display a border. “Interval Borders” refer to the horizontal lines marking start and finish of each interval. For hatching, this effectively become the hatch border and for interval labels this gives the column a table like appearance (each interval becomes a “cell” with a border).
Double-click on the icon to set the colour for the frame border. This input is disabled when a NULL fill colour is selected.
Select a line thickness value (in millimetres) for the border of the frame. THIN, MEDIUM, THICK, or a Custom thickness can be selected. This input is disabled when a NULL fill colour is selected.