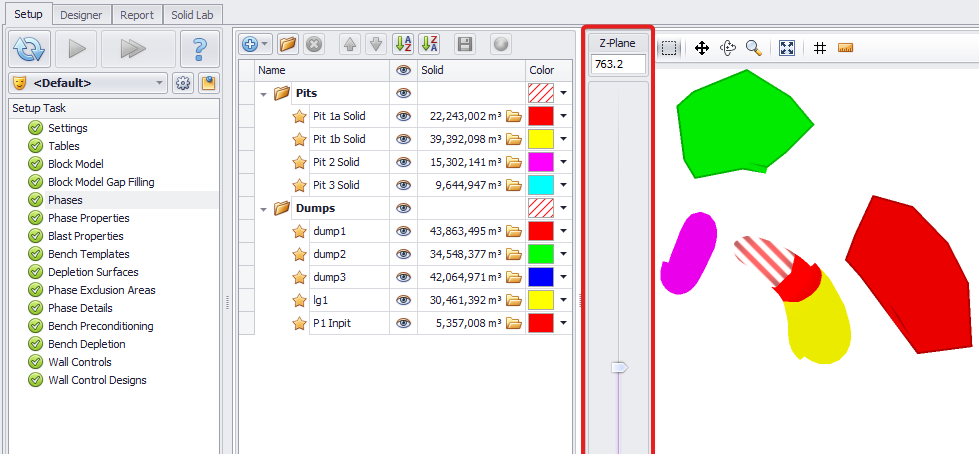
Phases
In the Phases step, the user is prompted to create/import phases for later reference in the project.
You can import solids from other planning packages or create them in the embedded Solid Lab tab.
Note that the names and order of the phases in the entire project are specified in this step. Make sure that the phases are added, named and listed correctly.
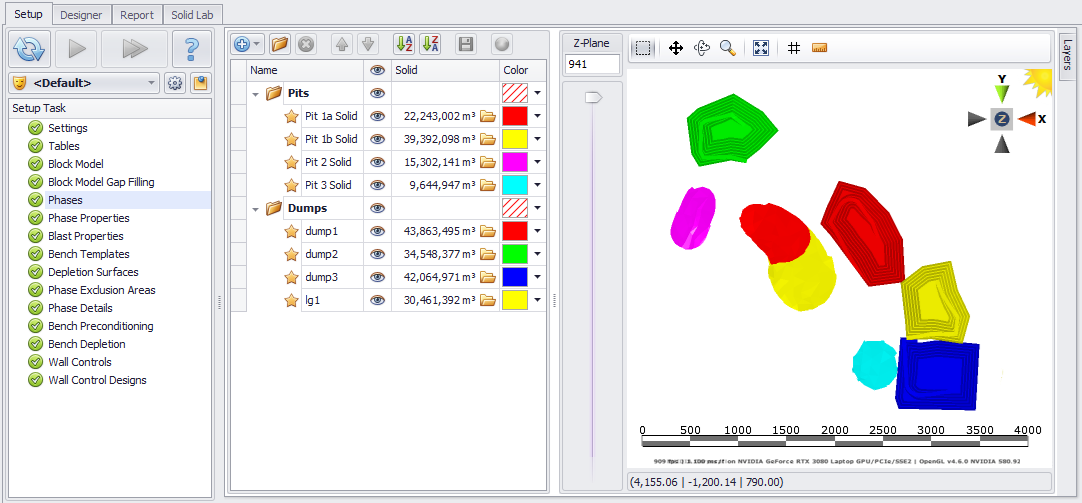
Phases Overview
Each phase is defined by a closed master solid. Pit solids must be closed (NOT open pit designs).
Importing Solids
You can import from a file, layer, or a third-party package:
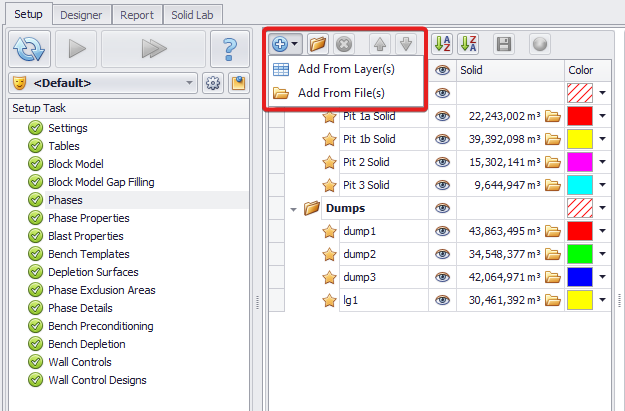
Adding solids from Layer(s) or File(s) options
Add from Layer(s)
If you have pre-created closed solids listed in the Layers panel, import them as Phases by selecting Add from Layer(s) from the drop-down menu. Then choose the relevant solid layers:
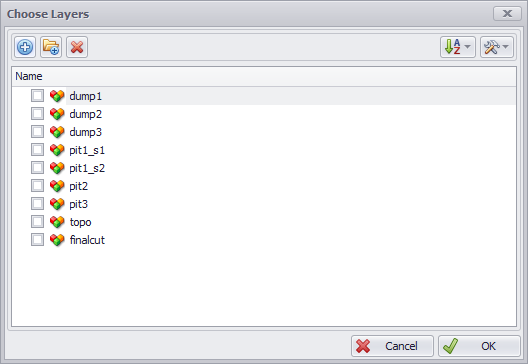
A simple way to check whether a layer is a closed solid or not is to report its Volume via Tools > Report Volume (on the right). Designs don’t have volume and cannot be used as phases.
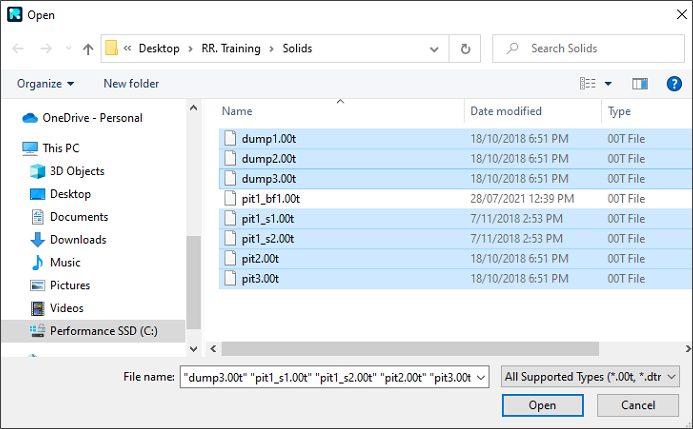
Add from File(s)
To import phases from File(s), select Add from File(s) from the drop-down menu and then navigate to the folder where the closed solid files are located.
When importing solids from another software, supported file formats are:
-
.00t (Vulcan)
-
.dtm (Surpac)
-
.dxf (AutoCAD)
-
.msr (MineSight)
-
.obj (Wavefront)
-
.tridb (Micromine)
If you do not have closed pit solids, refer to the Solid Lab tab section to generate them from designs.
Checking for Overlaps
Use the vertical Z-Plane slider (between the solid list and the 3D viewport) to check for overlaps between the phase solids.
-
Overlaps are marked with a red and white hatch pattern. These are a problem when material is included in multiple phases leading to double counting of tonnes – this must be fixed. So each block is mined only once.
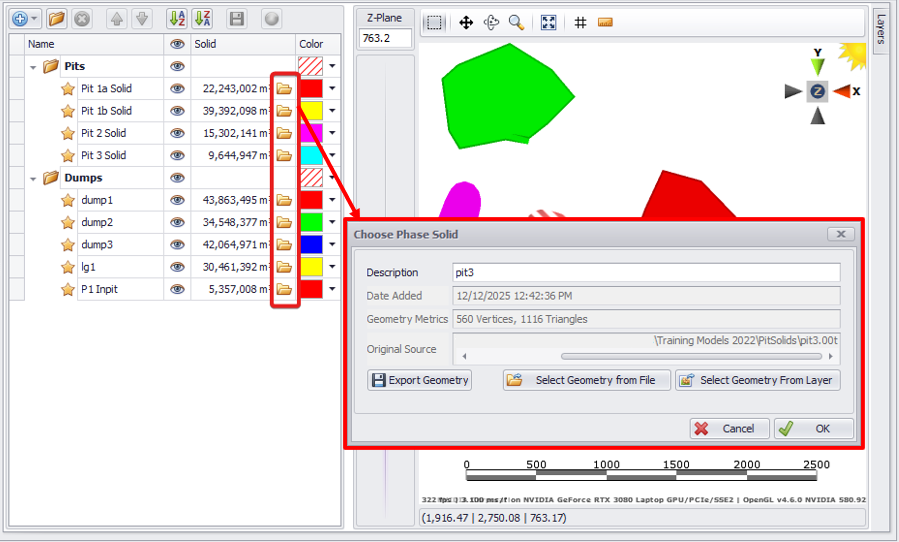
-
In the image to the right see that the same area is used for 2 different purposes: first Pit1 is mined out, then the area is used as a backfill. The block is mined once, the area is then available to backfill with waste, meaning correct and valid overlapping of solids (candy-cane pattern).
Note: When turning off phase visibilities, overlaps may still appear if they fall within the 3D ‘box’ of the visible phases.

Exercise
-
Navigate to the Solid Lab tab and create a solid for the Backfill stage.
-
See Solid Lab Exercises > Creating Backfill Stage Solid section.
-
-
Import it as a phase solid and check its overlap with Pit1_Stage1 phase.
To avoid double-counting tonnes in an overlap, revert to the Solid Lab and use the Subtract Solids operation to clean up the data.

Updating Solids
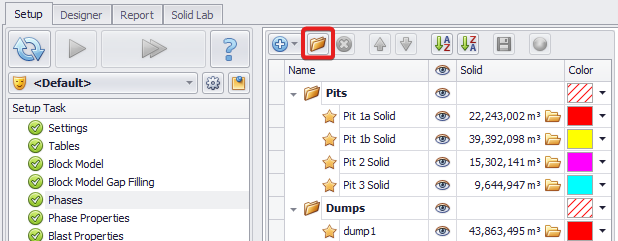
To update the solid for a given phase, click on the Folder icon and choose Select Geometry from File or Select Geometry from Layer.
When updating solids, avoid deleting them and adding new ones, as it will prompt you to re-populate phases details and construction lines. Always re-import solids to update phases, instead of deleting them.
Adding Folders
Click the New Folder icon to organise phases into folders:
Phases Order
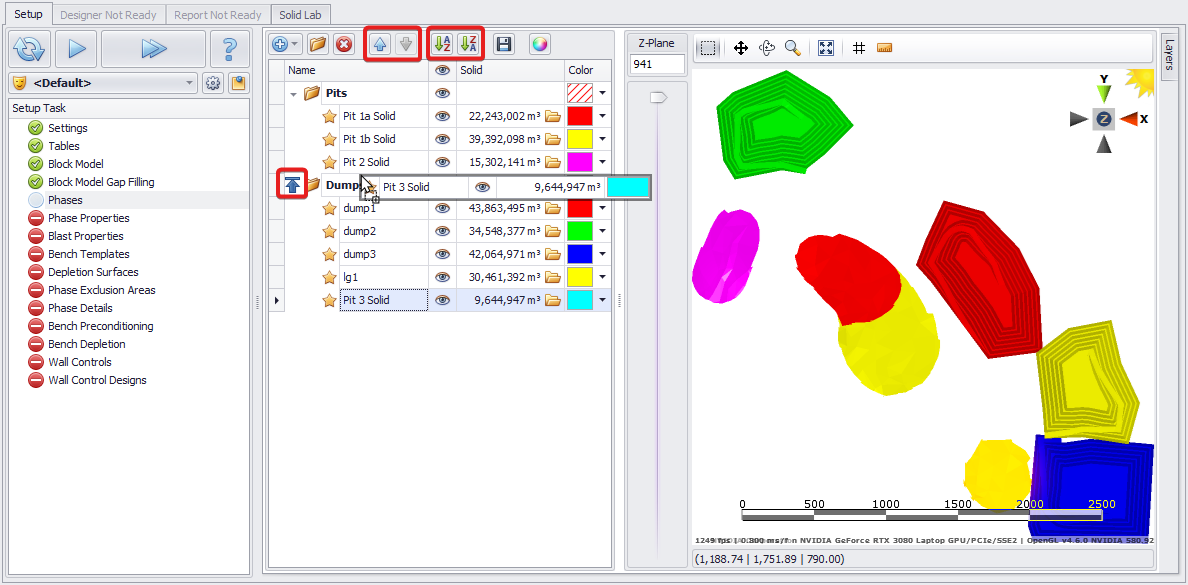
Select one or multiple Phases and reposition then using the blue Up/Down arrows, or by dragging a selected solid(s) within the phases list and dropping it to the location pointed by the blue arrow. The list can also be sorted alphabetically using the Sort buttons on the local toolbar.
When adding phases, phases are added below the selected phase.
One you are satisfied with the phases, click the blue Play button to proceed to the next step.