Bottom Panel
The Animation tab's bottom panel is used to run the animation in the Viewport section, as well as to select the exact time period for use in multiple panels and tabs.
Time Slider
Time slider is used to play and navigate through the animation.

Click the settings button to expand the time settings dialog, where you can set the ratio of real seconds/minutes to days/years as per schedule.
Playback/Video speed and duration can be altered using the Options button.
Blast Duration can be used to slow down the animation during blasts to make firing locations easier to visualise.
Exports
Click the Exports button to the left of the Bottom panel to expand its dialog. Several export options are available for selection.


Export Options
|
Export Type |
Outputs |
|---|---|
|
Export Period Solids |
Output separately for each period or cumulative solids for the end of each period |
|
Export Stage Plan at Current Time |
Output as mined/dumped surface at the time based on the slider location |
|
Export Stage Plans for All Periods |
Output multiple as mined/dumped surfaces for the end of each period |
|
Export Video |
Outputs video of animation |
|
Export View for selected Periods |
Outputs images for selected viewports and periods. |
|
Export Polygons for All Periods |
Output multiple as mined/dumped polygons for the end of each period |
|
Export Blocks for Conformance |
Outputs conformance file to be used in Spatial Conformetrics or as Schedule Guidance in APS |
Bottom Panel (Top)
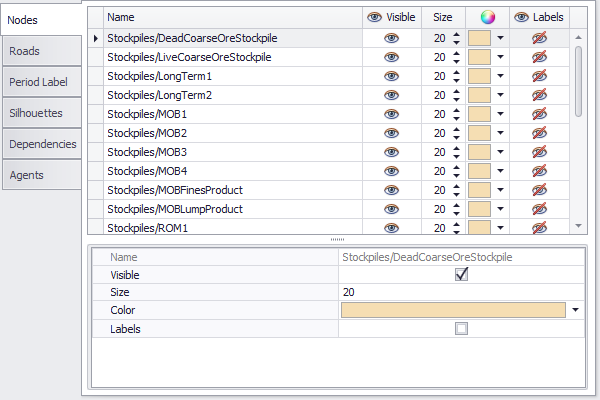
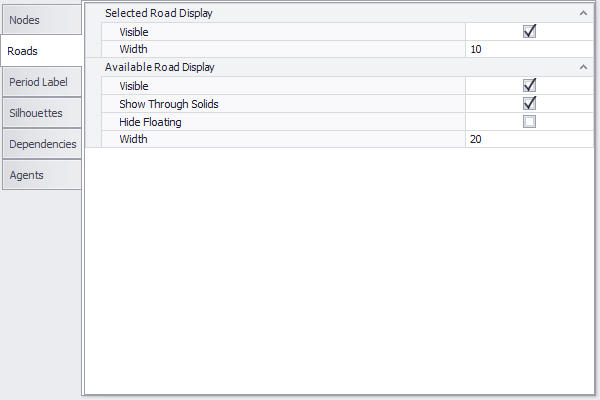
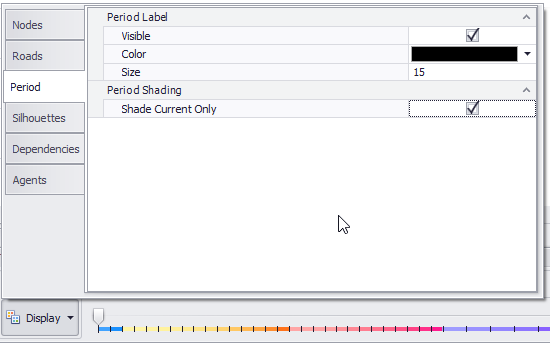
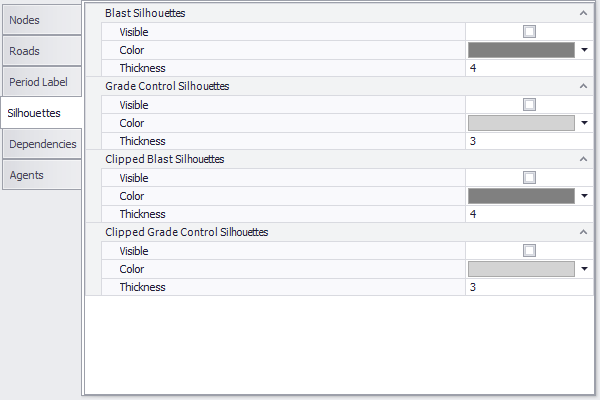
Display
Click the Display button to the left of the Bottom panel to expand its dialog.

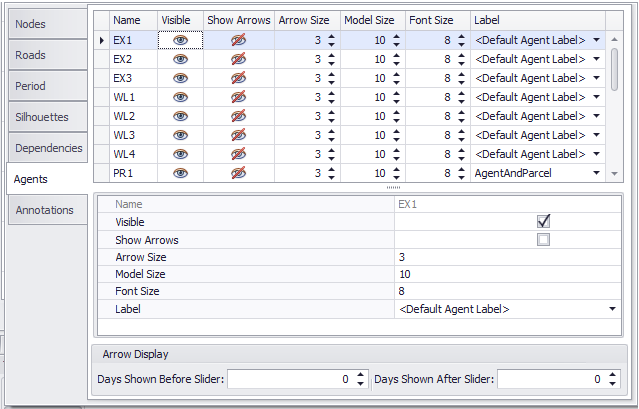
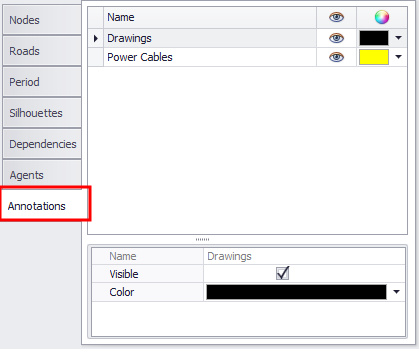
In this window, you can set various display settings for individual components, such as Nodes, Roads, Period Label, Silhouettes, Dependencies and Agents.

Bottom Panel (Top)
JiT Delays tab
“Just in Time” Delays allow for an Activity on a specific block to be delayed.
To create a new Jit Delay, select one, or multiple blocks in the Viewport, right click and select a Delay set to add Jit Delay. If a Delay set does not already exist a new set will automatically be created.

JiT Delays right click drop-down options and JiT Delays tab window
In the JiT Delays panel edit Activity, Start Time & End Time accordingly.
JiT Dependencies tab
“Just in Time” Dependencies allow for a custom dependency to be created between two activities on two specific blocks.
To create a new Jit Dependency, select 2 blocks in the Viewport, right-click and select a Dependency set to add Jit Dependency.
If a Dependency set does not already exist, a new set will automatically be created.
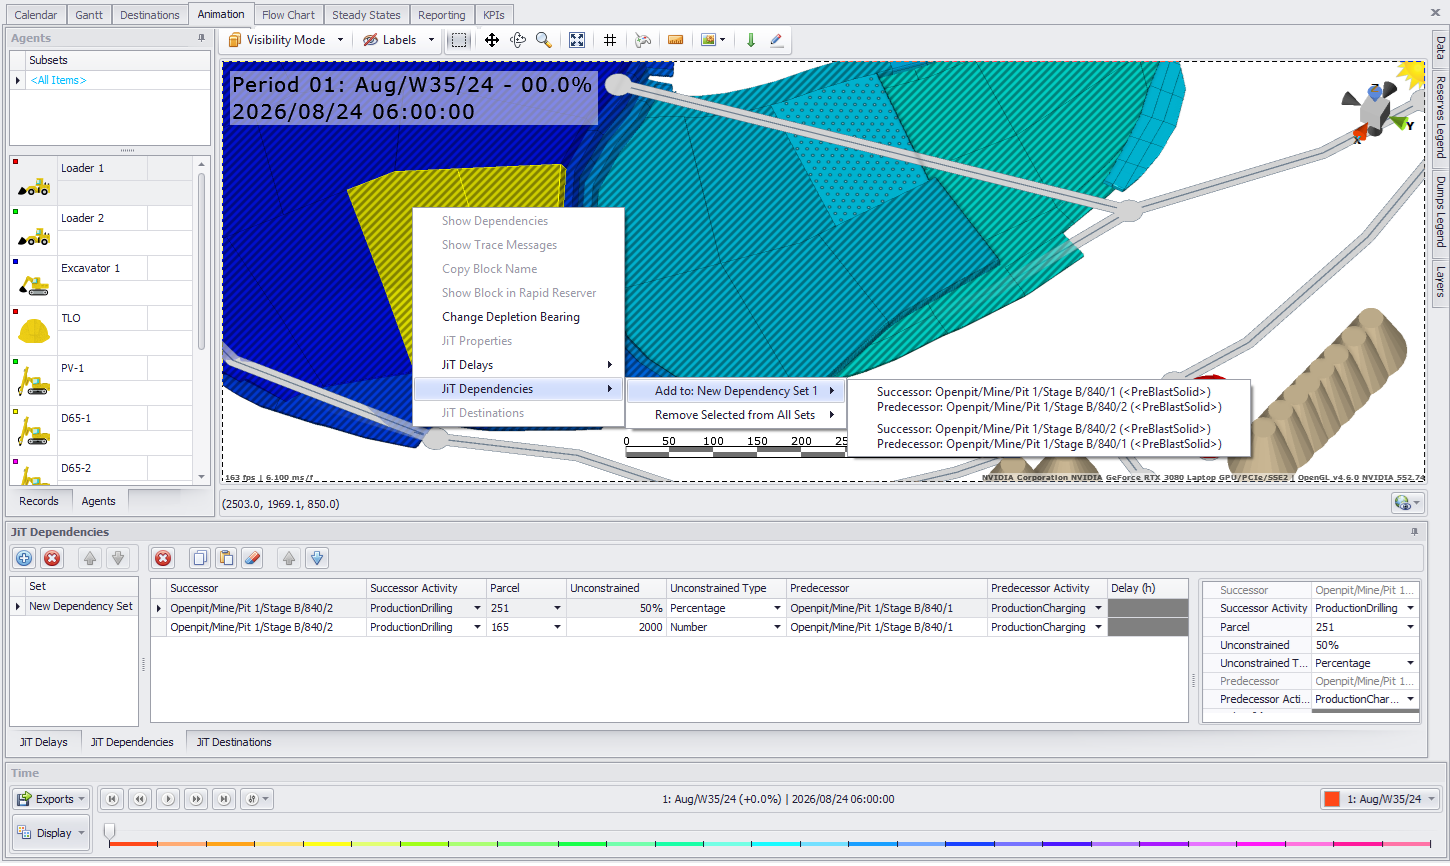
JiT Delays right-click drop-down options and JiT Delays tab window
In the JiT Dependencies panel, edit Activities and Delays accordingly.
-
Successor – Block that is dependent on another.
-
Successor Activity – Choose what activity is being restricted by the dependency.
-
Parcel – Optional: Choose what parcel is being restricted by the dependency. Note delays can only be applied when <All Parcels> is selected.
-
Unconstrained % - Input how much of the activity can be completed on the block before the dependency comes into effect.
-
Example: 0% means nothing can be done before the predecessor is completed. 50% means up to half of the successor activity can be done before the predecessor is completed.
-
Unconstrained Type - Choose how the allowable amount will be calculated:
-
Percentage – The amount that can be completed will be calculated as a percentage of the designed amount.
-
Number – Enter the amount that can be completed before the dependency is active.
-
Predecessor – Block that has other dependent upon it.
-
Predecessor Activity – Choose what activity is being used as the predecessor.
-
Delay (h) – Input how many hours delay are to be added once the predecessor has been included.
Bottom Panel (Top)
JiT Destinations tab
“Just in Time” Destinations allow for a parcel within a block to be sent to a specific destination.
To create a new Jit Destinations, select a dig block in the Viewport, right click to assign a Jit Destinations.
Each parcel contained within a block can be assigned to a different destination.
If the dig block has already been scheduled, the destination assigned by the optimizer will show in Associated Movements section.
Sending material to a destination which is not allowed by Destination Rules will cause the schedule to stop.

Prefer Destinations dialog for a selected dig block
Bottom Panel (Top)