Animation Window
The Animation Window is opened by default whenever you open a Scenario. To switch back to the Animation Window from the Schedule, open the Animation Window via the ribbon: On the Home tab, in the Results group, select Animation.
When Source Scheduling and/or Destination Scheduling simulations are enabled as part of your Scenario Settings, the Animation Window provides a simulation of the schedule task list from the Start date to the End date of your Scenario. When Haulage Simulation is enabled, an additional Haulage Networks node allows a network to be created as the basis for Haulage simulation.
The Animation Window is probably the most powerful tool available in the application and has many features that are either unknown or overlooked by less experienced users. This topic explains the various tools available.
![]()
Layers
In the Design Data pane, the Layers node is a mirror of the layers you can interact with in the Design Window. The same layers can be loaded and manipulated here. Additional Haulage Networks and Development Networks nodes allow networks to be created as the basis for haulage simulation and underground mine scheduling, respectively:
-
A Scenario that has Haulage Simulation enabled as part of its Settings, will have a Haulage Network. A Haulage Network has one to many network layers which may be connected to each other and which are used to assist planning. For more information, see: Network (Attach and Detach) Rules
-
A case that has the Data > Development Network option enabled as part of its Scenario Settings is able to support underground mine scheduling and reserving. Inputs to the process are Centreline strings which represent a Development Network and Solids which represent the stopes to be mined. From these, a set of scheduling solids are generated under a "Development Network Layers" node of the Design Data pane. For more information, see: Development Network Layers
Overlays
On the Design tab, in the Overlay group:
-
When one or more Centreline Layers are used as inputs to a Development Network Layer, there may be problems which make it difficult to make the necessary connections between the lines that will eventually be designated as the tunnels, declines, cross-cuts and vertical shafts of the network.
When the animation is run, disparities in the order and sequence of mining is an indication that there are broken or erroneous connections in the generated network. The Centrelines will therefore need to be validated to eradicate problems.
See: Development Network Warnings

-
The Tunnel Visualiser can be used to highlight any discrepancies between the Development Network and generated tunnel solids. This might be as a result of changes made to the network after the tunnel solids were generated. Tunnel visualisation also allows dependencies to be more easily derived from the centreline and stope connectivity of the network. . See: Tunnel Visualiser

-
Use the Visualise Scenario to visualise a period-based animation of any scenario in the current project.

-
Use Upcoming Activities in Period to visualise all upcoming tasks that will be active in the current period.

Keyboard Shortcuts
You can navigate your 3D animation with the following keyboard and mouse shortcuts:
- Rotate: Whilst hovering on any object, hold the Z key then left mouse button OR the middle and left mouse button to rotate the view around the mouse cursor.
- Pan: Whilst hovering on any object, hold the Space Bar key then left mouse button OR the middle and right mouse button to pan the view.
- Zoom: Use either the mouse wheel or the I and O keys to zoom in and out.
To view and modify keyboard shortcuts, change the rotation mode, invert the mouse wheel zoom, etc., click the File tab to open the backstage menu and select Settings > Keyboard Settings.
There are also several keyboard shortcuts you can use to navigate your Animation Date (hold down and mouse-wheel through):
- h: hour
- d: day
- w: week
- m: month
- q: quarter
- y: year
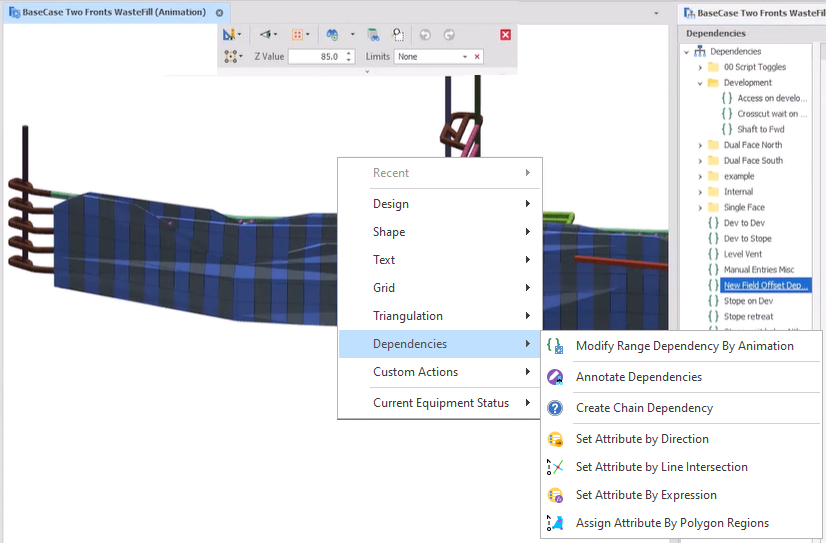
Animation right-click shortcuts
Using a combination of the Snapshot Viewer, the Output Schedule and Vertical Tabs you have access to a number of different menu options that let you schedule and troubleshoot using your animation.

Snapshots
The Animation Viewer works well in conjunction with the Snapshot Viewer. Right-clicking the Animation tab and selecting New Horizontal Tab Group or New Vertical Tab Group will allow you to work side-by-side.
To switch back to separate tabbed views, right-click and select Move to Previous Tab Group.