Implementation in Destination Scheduling
The template and method described in Introducing a Switchback can easily be modified to work for destination scheduling.
Important Check that your Destination Path order is set to "Strip/Bench"
Single Ramp Offset Dependency
As before, the best way to start this process is to create a single ramp for a single strip.
-
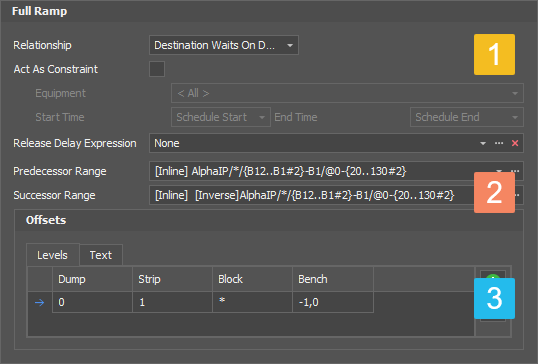
Ensure that the Relationship of your dependency is set to Destination Waits On Destination.
-
Paste your single ramp path in the Predecessor and Successor Range. Put a "*" in the Strip level and ensure Inverse is ticked on for the Successor Range.
-
Enter your offset values as shown.
Addition of a Switchback Offset Dependency
https://s3-us-west-2.amazonaws.com/secure.notion-static.com/edb8a514-abb4-433e-8930-7a2000db1fa6/RRampSwb.gif
-
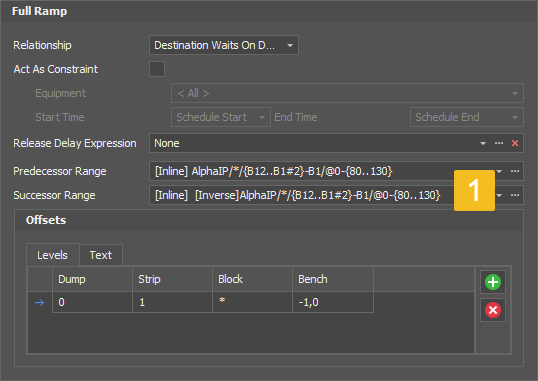
Note that the range has been changed. The ramp depth has been halved and consequently the bench offset is now one bench every second block.
Predecessor Range (without switchback): AlphaIP/{B12..B1#2} - B1/@0 - {20..130#2}
Predecessor Range (with switchback): AlphaIP/{B12..B1#2} - B1/@0 - {80..130}
-
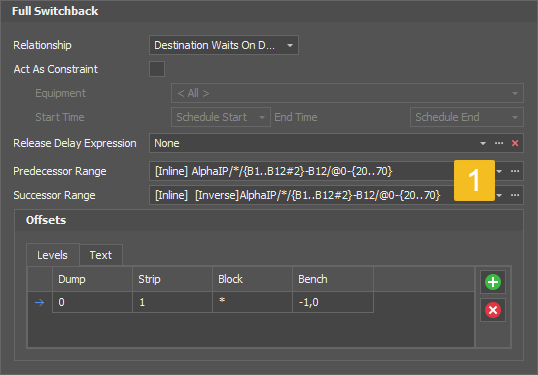
When creating your switchback ramp make sure to swap the Block direction of your dumping.
First ramp: AlphaIP//{B12..B1}-B1*
Switchback: AlphaIP//{B1..B12}-B12*
Splitting the Dump into Two Ramps and Two Switchbacks

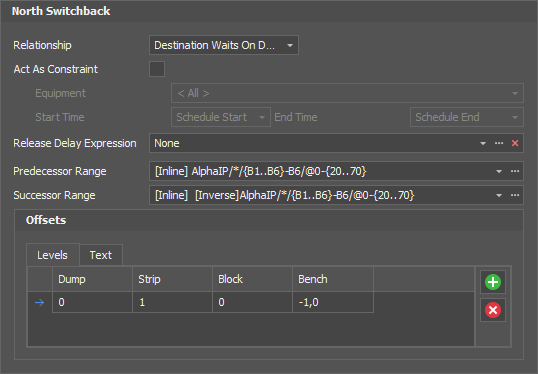
NORTH RAMP

-
The range has been changed to build a ramp in half the number of blocks compared to the example above.
-
The input into the Block offset has been changed to "0". This due to the V shape the dual ramps will build into the dump.
NORTH RAMP SWITCHBACK
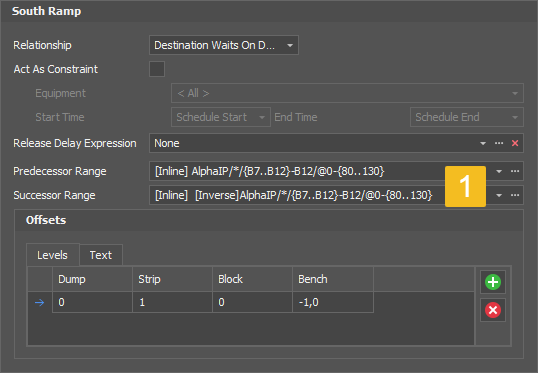
SOUTH RAMP
-
Make sure your ramp in the opposite direction has the correct range and direction. Again it is generally easier to build the ramp for a single strip and paste it in rather than trying to amend your original ramp.
SOUTH RAMP SWITCHBACK
