Receipt File Formats
Execute Configuration Manager | Metadata | Sample Tracker Metadata and select the Receipt File Formats option to setup definitions for the file formats and the laboratories that Sample Tracker will work with.
![]()
The idea behind a file format definition is to tell Sample Tracker which laboratories use which files, where to locate important data in the input file, and what to do when data values are missing or unexpected. In other words, format definitions provide the points of reference that will be used when receipts are processed.
Note: Since Micromine Geobank 23.5, the CSV convention of allowing text with commas to be qualified as data for a single cell by enclosing it in double-quotes is supported. Quoted strings like ,'PO-1001,2,5 and 7', are correctly interpreted.
Details
In the Details pane of the File Formats screen, you can select and edit the properties of the file formats that will be used by Sample Tracker when processing sample receipts. You can also use the tools on the local toolbar to add a new file format, to clone (copy) the current file format definition, or delete the current file format definition:

|
Click the Add button to add a new item. |

|
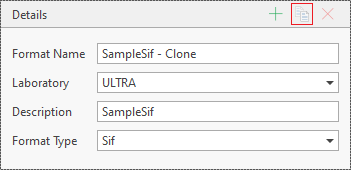
Click the Clone button to clone the current item. The Format Name will be temporarily set to < original name - Clone > as a prompt for the user to rename the cloned file format: |
|
|

|
Click the Delete button to delete the current item. |
To add a file format definition, select New | File Format from the ribbon menu, or click the Add button, to navigate to the location of a lab file that will be used as the basis for a new file format definition.
Format Name
Select a file format name. The name will typically reflect the format type (see below).
Laboratory
The name of the laboratory that uses this type of results file.
Description
A short description may help to differentiate this file format from other file formats.
Format Type
A receipt is configured for a specific laboratory and file format. These formats must be pre-configured in the Sample Tracker Metadata. In other words, once it is configured, a receipt can only be used to process result files from a specific laboratory and an associated lab file format.
Sample Tracker is able to process laboratory result files in standard interchange file (*.sif), comma separated values (*.csv) and Excel (*.xls, *.xlsx) format.
Sif files
When you add a new file format or select an existing one, a preview of the file is shown in the File Preview panel at the left of screen.
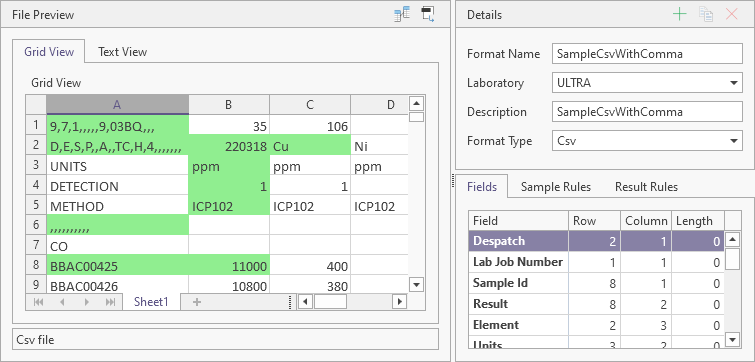
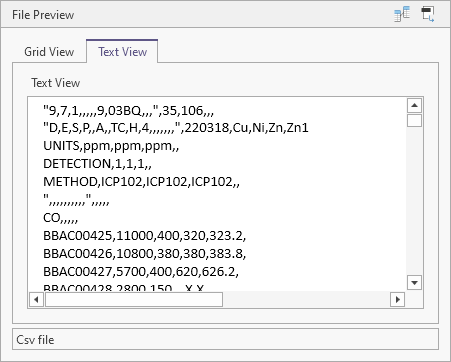
The File Preview panel contains tabs to enable the preview display in Grid View (as above) and Text View (as below):
In Grid View, you can interact in the Preview pane and use the mouse to define the row and column start positions and length of each field, as shown on the Fields tab of the Details pane. Required fields are shown in bold.

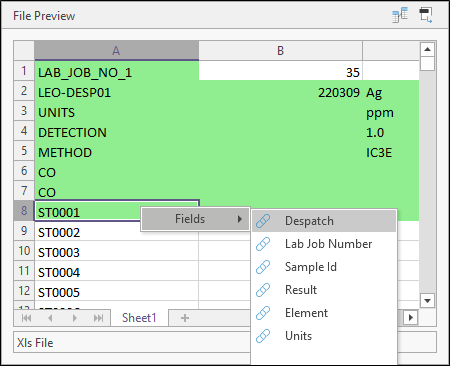
In Grid View, fields for which start positions and lengths have already been mapped are shown in the right-click Fields selection menu with a Link icon:
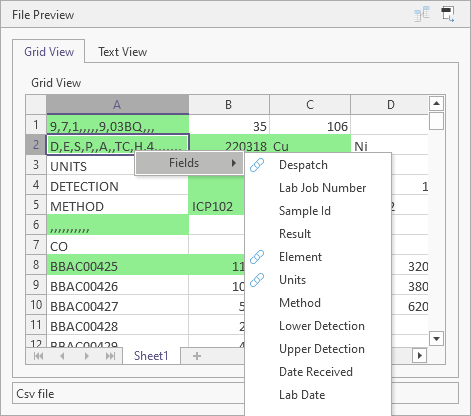
Note: When mapping fields, the same or overlapping sections in the file may be mapped to more than one destination field. The same date might be stored in both the Lab Date field and the Receipt Date field, for example, when only one date has been supplied.
Excel Files
Formats can be defined for Excel files to associate cells and ranges with data required for the Receipt Process. To avoid ambiguity with Excel files containing merged cells, Micromine Geobank displays an unmerged view of the Excel file; the file itself is not affected.
For single-entry values, right click and select the field it relates to. The corresponding field is populated with a Sheet Index-Exclamation Mark-Cell Reference. (Sheet indices are preferred since sheet names are liable to variation in name).
In the File Preview pane you can also select a range for Results and Comments. In this case, the corresponding field is populated with a Sheet Index-Exclamation Mark- Start Cell Reference and an End Cell Reference (for example, 0!A2:E8 shown for the Result field in the Fields tab below).
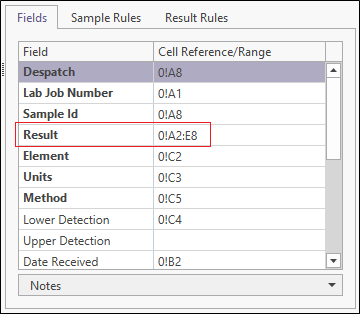
Since they are part of the result, Element, Method, Sample ID, Upper Detection Limit and Lower Detection Limit cells in the worksheet must ALL fall within the specified range or an error will be displayed.
Bear in mind that it is the WIDTH of the specified results range that is important, not the number of records. When the file is processed as part of a receipt, all records in the file will be processed irrespective of the records you select when you define the range.
Columns, on the other hand, will only be processed if they fall within the range that you select in the Preview window.
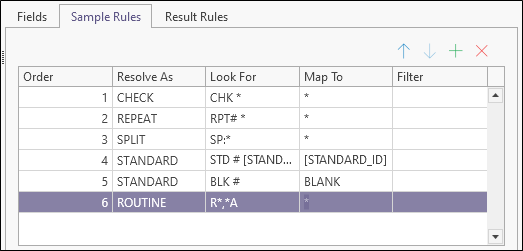
Sample Rules
On the Sample Rules tab, rules used to identify and automatically resolve the ROUTINE, CHECK, REPEAT and SPLIT sample tags used by a lab, can be defined. If no rule is able to be applied to a sample ID it will need to be resolved manually.
For more information, see: Sample Rules
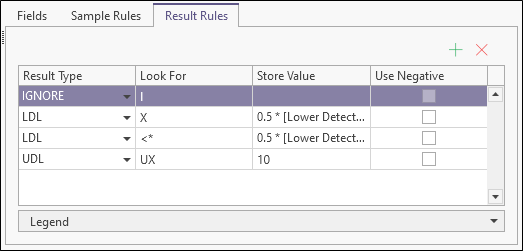
Result Rules
On the Result Rules tab, you can create text rules for the result codes returned by the lab, for example, make them null, or assign an arbitrary code or value.
For more information, see: Result Rules
The following setup pages are also provided: