Export View for Selected Periods
Schedule images may be exported in ".png" image format.
To export images:
-
Go to the Schedule tab.
-
Run the schedule.
-
Go to the Animation tab > Animation panel.
-
Click the Exports button on the right of the Animation panel.
-
Choose Export View for Selected Periods from the drop-down list.
-
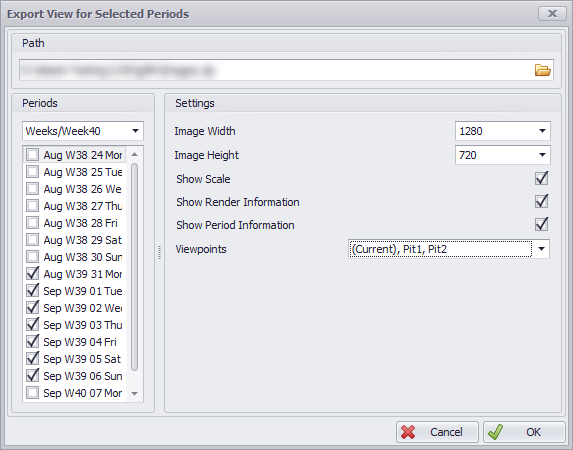
Choose the file path and file name for the export. For convenience images will be automatically zipped into a single file.
-
Choose from the following export options:
-
Periods – Choose periods to export. Can be selected individually or using Period Subsets.
-
Image Width & Height – Dimensions for the output image.
-
Show Scale – Tick to include Scale bar in image.
-
Show Render Information (Text on bottom of viewport) – Tick to include Render information in image.
-
Show Period Information – Tick to include Period information in image.
-
Viewports – Select one or more viewports to export. Images for each viewport will be places in their own folder.
Animation tab > Animation panel > Export View for selected Periods
-
Click OK to finish.