Output
On the Output tab of the Report Generator form, choose how the report data will be written to one or more report files.
Options
Output all grouping permutations
When there are multiple groups, some group combinations may not have data entries. For example, if entries do not exist for the group combination Rock type="Sediment" and Gold grade="High", by default that group combination will be excluded from the output.
Select this check box to include all possible group combinations in the output report, even if they do not have data.
Include grand total
If this option is selected, a final row will be added at the end of each group, where the grand total of all data in that group is aggregated, as shown in the following screenshot:
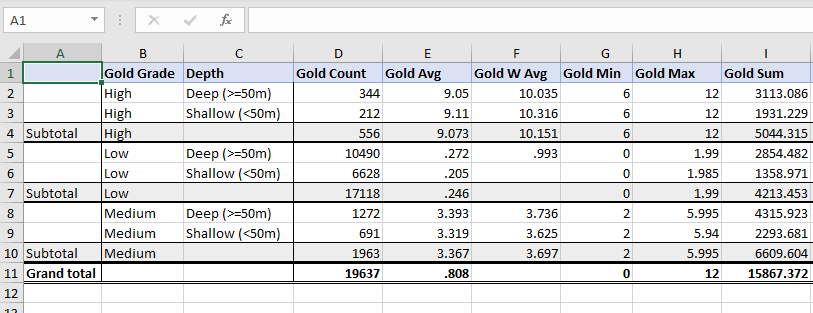
If no groups are specified, there will be a single line which already acts as a grand total. Selecting the option, in this case, will apply formatting to a Grand total label.
Grand total label
Specifies what text to put next to the Grand Total row. The default label is "Total".
File
Note that when you are generating a Scheduling or a Resource Estimation report which references a Report Generator form set, Micromine and Excel output report options on the Output tab of the Report Generator form are disabled.
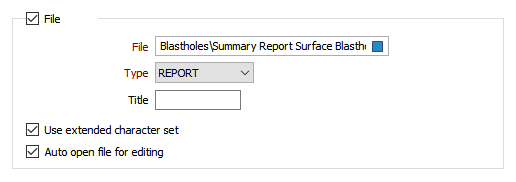
File
Select a report type. Enter (or double-click to select) the name of the file to which the report data will be written, and optionally specify a title for the report.
Use extended character set
If this option is selected, the file will be created as a Unicode Text Format (UTF-8) file, which provides support for extended character sets and is ideal for multilingual workplaces.
Auto open file for editing
Select this option to open the report file automatically for editing once it has been generated.
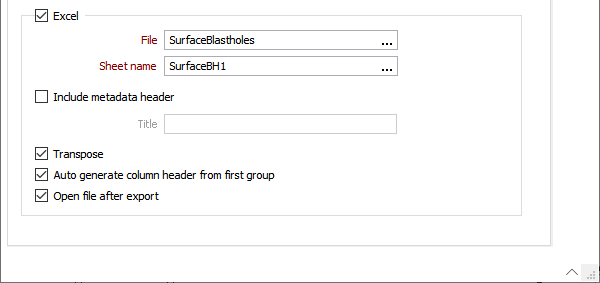
Excel
Note that when you are generating a Scheduling or a Resource Estimation report which references a Report Generator form set, Micromine and Excel output report options on the Output tab of the Report Generator form are disabled.
Select an Excel file format and then enter (or double-click to select) the name of the Excel file to which the report will be written.
File
The following output file formats can be selected:
|
Format |
Extension |
Description |
|---|---|---|
|
Excel Workbook |
.xlsx |
The default Office Excel 2007 XML-based file format. |
|
CSV |
.csv |
CSV format compatible with both Excel and Open Office (spreadsheet). |
Sheet name
If you are exporting to a new file, enter the name of the sheet in the file, i.e. Sheet1. If you are exporting to an existing file, double-click (or click on the ellipsis) to select a sheet.
Options
Include metadata header
Select this option to write metadata to the file and optionally add a Title for the report.
Transpose
Select this option to pivot the tabular layout, in other words, flip the rows to columns, and the columns to rows, essentially giving you a different way of viewing the data. This is useful if you want to read from top-to-bottom instead of from left-to-right.
Auto generate column header from first group
Select this option to make the top-most group more visually prominent. If selected, the top-most group is "lifted out" on top of all rows, its entries become merged cells, and the whole row is marked as a header row. The top-most row "Gold Grade", in the screenshot below, is the result of selecting this check box:
![]()
Open file after export
Select this check box to automatically open the file in Excel after the export is complete.