Create Sync Manager Operations
The Sync Manager component of Data Transfer is designed to synchronise data between a Central Geobank system and a Subsidiary system on a field device or separate mining or exploration site, with filtering to control subsidiary data.
![]()
If you have not already configured the Synchronisation process, see Synchronisation Setup.
Note: Sync Operations should be created and configured in the Central system Sync Manager.
In the Configuration Manager, under Data Transfer, double click the Sync Manager option to open the Sync Manager.
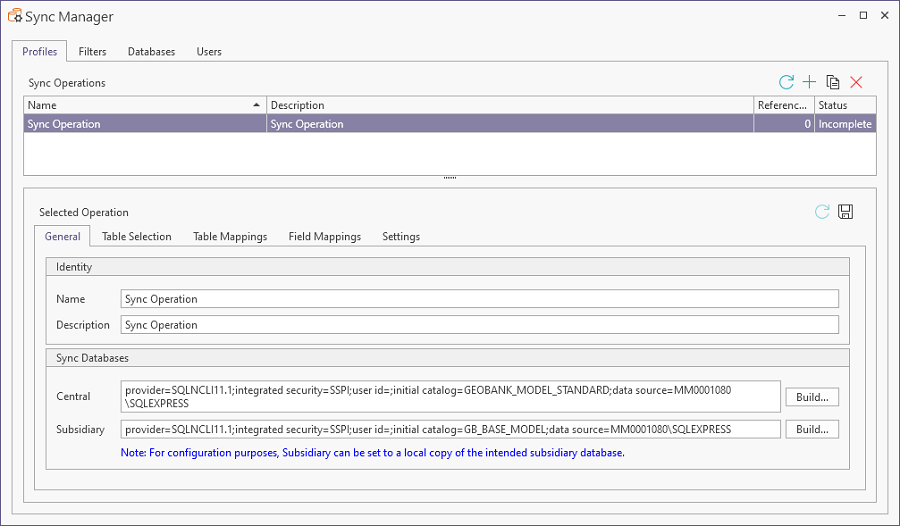
The Profiles tab of the Sync Manager displays the details of all the Sync Operations that have been configured.
To create a new Sync Operation,
-
Click the Add button in the Sync Operations section of the tab.

-
Enter a unique Name and a Description for the new profile.
The Subsidiary and Central databases must be configured in the Sync Databases section. You can use the Build button for Subsidiary and Central to open the Data Link Properties form and connect to the database.
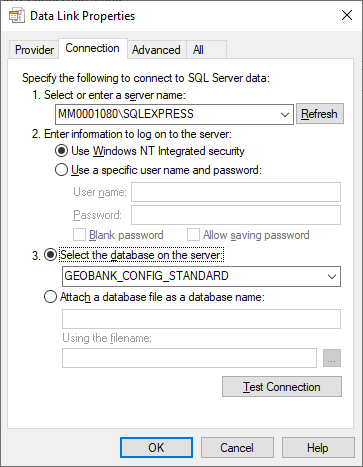
Information on building a database connection using the Data Link Properties form is contained in the Connect to a Configuration Database.
When you have connected to the required Central and Subsidiary databases,
-
Click the Table Selection tab to select the available tables from the databases.
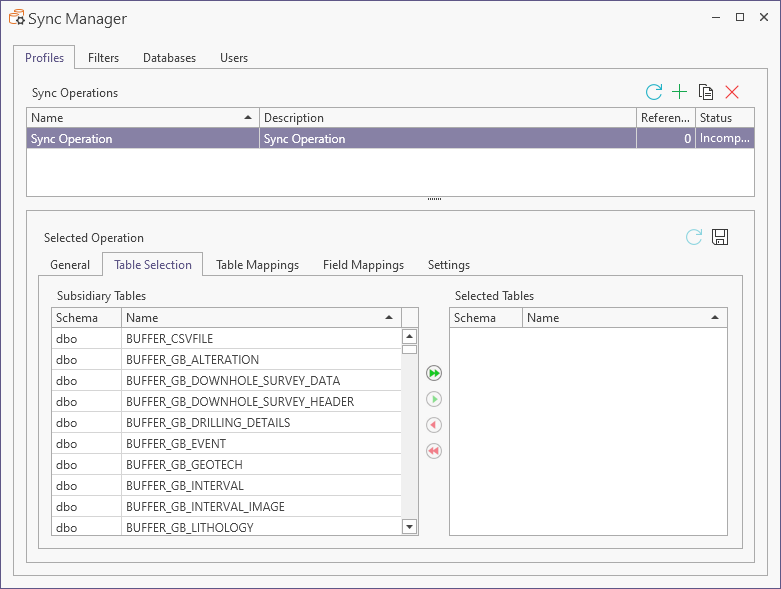
In the Subsidiary Tables panel at the left, you can select the tables for synchronisation to be added to the profile.
Note: Tables can only be selected in one profile at a time, so will only be available for selection when it is valid. For example, if Profile1 has dbo.Table1 as a mapped table, then dbo.Table1 cannot be selected for mapping in Profile2. In this instance, dbo.Table1 will be removed from table selection and the table mapping grid.
Note: Each table you select in the Subsidiary Tables panel and every table it is mapped to in the Central database must contain at least 1 primary key. Primary keys are indicated with a key icon.
-
Select the Tables for synchronisation to be added to the profile using the right arrow buttons between the Subsidiary Tables and Selected Tables panels.
Remember to only select tables with at least 1 primary key. You can remove any selected tables from the panel at the right using the left arrows.
-
Click the Table Mappings tab to map the selected tables from the Subsidiary database to the equivalent Central database.
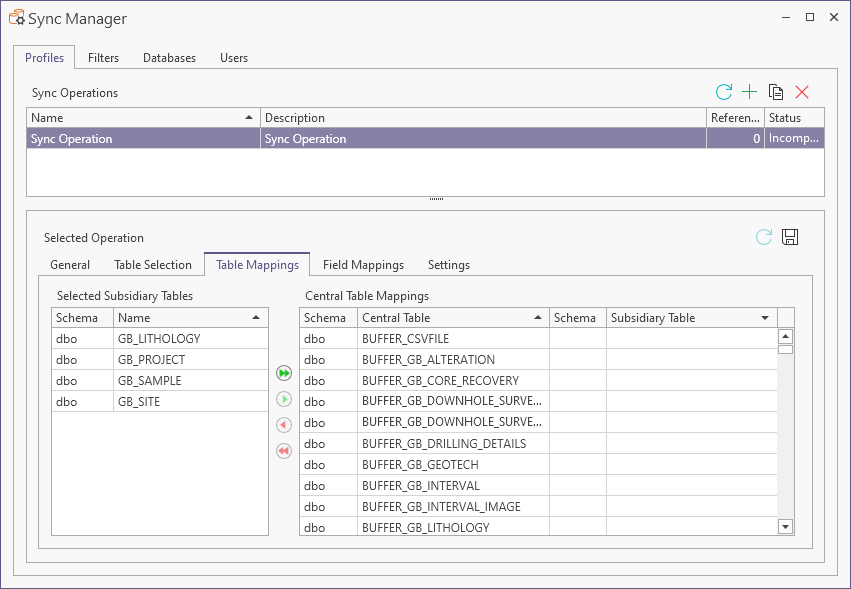
To map a table in the Subsidiary database to a table in the Central database,
-
Select the Subsidiary table for the mapping in the panel at the right.
-
Select the Central table for the mapping in the panel at the right.
-
Use the single right arrow between the two panels to create the mapping.
-
Alternatively, click the double right arrow to map all Subsidiary tables to the tables of the same name in the Central table.
If any tables remain in the Select Subsidiary Tables panel, you can manually map the tables as described.
When the Subsidiary and Central tables have been mapped as required,
-
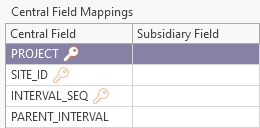
Click the Field Mappings tab to map fields from the mapped tables to fields in the Central database.
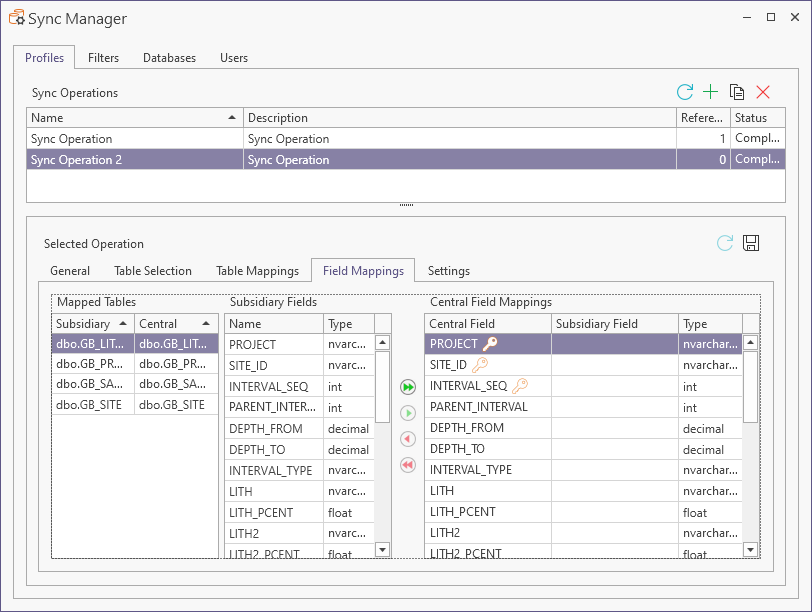
Note: The Primary Key fields in the Central database are indicated with a key icon.
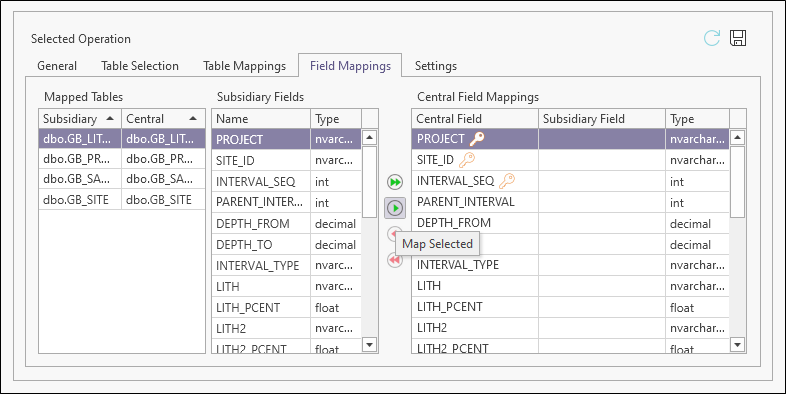
To map a field from the mapped tables to a field in the Central databases,
-
Select a Mapped Table from the panel at the left.
-
Select the field to be mapped from the selected table from the Subsidiary Fields panel.
-
Select the destination field for the mapping in the Central Field Mappings panel at the right.
-
Click the single right arrow to complete the mapping process.
-
Alternatively, click the double right arrow to map all of the fields from the selected mapped table to the Central fields of the same name.
This process can be repeated for every mapped table and the relevant fields to be mapped.
If any fields remain unmapped from any of the selected Mapped tables, you can manually map the fields as described.
When the field mapping is complete,
-
Click the Settings tab to select the Sync Direction for the mapped tables and apply any applicable filters.
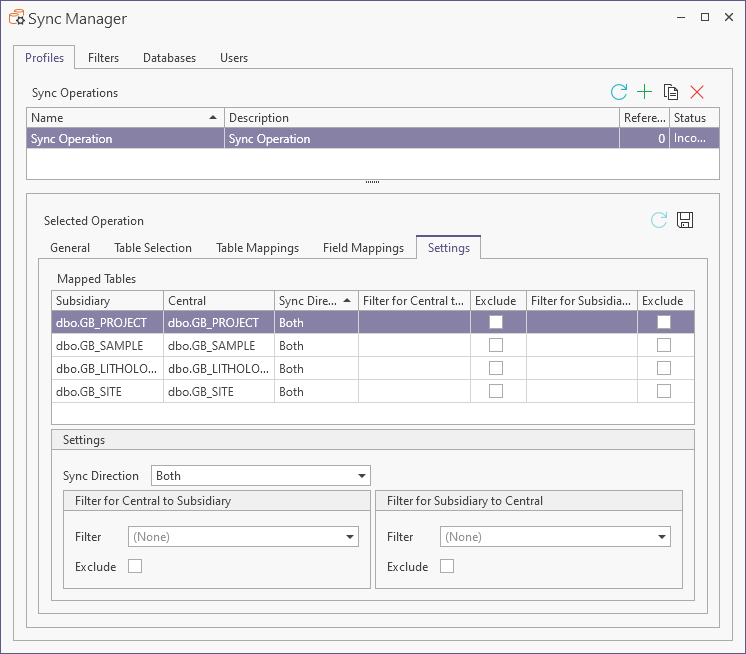
The tables that have been mapped are displayed in the Mapped Tables grid of the Settings tab.
For each mapped table in the grid, you can:
-
Select the relevant Sync Direction for the table from the drop-down - Up, Down or Both.
-
Set a Filter for Central to Subsidiary / Filter for Subsidiary to Central from the drop-down - which provides a list of the configured Filters for synchronisation.
-
Select whether to Exclude the selected mapped table from the synchronisation.
Information on creating filters for synchronisation databases is contained in Create a Sync Filter.
When the Sync Direction and Filter properties for the mapped tables have been configured,
-
Click the Save button to save the new Sync Profile.
The profiles created can be copied to a new profile using the Copy button on the Profiles tab, or removed using the Delete button.
Databases added to a Subsidiary system must be authorised by an Administrator using Synchronisation Setup. See Approve a Database .