Scenario Comparison
Calendar Input and Output fields can be compared when viewing a custom Dashboard. This allows users to quickly validate inputs and compare the results of multiple scenarios, without having to swap between each scenario.
When a custom Dashboard has been selected the Compare button will be available.
Adding fields for Comparison
To avoid long lists of fields and data, all Dashboard fields are not automatically setup for comparison by default.
Fields can be added in 2 ways:
-
Highlighting the fields in the calendar, opening the Compare UI and clicking the ‘Add Selected button’:

-
Selecting the row in the calendar, right-clicking and selecting ‘Add to Compare’:
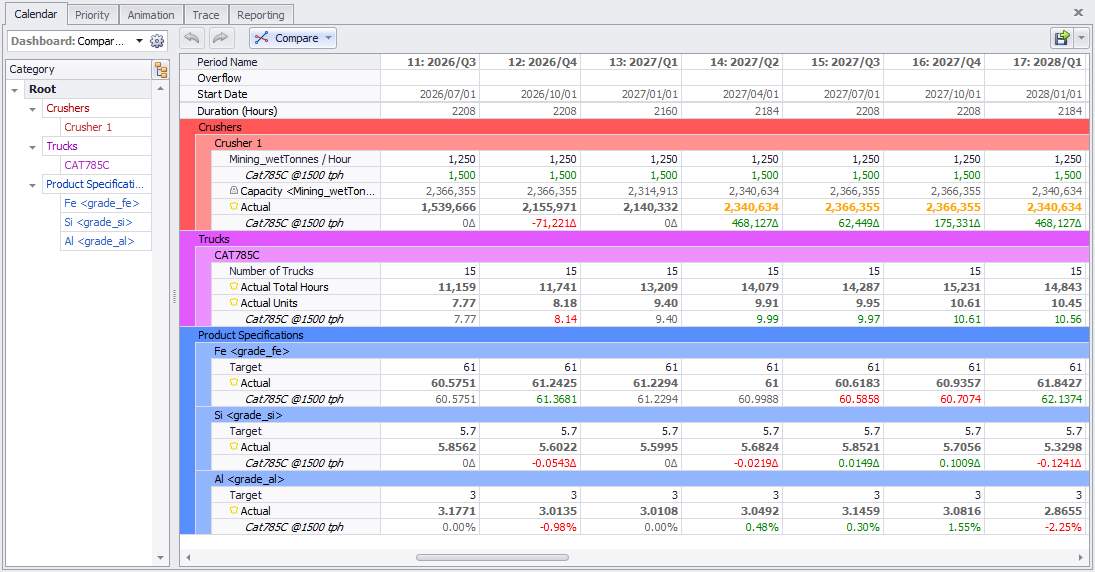
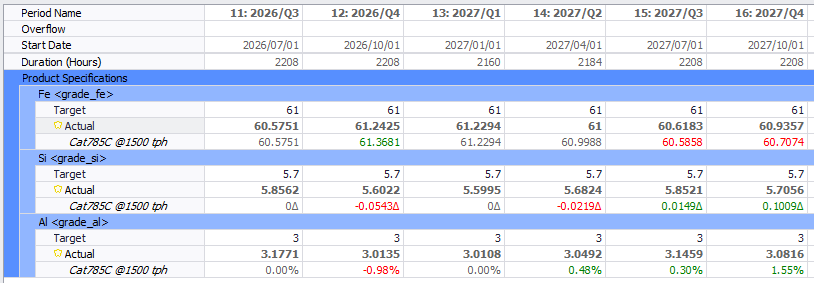
Configuring Value Comparisons
Within the Compare window, how each compared field is displayed can be configured.
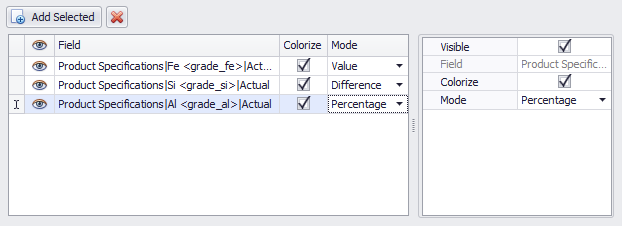
Colorize – Color comparison values based on their difference to the root scenario. Green (greater than) and red (less than).
Mode – Select how to display the comparison values:
Value – Displays the actual value
Difference – Displays the difference between the root scenario and those being compared.
Percent - Displays the percentage difference between the root scenario and those being compared.
To quickly configure several fields at once, highlight the desired fields and use the right-hand panel to perform bulk updates.
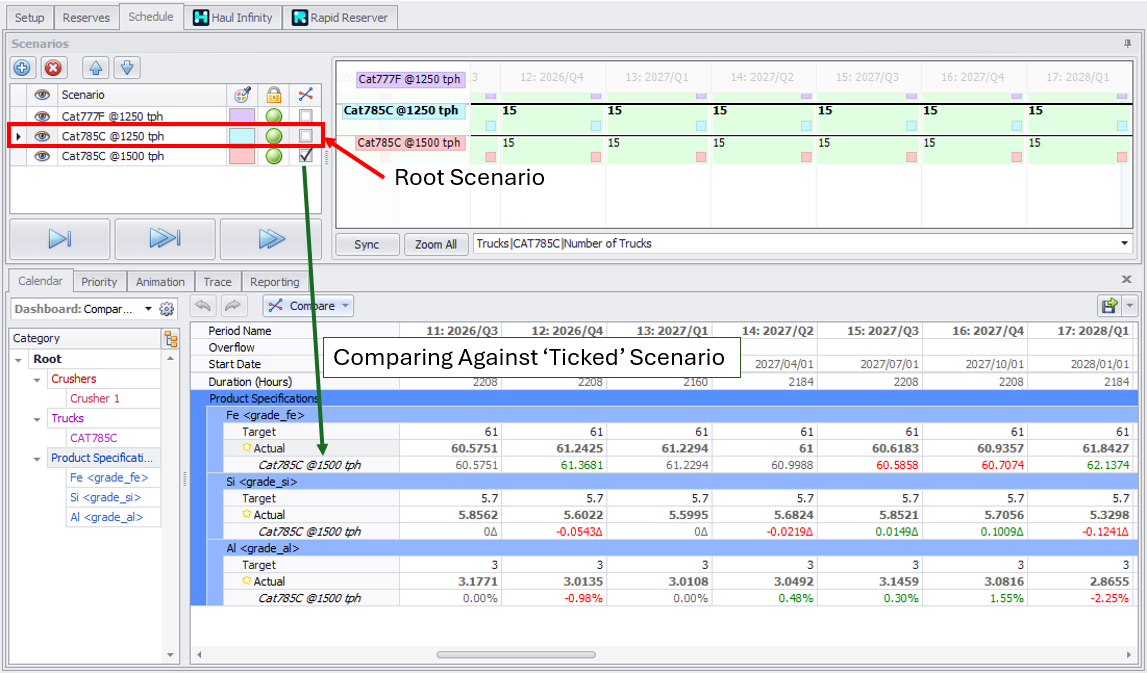
Comparing Multiple Scenarios
Controlling what scenarios to compare is handled via the Scenarios Panel.
The selected scenario is considered the root scenario. Other scenarios with a tick in the compare column will be compared against in the calendar.