Generate Room & Pillar Shapes
![]()
The Generate Room and Pillar Shapes tool allow the mine designer to determine where pillars should be located and which areas should remain open as rooms within a target orebody. A regular pattern that allows the best cost-effective, productive and safest access to valuable ore deposits is the goal.
The room and pillar shapes can then be extruded to a nominated surface. The geometric configuration of the triangulation you select will typically comprise of several flat-lying seam or stratiform deposits which are relatively shallow.
Generate Room and Pillar Shapes Design Action
Input Source
Use one of the following methods to select the polygons that will be used to determine the extents of the mining pattern.
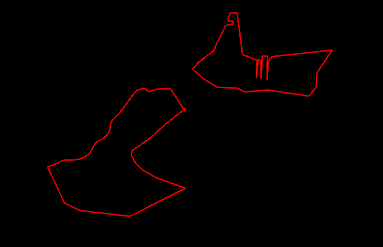
Select the Source of the data that will be used as input to the function:
| Selection | Design elements you have interactively selected in the Design Window. |
| Visible | Design elements that are visible in the loaded layer. Elements that have been specifically hidden are excluded. This a quick way of selecting all visible elements in a layer without having to explicitly select them. |
| Layer | One or more layers that you select. Names of layers currently loaded in the Design Window are shown in bold. |
For large datasets, you may prefer to select a layer rather than load that layer and select all of the elements in the layer. Selecting a non-applicable layer will have no effect. In most cases, an error icon ![]() will indicate the chosen input layer is not valid. Hover over the icon to view a validation hint.
will indicate the chosen input layer is not valid. Hover over the icon to view a validation hint.
Settings
Grouping Expression
The grouping expression groups shapes together for the sake of column and row numbering. Any shapes with with the same result from the grouping expression will be part of the same group of rows and columns.
New groups will reset the row/column counter to the row/column starting index. This allows a single mining area to exist across several shapes while maintaining cohesive row and column numbering.
Output Room and Pillar Layers
Use the drop-down to select Output Layers for the generated rooms and pillars.
Tip: In the Layer Selection pane, you can right-click on the Layers node (or a folder) to Add a new layer.
Reference Point
Specifies the origin of the grid of rooms and pillars that will be generated from the below settings.
Direction
Specify a bearing that defines the direction of mining.
As an alternative or precursor to modifying Reference Point and Direction settings (above), click the ellipses buttons to use the mouse to digitise a reference point and a bearing.
Forward Offset
Offsets the start of the room and pillars by the specific amount along the forward direction.
Cross Offset
Offsets the start of the room and pillars by the specific amount along the cross direction.
Heading Spacing
Specify the Heading Spacing (room width) to be applied during mining. The spacing specified here will be influenced by geological conditions, equipment capabilities, and desired recovery rates.
Cut Through Spacing
Specify the Cut Through Spacing to be left during mining.
Pillar Width
Specify the Pillar Width to be left during mining.
As a result of modelling and analysis, the values specified above will ensure adequate structural support, maximize resource recovery, and provide sufficient space for mining equipment.
Row/Column Attributes & Start Row/Column Indices
Room and Pillar solids written to the specified output layers are laid out in a grid formation. Select the Row/Column Attributes and the Row/Column Indexes that will be used to identify and navigate the productive areas of the mine.
Sub Shape Attribute
If a specific generated room or pillar results in multiple disconnected shapes, this attribute stores a distinct shape number.
Room or Pillar Attribute
This attribute stores whether the shapes represent the rooms or the pillars.
Attribute to Copy
Use the drop-down to select the boundary attributes to be copied to the Output Room and Pillar layers.
Apply
Click Apply to generate room and pillar shapes.
Open the Output Room and Pillar solid layers to view the results of the process.
