Point Cloud Outer Shell
The following Input, Output, and Modelling parameters must be defined in the Point Cloud Outer Shell form:
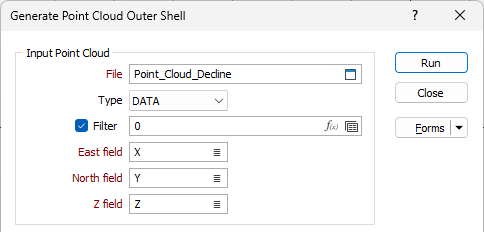
Input Point Cloud
File
Double-click (or click on the Select icon) to select the Input file that contains the points you want to model. You can also click the Pick from Vizex button to collapse the form and interactively select a layer containing the file to be inserted and return to the form.
If required, define a filter to selectively control the records to be processed.
East and North and Z fields
Specify the names of the fields in which Easting, Northing, and Z point coordinates are stored in the Input file.
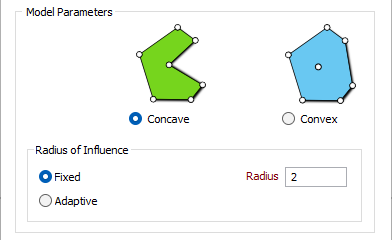
Model Parameters
Choose whether to generate a Concave or a Convex hull around the points.
Convex
The convex hull of a set of points or point cloud is the smallest convex polygon in which each point either lies on the boundary of the polygon or lies inside the polygon. To compute the convex hull, no parameters are necessary other than a set of points.
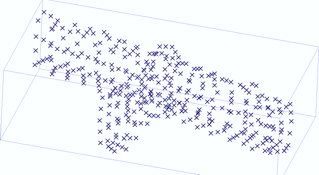
Point cloud
Convex hull
Concave
The concave hull of a set of points is generated from the Convex hull and the Delaunay triangulation.
Fixed
The FIXED computational algorithm will attempt to create a concave wireframe by using a radius of influence to remove triangles from the Convex hull.
Imagine that the Convex hull is a mass of ice-cream that contains an inner layer of chocolate pieces. The radius parameter is the radius of the ice-cream scoop you will use to reshape the mass of ice-cream around the layer of chocolate pieces, without disturbing those pieces.

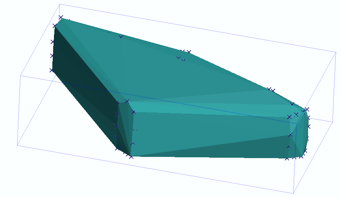
Radius of influence = 5
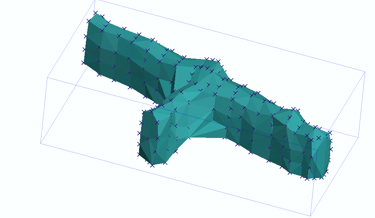
Radius of influence = 2
Adaptive
The ADAPTIVE algorithm will attempt to create a concave wireframe using a variable radius of influence to remove triangles from the Convex hull. The radius is automatically determined based on the density of data points. Where data points are densely packed, smaller radii of influence are used to preserve object details. Larger radii of influence are used in more sparsely populated areas to avoid leaving holes in the resulting wireframe.
Using the previous ice-cream scoop analogy, the adaptive algorithm removes ice-cream using a variable-sized scoop. No parameters are necessary other than a set of points.
Output Wireframe
Select a Wireframe Type and then enter (or double-click to select) the Name of the wireframe that will be created as a result of the process. You can also use the Pick from Vizex button (or select the context menu option where available) to collapse the form and interactively select the required Wireframe to insert and return to the form.

Wireframe types are defined in a triangulation database (*.tridb) file, and may be located in the current project or in any folder location.
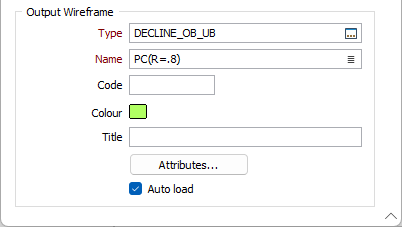
Code
Enter a character code that can be used to differentiate between this and other wireframes of the same type. For example, you might enter a rock type code and then use it later as a filter when reporting volumes, reserves, etc.
Colour
Double click (F3) to select the default colour that will be used to display the wireframe object.
Title
Enter a short title that describes what the wireframe is meant to represent. The title will be used when you create a plot.
Attributes
Click the Attributes button to set Wireframe Attributes for the wireframe output.
User-defined attributes may be mapped against the fields in the Input file. It is also possible to specify a default value for each attribute. Default values are used when a corresponding value in the Input file is either missing or is not mapped.
Auto load
Select this option to load the generated output in Vizex. The default Display setting for autoloaded wireframes is Auto, which will display the layers as 2D slices when Vizex is in clipped view.