Select Printer Parameters
Use the Select Printer Parameters form to set the printer mode, name, paper size and page orientation. For printing to PDF, you can also navigate to the location of a PDF/XPS file. Compatibility mode may also need to be enabled, depending on the printer driver (See Compatibility Mode below).
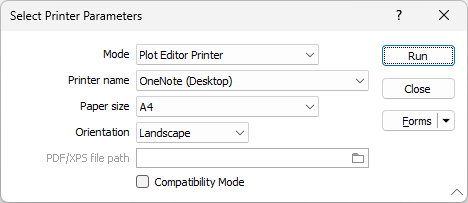
Mode
Choose a (Plot Editor, Database Editor, Drillhole Log) Printer Mode.
Printer name
Select the name of the printer you want to use. You can also print a Microsoft PDF/XPS file.
Paper size
Choose a paper size from a list of the paper sizes supported by the printer you have selected.
Orientation
Choose a (Portrait, Landscape) page orientation.
PDF/XPS filepath
This input is enabled when you have chosen to print to a Microsoft PDF/XPS file. Unless you click on the folder icon to navigate to the location of a file, [AUTO] will use the filepath of the plot file that is being printed.
Unless you specify a name, the process will use name of the plot that is being printed.
Compatibility Mode
The Plot Editor uses modern rendering technology (Direct2D) for better print quality and rendering speed. However, some printer drivers (including some PDF printer drivers), may not support Direct2D printing, in which case you should select Compatibility Mode.
For 2D Plots, on the Plot Editor tab, in the Print group, you can choose a Save to PDF option. In this case, Direct2D printing is supported and you can also choose to enable Compatibility Mode.
When Compatibility Mode is enabled, the Graphics Device Interface (GDI) is used to render and vectorise the plot. A smaller PDF is generally generated as a result. Vectorised PDFs are editable in programs such as Adobe Illustrator. Some text wrapping may be disabled, however.
To print directly to the printer or file format of your choice, see Page Setup
Forms
Click the Forms button to select and open a saved form set, or if a form set has been loaded, save the current form set.
By design, the Forms button is not available for loaded Vizex layers (i.e. when opening the form set properties of a layer in the Vizex Layer Display pane). In Vizex, the Forms button is only available for new forms opened via the Home tab or the Vizex tab, in the Layer group (or by double-clicking on a form type node in the Vizex Layer Types pane).
Save and Save As
Click the Save button to save the changes you have made to the form set. Click Save As to save your changes as a new form set. Save As will default to the first available form set number.
Reset
Click Reset to clear the form of all values and reset the form to its default state.
Reset Tab
For tabbed forms, select Reset Tab to clear the active tab of all values and reset the tab to its default state - without making any changes to other tabs in the dialog.
Undo and Redo
Click Undo (CTRL + Z) to undo recent changes in the form. After an Undo, click Redo (CTRL + Y) to restore the last change that was undone.
Collapse
Collapse (roll-up) the form to preview a chart, or preview the results of an operation in Vizex, or obtain input values from Vizex, the Property Window, the File Editor, or the Plot Editor.
Run
Click the Run button to proceed.