GIS
![]()
Input File
Select a (DATA, SURVEY, STRING, PIT DESIGN) file type and then enter (or double-click to select) the name of the file containing the data to be exported.
You can also click the Pick from Vizex button to collapse the form and interactively select a layer containing the file to be inserted and return to the form.
If required, define a filter to selectively control which records will be included in the export process.
The input fields you need to specify will depend on the output file type and the output feature type.
X/Y/East/North fields
Double-click to select the fields that contains the coordinates of the data to be exported.
You can use the Coordinate Transform option on this form (see below) to convert the data into a local, projected or geographic coordinate system during the export process.
Z field
If you are exporting 3D data, double-click to select the name of the field that contains Z coordinates.
Because the attribute table can only contain one Z value per shape, Z attributes are set to NULL for shapes with multiple Z values, avoiding a mismatch between the geometry and its attributes. Geometries are still exported as 3D shapes. Shapes with constant Z values (such as contours) will have the correct Z attribute.
Join field
In forms that require polylines as an input, the values in this field define whether the data points in the input file should be joined by a line. If successive records have the same value in this field, a line will join the points. If two-factor topology is required, the values in a String field may also be used to segment the lines.
String field
In most forms, the String field is an optional generic attribute used to store a secondary input such as a code. Traditionally, this field has also been used with the Join field to define whether data points should be joined by a line, or strung, hence the name.
Label field
If you are exporting to a MapGIS (.wat) point file, double-click to select a field containing values that can be used to label the points in the output file.
Export attributes
To export attributes, select this check box. Values in fields other than the coordinate fields you have specified (above) will be written as attributes to the output file.
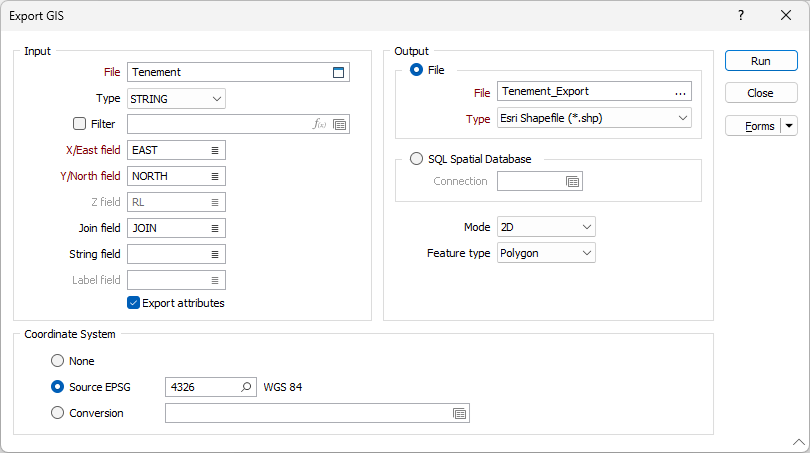
Output
File
Select an output file type and then enter (or double click to select) the name of the file the data will be written to. You can export to the following GIS file types:
|
File Type |
File Extension |
|---|---|
| Esri Shapefile | shp |
| Esri File Geodatabase | gdb |
| Geography Markup Language | gml |
| MapInfo Interchange | mif |
| MapInfo Table | tab |
| MapGIS Points | wat |
| MapGIS Lines | wal |
| SpatialLite Database | sqlite |
MS SQL Spatial Database
Select this option to set the connection parameters of the database table you want to export data to. See: Spatial Database Settings
Click the Forms icon to select a saved form set. Right click (F4) to Edit the current form set, or select New to create a new form set.
Mode
Choose whether to export 2D or 3D data. This option is disabled for MapGis Point and MapGis Line output formats. All other output formats support the display of spatial data in 2D or 3D.
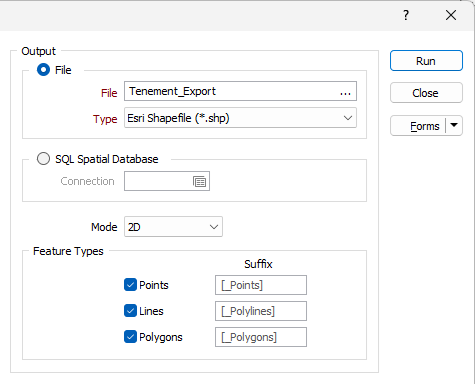
Feature types
Some output formats only support one feature type per file. If the Feature type option is available for the file type you have selected, choose whether to export Point, Polyline and/or Polygon data.
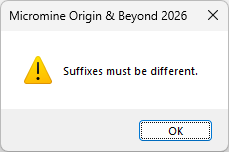
Selecting any or all of the options determines what features are exported from the Input file. For each selected feature type, you can accept the default Suffix or enter a custom value. Each Feature Type suffix must be unique and an alert will be displayed if they are not:
In the case of an Esri File Geodatabase, the application will assign a unique <myInputFile>_<Layer> name to each layer in the geodatabase. For example, if the input file is Zones.str, then the data will be loaded in separate Zones_Points, Zones_Lines and Zones_Polygons layers.
Coordinate Transform
None
If you do not want to convert between coordinate systems as you load your spatial data, select None.
There are currently two conversion options:
Source EPSG
If the Source EPSG option is selected, the selection of a known coordinate system referenced by a Source EPSG code can be used to write Source coordinate system information to the Output file. It is possible to search for the correct coordinate system by pressing the search icon (magnifying glass).
Conversion
To apply a coordinate system conversion to the coordinates, click the Form Set button (F4) to select a Coordinate System Conversion form set. Right-click to create a New formset.

Forms
Click the Forms button to select and open a saved form set, or if a form set has been loaded, save the current form set
Run
Finally, click the Run button to begin the export process.