Job Scheduler
The Job Scheduler in Automation enables you to schedule and automatically run various jobs/tasks from Micromine Geobank installed on one or more machines on your network.
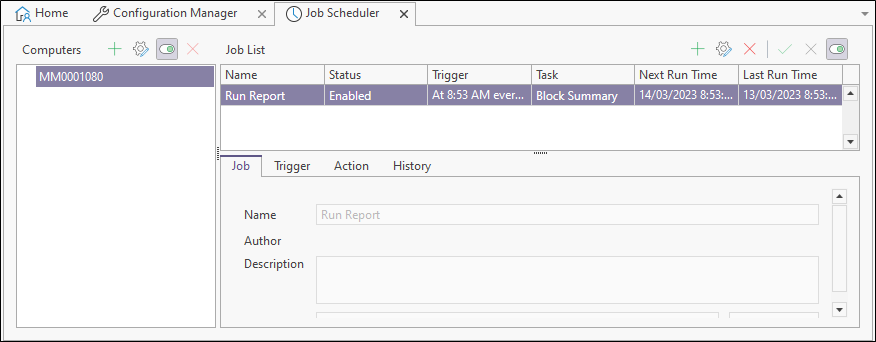
In the Configuration Manager, select User Interface | Automation | Job Scheduler to open the Job Scheduler.

The following tools are available in the Job Scheduler ribbon.
New
 |
The New button provides the Scheduled Job option which is used to open a new job/task for editing in the Job Scheduler. |
Migrate

|
The Migrate button is used to manually execute the Job Scheduler configuration migration where the Skip Migration option is enabled, or the Do not prompt to migrate... check box is selected. Geobank automatically runs the migration as part of migrating Configuration from the previous Geobank version to the current version, and these options disable that step. |
For information on the Job Scheduler migration process, see:Job Scheduler Migration.
Close
 |
The Close button will close the Job Scheduler. |
Note: If you close the Job Scheduler with the Close button, any job/task currently being created or edited will not be saved.
Refresh
 |
To update the information contained in the Job List, click the Refresh button. |
The following tools are available in the Computer pane task bar:
New

|
The New button opens a new computer (Application server reference) for editing. Note: for a reference to the local machine, leave all fields blank except name. |
Edit

|
The Edit button is used to make changes to an existing Computer reference. |
Delete

|
The Delete button deletes the reference to an application server from the Computers list. Jobs must be deleted before the reference to a Computer can be deleted. |
Activate

|
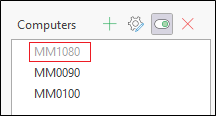
The Activate button enables the computer selected in the pane. If you toggle the button, the computer in the list will be deactivated. This will make the computer inactive, but retain all settings; unlike the Delete function.
|
The following tools are available in the Job List pane task bar:
New

|
The New button opens a new job schedule for editing. This action can also be performed using the New | Scheduled Job option. |
Edit

|
The Edit button is used to make changes to an existing job schedule. |
Delete

|
The Delete button deletes a selected task from the Job List. |
Save

|
The Save button is used to save the configuration of the current job/task. |
Cancel

|
The Cancel button closes the current job/task without saving any changes. |
Enable

|
The Enable toggle button. See Disabling and Enabling Jobs. |
Job List
The Job List panel of the Job Scheduler displays information on the currently configured jobs/tasks on your computer.
Name: Displays the name of the job/task.
Description: Displays the description of the job/task.
Status: The current status of the job/task.
Trigger: The configured trigger for the job/task, such as the date and time.
Task: The name of the job/task configured as selected in the Action tab.
Next Run Time: The date and time of the next time the job/task is scheduled.
Last Run Time: The last date and time at which the job/task was triggered.
Disabling and Enabling Jobs
When connected to a computer in the Job Scheduler, any job/task can be disabled by clicking the Enable icon. In the Job List Status Column, the job will show as Disabled and will not be run on its schedule until enabled again.
Note: The trigger for a job/task can also be enabled or disabled when editing a job. Disabling the trigger means the job is not triggered, and therefore will not run on its schedule. However, to avoid confusion, it is recommended that the Enabled flag for the trigger be left as checked, and jobs/tasks enabled or disabled by using only the Enabled toggle in the Job List. If a job does not run as expected, check the trigger flag, as well as the Job Status. Also, check logs and connections.
Sorting, Searching, Grouping and Filtering the Job List
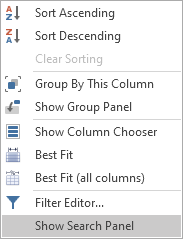
In the Job List, the Data Table Tools can be enabled using the shortcut menu. To do this,
-
Right click on the column headers to open the shortcut menu.
-
Select any of the options to apply sorting, grouping or filtering of the list; use Best fit to automatically adjust column widths and use Show Search Panel for searching across all columns.

Additional information which can be shown in the Job List
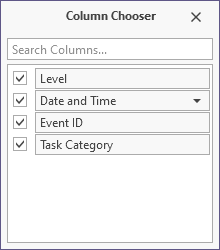
The Task List (within the Profile) and the name of the Micromine Geobank Object referenced by the Task can also be shown in the table. To do this,
-
Right-click in the header row and select Show Column Chooser from the shortcut menu.
-
Select the columns you wish to display using the corresponding check boxes.
-
Click the Close button at the top right of the Column Chooser to save your selections.

