Generating Blast Shapes
Rapid Reserver contains tools for automatically generating blast masters on a single bench, or across the entire mine.

For a description of each option, see below:
Select a level from the drop-down where to generate automatic blast shapes: Selected/Current/Visible Blasts/Benches/Flitches and Digs.
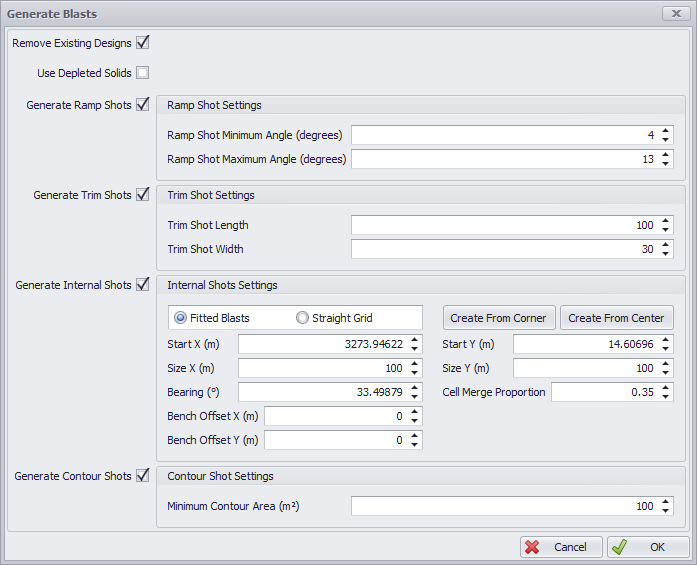
Remove Existing Designs
Flag this option to clear existing linework from the specified level.
-
If flagged, no need to use the Delete Designs tool.
-
If not flagged, new shapes will be applied over existing ones.
Use Depleted Solids
When unticked, blasts will be cut to the original bench silhouettes. When ticked, blasts will be cut to the bench silhouettes after Phase Exclusion & Bench Depletions have been applied.
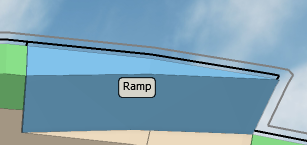
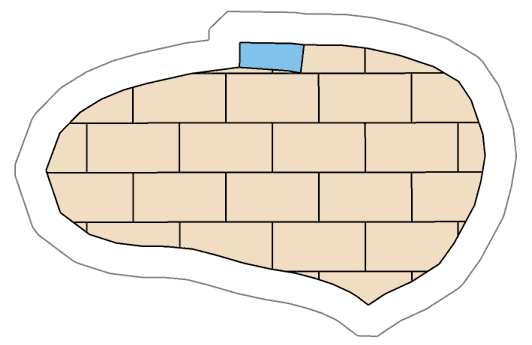
Generate Ramp Shots
Flag this option to automatically create a closed polygon around a section of ramp that is less than a user-defined depth.
-
Enter the Ramp Shot Minimum and Maximum Angles (in degrees).
-
By default, ramp shots are displayed in blue.
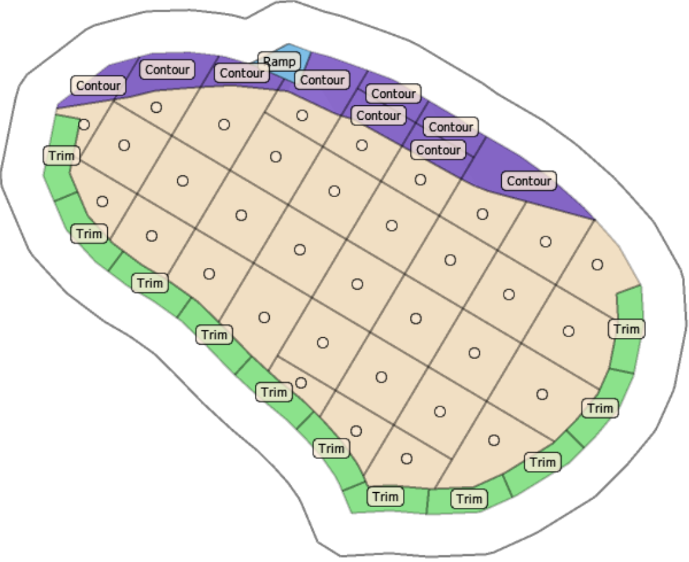
Generate Trim Shots
Flag this option to automatically create closed polygons around a section of Bench/Flitch against the wall.
-
Note that for Trim Shots to be generated, the wall area must be defined in the Wall Control Designs step.
-
Set Trim Shot Length and Width (in meters).
-
By default, ramp shots are displayed in green.
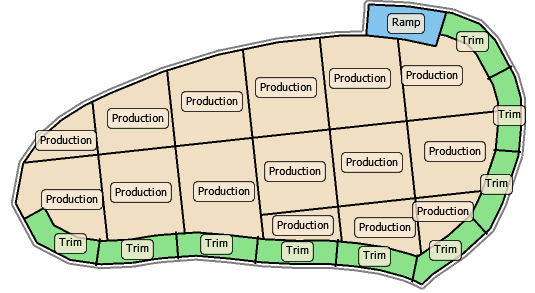
Generate Internal Shots
Flag this option to automatically create closed polygons around Internal (Production) Shots.
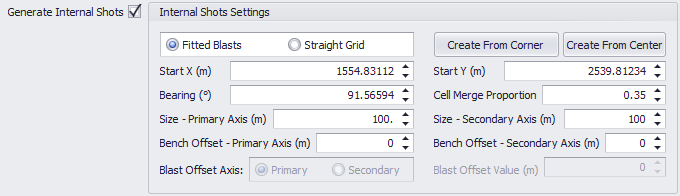

Refer to the table below for a description of the settings for generating internal blasts.
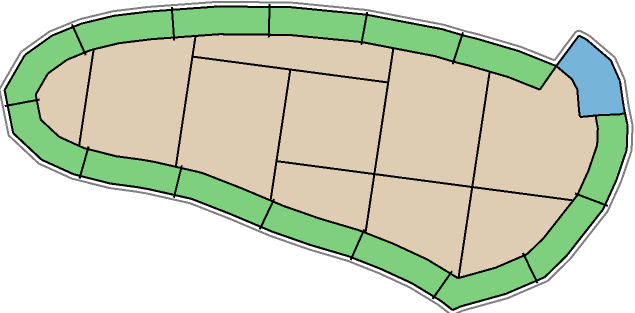
Fitted Blasts |
Generating blasts following the Bench/Flitch contour. |
|
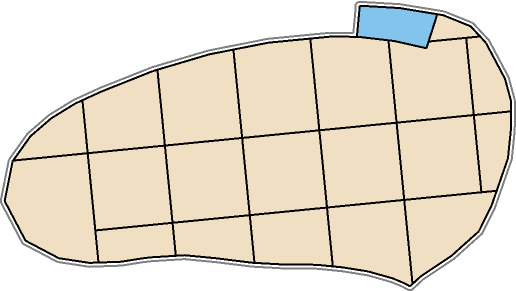
Straight Grid |
Straight grids across the Bench/Flitch. |
|
Create from Corner/Center |
Create Shots grid from a defined corner/center.
Left-click to confirm. The Generate Blasts window will reopen. Edit, or click OK to confirm. |
|
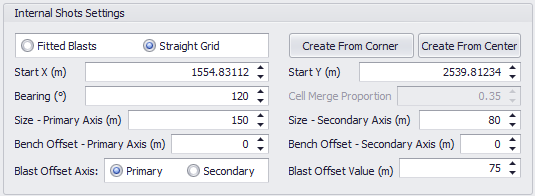
Start X (m) and Start Y (m) |
Set the starting position for where the blasts will propagate from. Note that fields are automatically populated when using one of the Create options above. |
|
Bearing |
Set the Bearing to match the pit orientation (for example, 120°). |
|
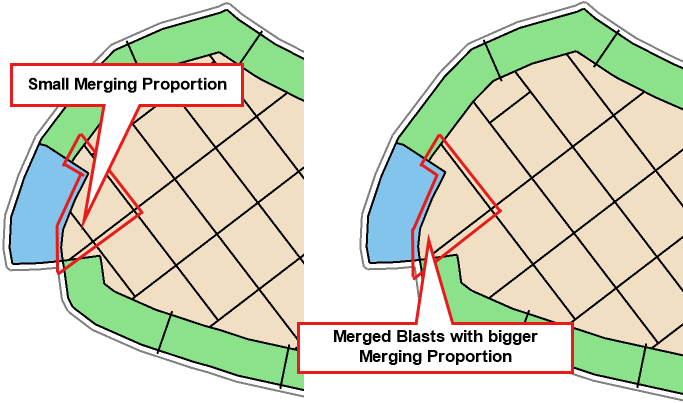
Cell Merge Proportion |
Specify proportion to merge adjacent blocks, ie, if some are too small. |
|
|
Size Primary Axis (m) & Size Secondary Axis (m) |
Set the size of the blast dimensions. Primary direction is in the bearing direction and secondary is perpendicular to that. Note that for medium or long-term planning (ATS) the size of the blocks should be relatively large, while for shorter planning horizons (APS) they can be smaller in order to provide more details when sequencing mining. The smaller the size of the blocks, the longer it takes to generate and process them. Keep this in mind when working with larger mine models. |
|
Bench Offset Primary Axis (m) & Bench Offset Secondary Axis (m) |
Set distances to offset blasts between benches. Leaving these values as zero can lead to blasts having the same positions over multiple benches. |
|
Blast Offset AxisOnly available when using a Straight Grid. |
Select the direction to the offset blasts. Set the value on how far to offset each blast.
|
|


Generate Contour Shots
Flag this option to automatically create closed polygons around of shallow Contour Shots.
-
Specify the Minimum Contour Area (in meters).
-
By default, ramp shots are displayed in purple.
For a better understanding of the Automatic Blasts Generation tools, and for practical guidance, please proceed with the exercises provided in the Designer tab: Exercises section.