Reporting Periods
Before looking at your first Report (Gantt Chart, Pivot Table or Spreadsheet), it's important to set some parameters for the periods you want to report on. Reporting Periods are the mechanism you use in the application to set your definition of a week, month, financial year or other period of time relevant to your site. There are no default Reporting Periods, so it's up to you to determine what periods are important to report on.
The Output Schedule is the finest grain of detail you can report in. Without any Reporting Periods a Task which runs from the 31st of December 2017 to the 2nd of January 2018 has only 1 line on the Output Schedule. This means that you won't be able to differentiate in your reports between which part of the Task occurs in 2017 and which occurs in 2018.

A Reporting Period will slice any Task that crosses it so that we get more than one line in the Output Schedule, and therefore get more detail available in our reports.

New Reporting Level
![]()
In this example, current reporting periods are Financial Year, Monthly and Yearly:
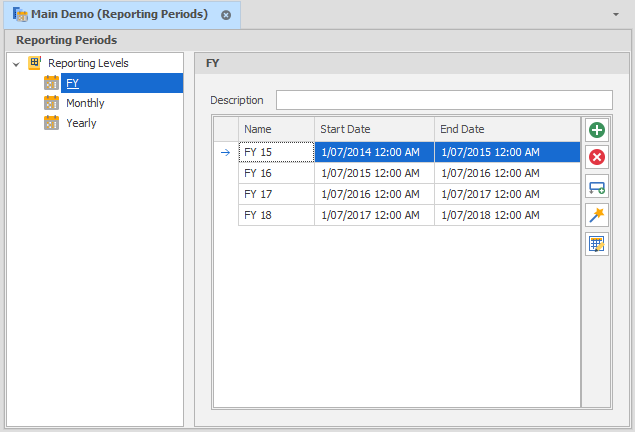

|
Add a reporting period. |

|
Delete the currently selected reporting period. |

|
Insert a reporting period before the currently selected period. |

|
Run the Reporting Wizard. |

|
Use the Bulk Editor to make bulk modifications to reporting periods. |
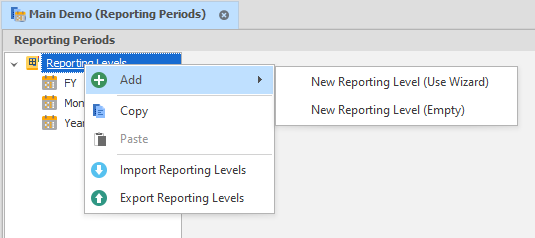
To add a new Reporting Period, right-click "Reporting Levels" in the side window and choose Add -> New Reporting Level (Use Wizard):
By default, the Reporting Level Wizard looks like this:
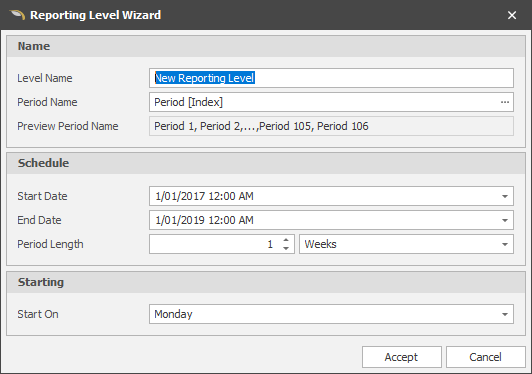
Start Date and End Date control the scope within which the reporting periods will be set.
Period Length options: Hours, Days, Weeks, Months, Quarters and Years.
Depending on the Period Length, the Start On options adjust as well.
Period Name & The Reporting Period Name Builder
The default Period Name is Period [Index]. To see the full range of variables click the ellipsis [...] button to open the Reporting Period Name Builder.
Once you've got your reporting periods set (generally Monthly and Yearly to start with) it's time to look at your Schedule. Be aware that the more reporting periods you set, the longer your results will take to generate.
See: Date Format Strings