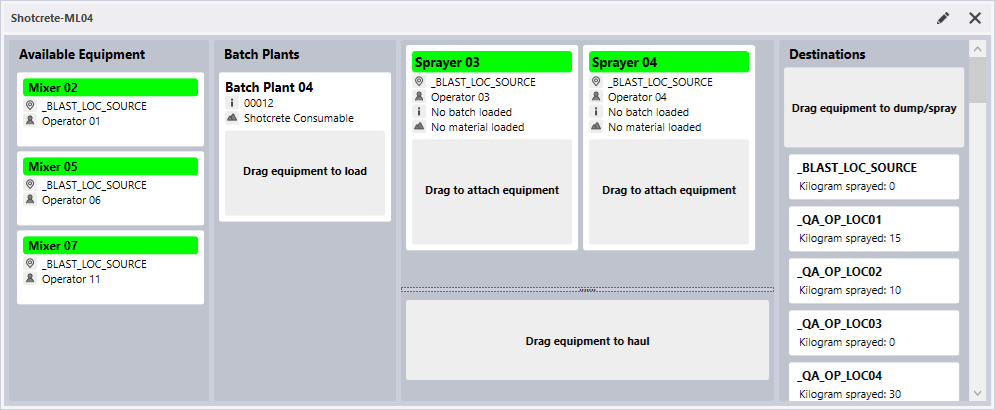
Using the Shotcrete Panel
Shotcreting is a process used in underground mining to apply concrete or mortar onto surfaces, such as rock walls, for stabilisation and support. Materials (additives) are mixed at a batch plant in a Mixing unit which is then attached to a Spraying unit for spraying to a location. Expired material (waste) is dumped to a location that can be a specified default or a user-selected location.
Using the Shotcrete panel, you can record the instances of mixing units loaded by a batch plant and attached to a spraying unit with a batch number and material (along with measure) set at the time of loading. Spraying is performed against a destination, which defaults to the allocated location for the spraying unit. Only a partial amount of the volume of the mixing unit is used, so the mixing unit remains attached to the spraying unit. The remaining volume for the mixing unit is dumped directly to the configured Waste destination.
More information on the Shotcrete panel, including how to create a new panel, is contained in Shotcrete Panel.
To open a Shotcrete panel:
- Click on the plus/minus box to expand the Shotcrete node in the Panels tab of the Display pane.
The panels you have created will be listed underneath.
- Click the mouse on the name of a panel and drag and drop it onto an open Canvas.
To set attribute values
At any stage of the shotcreting process before dumping, you can set the attributes for the mixing equipment, spraying equipment and batch plants.
-
Right-click in the equipment or batch plant for the attribute values.
-
Select the Set Attribute Values option from the menu.
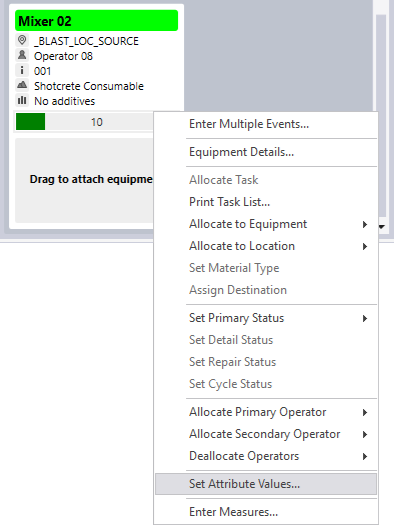
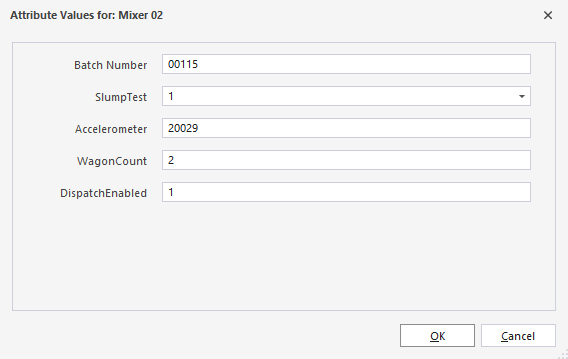
This will open the Attributes Values dialog for the selected equipment/batch plant.
-
Enter the required attributes in the fields provided, including the Batch Number, SlumpTest value (for Mixers) and Accelerometer reading.
-
Click OK to apply the attributes.
To load a unit to a batch plant
-
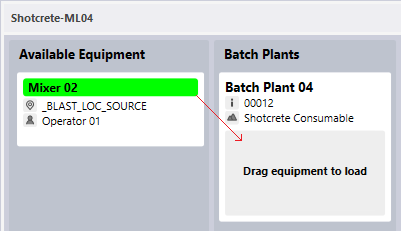
Drag a Mixing Unit equipment entry (using the header) from the Available Equipment column to the labelled section of a batch plant entry in the Batch Plants column.
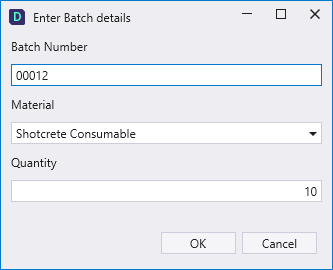
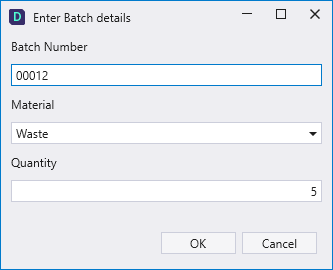
The Enter Batch details dialog will open.
-
Enter the Batch Number for the shotcrete event in the field provided.
The Batch Number is the identifier for a batch of concrete. This value identifies the concrete batch across the various stages of the shotcrete process. The batch number identifier is inherited from the batch plant where it is sent to the spraying unit. In this way, tracking specific batches is achieved.
-
Select the Material for the batch from the drop down.
The specific material required for shotcreting will have been configured in the Reference data and marked with the IsShotcrete attribute - see Shotcrete Configuration.
-
Enter the Quantity for the equipment load in the field provided.
Movement and Additive attributes are configured for the Measure Type token required for shotcrete measurement. The Quantity value for the batch details refers to the Measure Type assigned to the mixing unit.
-
Click OK to record the loading of the mixing unit with the specified material and quantity.
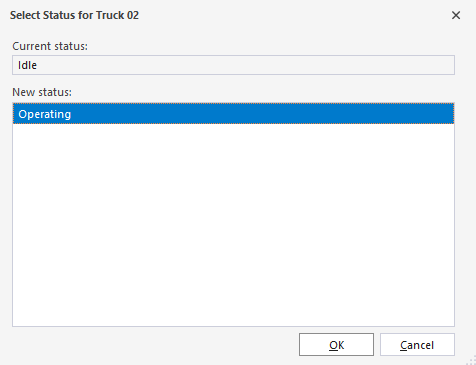
The Status prompt may appear if the equipment has changed statuses:
-
Click OK to confirm.
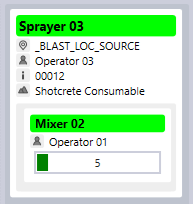
Now that the mixing unit has been loaded, it will be moved from the Available Equipment column and the batch plant entry will display the attachment:
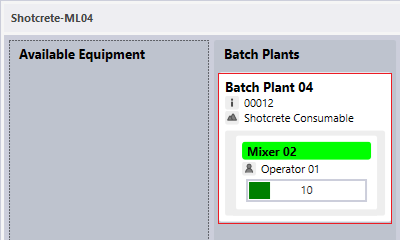
Note that the Equipment details, including the Batch Number, Material and Quantity values are displayed in the Batch Plants entry.
To assign a mixer to hauling
In some instances, Mixing units may be too large for attachment to a Spraying unit, especially in limited space underground areas. In these instances, it can be more suitable to use the large Mixing unit to fill smaller units onsite. Smaller units can be marked attached to the large unit in the panel.
To mark the Mixing unit as hauling
-
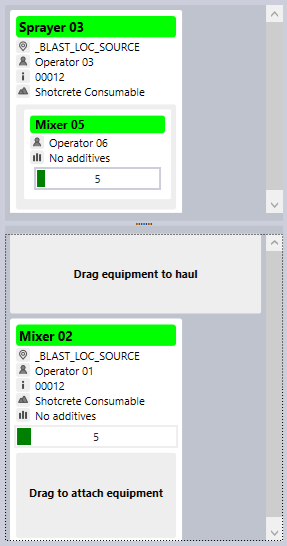
Drag the loaded Mixing unit from the Batch Plant to the labelled section below the Spraying column:
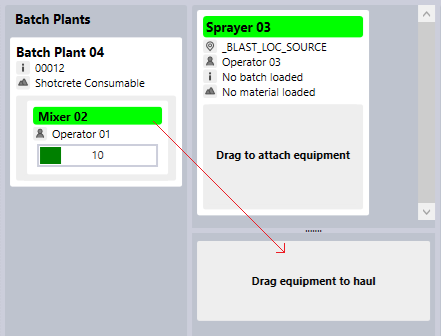
The mixer is removed from the batch plant entry and displayed under the hauling section, indicating the Hauling status:
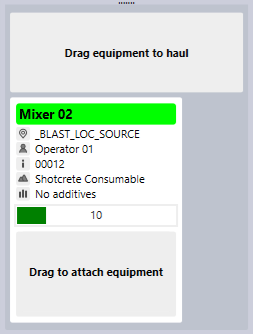
The hauling mixing unit entry contains a Drag to attach equipment label. You can drag additional mixers to the section to indicate they are attached and open the Enter amount load dialog:
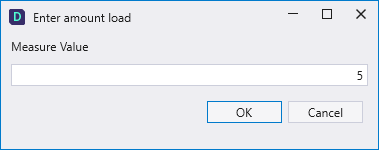
-
Enter the required Measure Value in the field and click OK.
The value entered will be subtracted from the main mixing unit and assigned to the attached mixer:
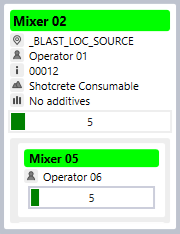
The required mixer from the additional mixer/s attached can now be attached to a Spraying unit.
Use Additives
At the Hauling or Spraying stage, you can also assign Additives to the Mixer.
-
Click the Additives icon.
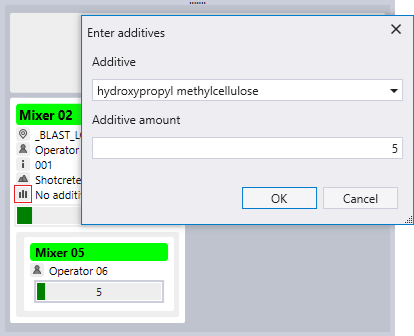
The Enter additives form is displayed.
The Additive type Equipment Measures you have configured for shotcreting are available in the Additive drop down.
-
Select the required additive from the drop down list.
-
Enter the amount value in the Additive amount field.
-
Click OK.
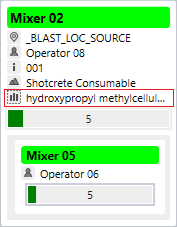
The selected additive is listed in the Mixer details:
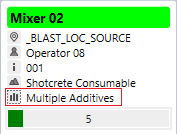
Additional additives can be assigned to the same mixer using the same method. The Mixer information panel will list Multiple Additives.
When any required additives have been assigned, you can drag the Mixer to a Sprayer. You can also assign additives to the Mixer after it is added to the Sprayer.
Attach a mixer to a sprayer
-
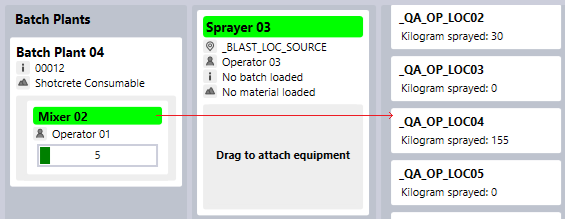
You can drag a loaded Mixer from the batch plant directly to the labelled attachment section of the required Spraying equipment entry:
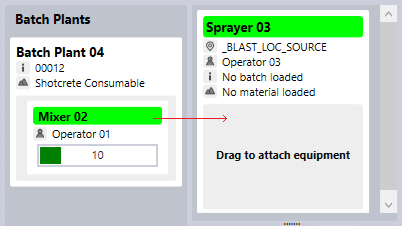
The Enter amount load dialog will open:

-
Enter the Measure Value and click OK.
The Spraying unit entry for the load will display the details for the batch plant load, including any additives recorded and the quantity value:

-
Alternatively, if you have a mixer in a Hauling state with an attached mixer you want to spray, drag the mixer from Hauling to the relevant spraying unit:
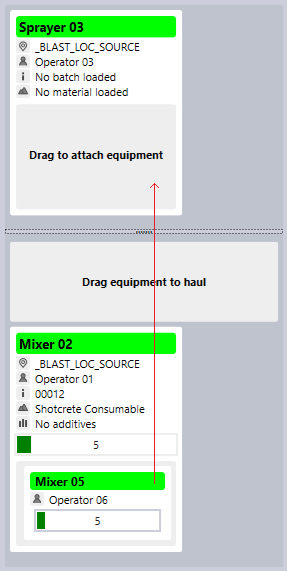
With an attached mixer, the unit will be removed from the main mixer and the assigned quantity will be displayed for the Spraying entry:
To spray the batch
Loaded spraying Equipment entries in the Spraying column can be recorded to a spray event using the labelled section or any of the available locations in the Destinations column.
-
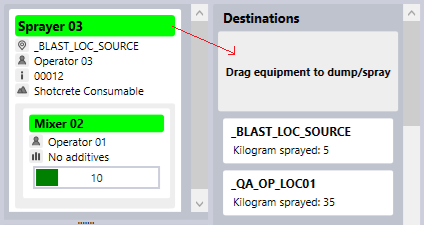
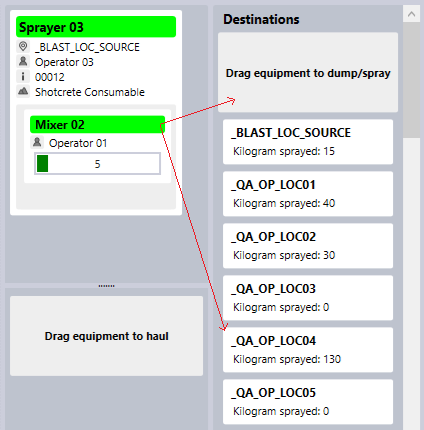
You can drag the loaded Spraying unit entry to the labelled section in the Destinations column:
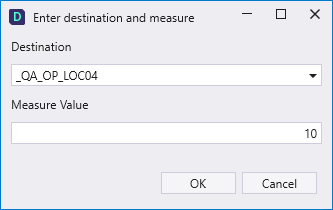
The Enter destination and measure dialog opens:
-
Select the Destination for spraying from the drop down and modify the Measure Value if required.
-
Click OK to mark the batch as sprayed to the specified location.
The details for the location entry in the Destinations column are updated accordingly:
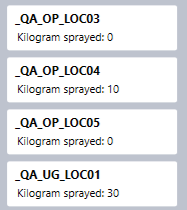
The measurement value sprayed is displayed under the location name. The equipment used for the spray event is returned to the Available Equipment pane for the next cycle.
Alternatively, you can drag the Spraying unit to a location in the Destinations column. The Enter destination and measure dialog will open with the selected destination already selected.
To dump a batch
Commonly, not all of the material loaded to a mixer is used by a sprayer. In these instances, material can sometimes be unusable and must be dumped.
When entering a spraying event, the portion of the material used is recorded in the Measure Value field:
If the value entered is not the total material loaded from the mixer, the Mixing unit with the remaining quantity displayed will remain attached to the Sprayer and will not be returned to the Available Equipment:
To dump the remaining material,
-
Drag the Mixer unit by the header to either the nominated Dump location or the labelled section in the Destinations column.
The Enter destination and measure dialog will open with the dump destination and the material Measure Value displayed:

-
Click OK to confirm the dump event.
The total for the Dump location will be updated and the Mixer will be returned to the Available Equipment column.
Alternatively, material can be dumped directly from Mixing equipment from the Batch Plants column by dragging it directly to the Dump destination:
The material for the mixer can also be marked as Waste at the time of loading the Batch Plant before dumping to the Dump location using the Enter Batch details dialog:
Regardless of the material selected for the mixer at the Batch Plant, dragging a Mixer directly to any location will be recorded as a dump event.
The shotcreting process can be carried out in a number of varying scenarios - such as full or partial load use, or even multiple sprayers per mixing load. Examples of using the Shotcrete panel in different scenarios are outlined in the Shotcrete Workflow Examples section.