Multiple Loaders and Trucks Panel
For a live view of the trucking cycle, from and to a single loader, see: Loader and Trucks Panel
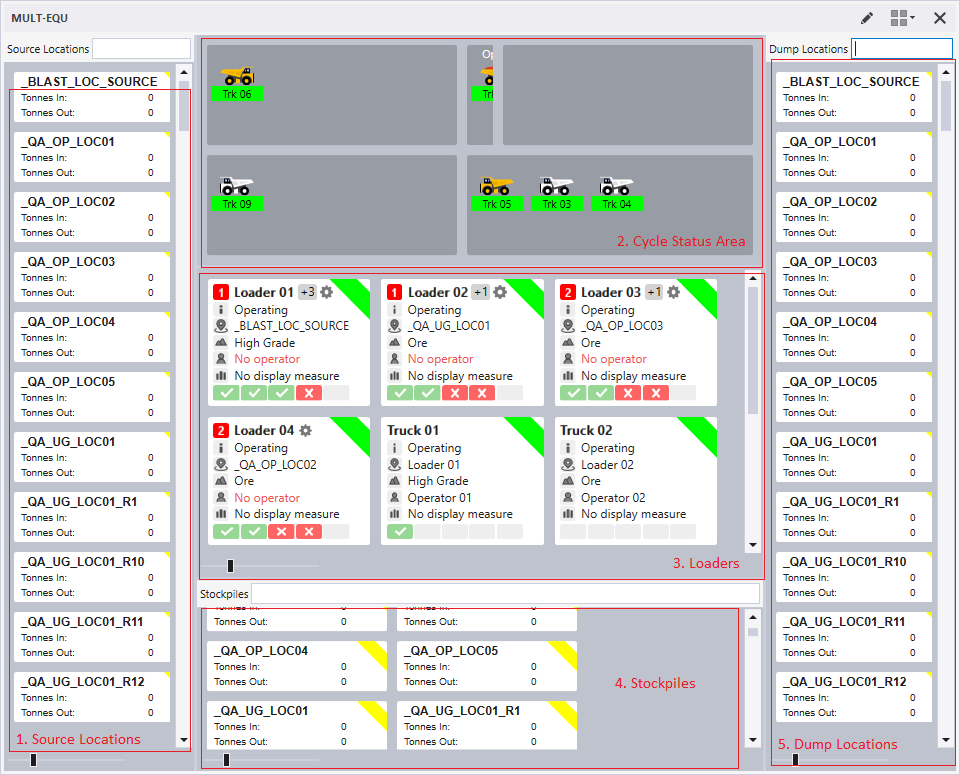
The Multiple Loaders and Trucks panel is appropriate for both open cut and underground operations, and provides a live view of the trucking cycle - the truck cycle starts with “loading” where one or multiple loaders load the truck. The truck then hauls, dumps, travel empty and goes back to the loading state.
To set up a Multiple Loaders and Trucks panel,
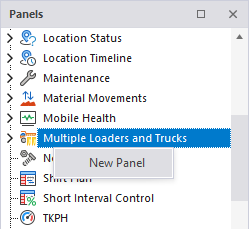
- In the Panels pane, right-click on Multiple Loaders and Trucks and select New Panel from the right-click menu.
- Enter a Name for the panel.
- Select the Source Locations for the panel; choose 'All Locations', a predefined location reference group, or individual locations.
- Select the Stockpiles; choose 'All Locations', a predefined location reference group, or individual stockpile locations.
- Select the Loading Units for the Loaders in the panel from a predefined equipment reference group, or individual equipment units.
- Select the Hauling Units for the Trucks in the panel from a predefined equipment reference group, or individual equipment units.
- Select the Dump Locations for the panel; choose 'All Locations', a predefined location reference group, or individual locations.
- Select the Materials; choose 'All Materials', a predefined materials reference group, or individual materials.
- Select the Data Entry Sequence for the panel - either Dump location then measure, or vice versa.
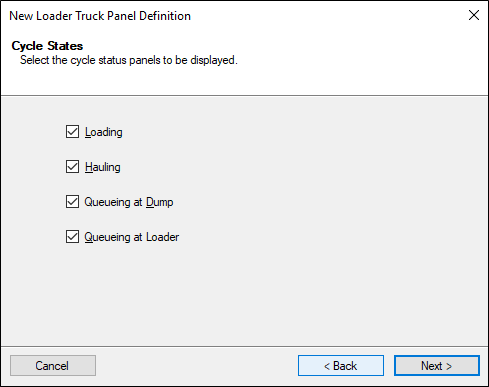
- Select the Cycle States for the cycle status panels to be displayed.
- Select the Displayed Measure. This is the code that will be used to display material movements in the panel.
- Select the Loader Measure. This is the measure in which loader movements to a location will be recorded.
- Select the Secondary Loader Dump Measures (optional) - the secondary measures to be made available for loader movements.
- Select the Truck Measure . This is the measure that will be used to record truck dumps.
- Select the Secondary Truck Dump Measures (optional) - the secondary measures to be made available for truck movements.
- Select the Loader Measure for Dumping to Trucks. This is the measure in which loader dumps to a truck will be recorded.
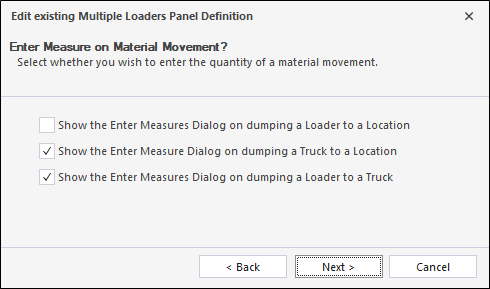
- Choose whether to Enter Measure on Material Movement to determine when the Measures dialog is shown for data entry after which movements.
- Select the Status Types for display in the panel; choose 'All Status Types' , a predefined Status Type reference group or individual status types.
- Select the Operator Role for the operator or select a default role from the drop down.
- Click Finish to exit and create the new panel (or Cancel to exit without saving).
To open a Loaders and Trucks panel:
- Click on the plus/minus box to expand the Multiple Loaders and Trucks node in the Panels tab of the Display pane.
The panels you have created will be listed underneath.
- Click the mouse on the name of a panel and drag and drop it onto an open Canvas.
For information on the options available in the toolbar for the panel, see Panel Toolbar.
Source Locations
The Source Locations panel comprises the following:
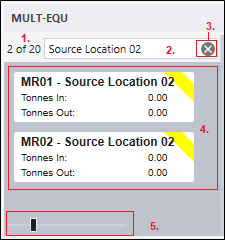
- The number of locations displayed against the number of locations in total, for example, 2 of 7.
- A Filter box. Locations may be filtered by a partial match on Description.
- A Clear Filter button can be used to clear the filter.
- Locations (defined as part of the configuration of the panel) that pass the filter.
- A Zoom control which allows the scale of the object in different areas of the panel to be increased or decreased. Note that when an area of the panel has focus, you can zoom in/out with the mouse wheel while holding down the CTRL key.
Note: These values will be empty when the Filter box is empty, or when the number of filtered locations is equal to the total number of locations.
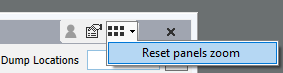
You can reset the zoom for the areas on the panel from the Panel menu:
Scrolling
If there are more objects than can be displayed in an area of the panel, a vertical scrollbar is displayed:
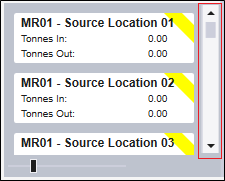
This allows the list of loaders, for example, to be scrolled by clicking and dragging the scroll bar with the mouse. Alternatively, click on the scroll bar and use the mouse wheel to scroll up and down while holding down the CTRL key.
Cycle Status Area
The Cycle Status Area comprises a maximum of five separate status zones, each of which corresponds to a truck cycle status.
The number of status zones is specified as part of the configuration of the Multiple Loaders and Trucks panel.
The Travelling Empty status zone is mandatory and will be present on every Multiple Loaders and Trucks panel.
For easy identification, each status zone has its own tooltip and may contain multiple trucks.
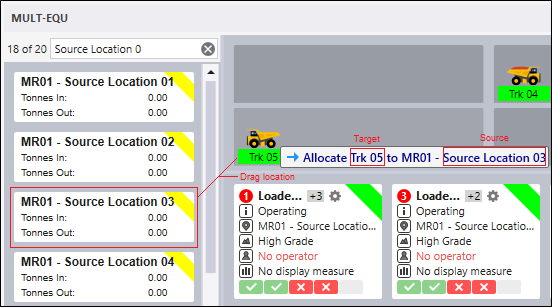
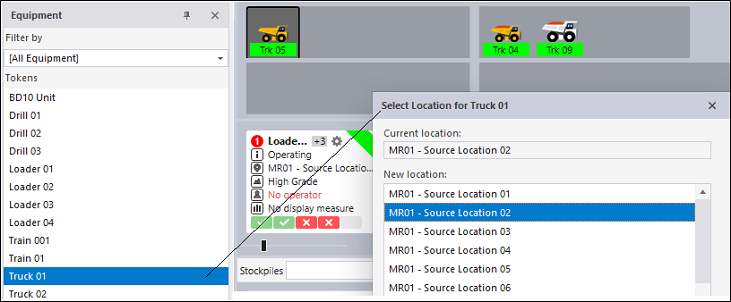
Drag and drop operations are annotated to show the object being dragged and the target of the drag and drop operation. In the following example, a location is dragged onto a truck - the annotation reveals that the truck is allocated to that location:
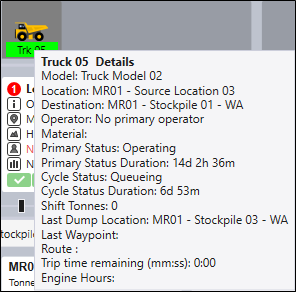
Each truck also has its own Details tooltip showing the properties of each truck, such as the Status, Material and Person Allocation, etc:
Trucks are automatically sorted based on their time of allocation in each of the cycle status zones. The earlier a status is set for a truck, the closer that truck will be to the next cycle status.
Trucks may be moved from one cycle status zone to another by:
- Double-clicking on the truck to move it to the next stage in the cycle
- Interactively dragging and dropping a truck with the mouse.
Note: If a truck is in a pre-dumping state (queuing at dump or hauling, depending on how the panel has been configured) double-clicking will not produce any cycle status change since a dump event is expected.
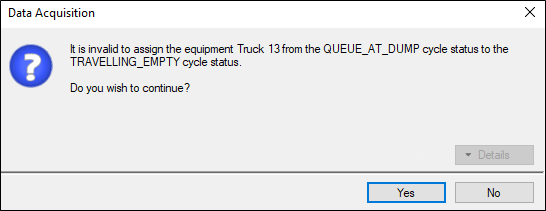
In the case of drag and drop, validation is applied to ensure that the cycle status change is valid. If the cycle status change fails the validation, a user is still able to complete the status change, however he or she must confirm the change via a warning dialog:
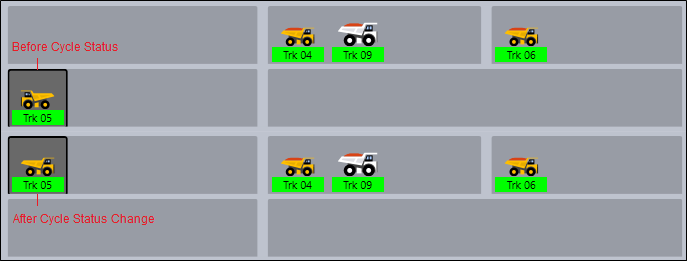
After a drag and drop operation has been completed, the truck will be placed at the end of the queue in the new status zone, and will be furthest away from the next status zone:
Interactions with the Token Navigator Panel
The following scenarios are supported:
- The user is able to reallocate equipment (a loader or a truck) when dragging that equipment from the Token Navigator panel to the Multiple Loaders and Trucks panel.
- Allocate the truck to a location
- Change the cycle state in the case where it is different from its current cycle state – e.g. if the truck is in a ‘Loading’ state but is dragged to a section for ‘Hauling’.
A truck should be dropped onto a Cycle Status Area. A loader should be dropped onto the Loaders Area.
The following events are created on completion of the drag and drop:
- A person can be allocated to equipment by dragging and dropping that person from the Token Navigator panel and onto a Loader or a Truck in the Multiple Loaders and Trucks panel:
- On completion of the drag and drop:
- An Allocate primary operator to equipment event is created:


- A truck which is in a non-operating primary status may be dragged from the Token Navigator Panel to the Cycle Status Area (any cycle state) in the Multiple Loaders and Trucks panel.
- The Multiple Loaders and Trucks Configuration Wizard includes that truck AND
- The truck listed in the wizard is in an operating state. If the truck is not operating, it will not be displayed in the panel. To solve this problem (to display a non-operating truck in the panel), a user can drag it from the Token Navigator Panel and drop onto the Multiple Loaders and Trucks panel.
- Change the primary state to “Operating”;
- Allocate the truck to a location, and
- Change the cycle state in the case where it is different from its current cycle state – e.g. if the truck is in a ‘Loading’ state but is dragged to a section for ‘Hauling’.
A truck is displayed in the Multiple Loaders and Trucks panel if:
When dragging a truck to the Multiple Loaders and Trucks panel, a user is prompted to: