Users
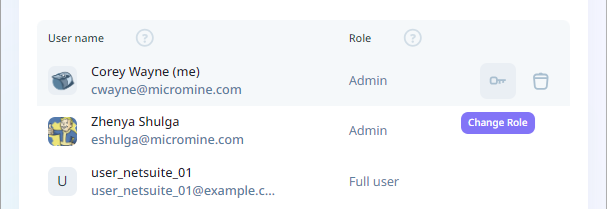
The Users page lists the users who have been invited to the Company to be given permissions on a licence, their user Role, the Teams to which they belong and the Licences they are using.
With Nexus - Manage Licences open,
-
Click Users to navigate to the Users page.
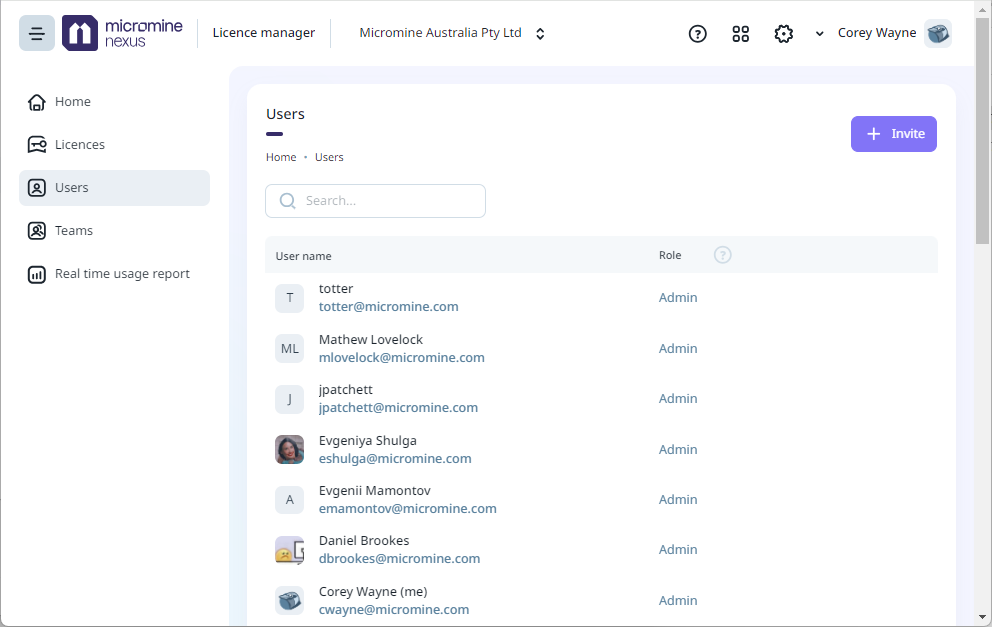
The Users page displays details of the Users who have been assigned a licence with Nexus - Manage Licences. The User Name and Role for each user is displayed in a grid. You can use the Search field to find a User.
Users are invited on the Company level. From the Users page, you can Invite members by clicking the button at the top of the panel. This will open the Invite pane:
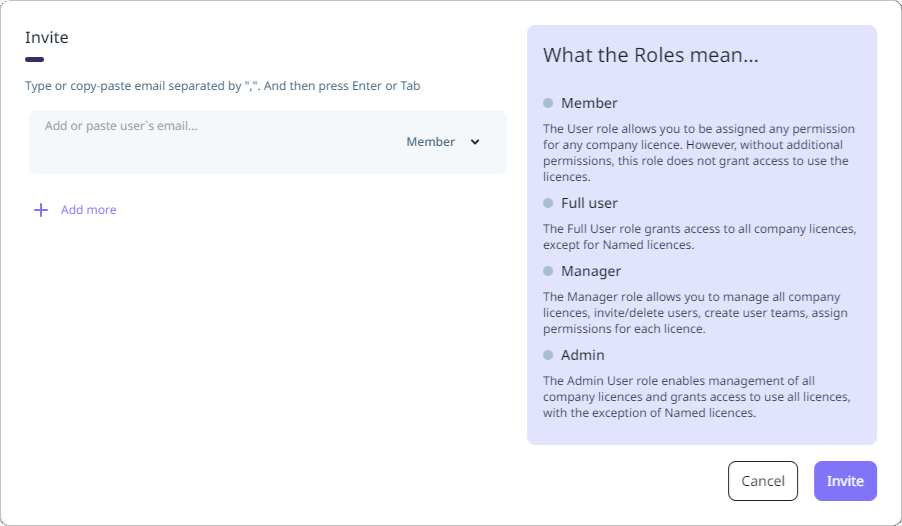
Invited users will be assigned the Member role by default. The role can be modified later by an Administrator when the user is assigned a licence. Alternatively, you can select a role for the invited user from the drop down:
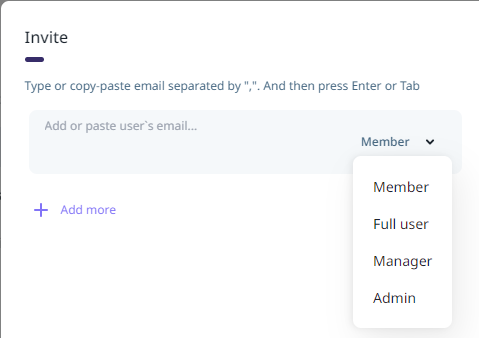
The available roles are defined in the Invite pane. The actions available to a user are determined by the Role and Permission assigned.
Roles grant permissions on the Company level, while the following permissions can be assigned on the licence level.
-
Use - If a role has permission to use a licence, the user with that role can use a floating licence, 'evict' themselves from the seat, view active sessions for the licence, and use the Borrow option.
-
Manage - If a role has permission to manage licences, a user can define permissions for the other users in the limits of this licence, invite new users to the licence and the company, view usage reports for this licence, 'evict' users and reserve seats for Floating licences.
The available Roles for users with permission to use or manage a licence are as follows:
-
Member - The Member role allows you to be assigned any permission for any company licence. However, without additional permissions, this role does not grant access to use the licences. Member roles can be granted different combinations of Manage and User permissions for specific purposes - such as providing Licence Administrator functions with Member + Manage permission.
-
Full User - The Full User role grants access to all company licences, except for Named licences.
-
Manager - The Manager role allows you to manage all company licences, invite/delete users, create user teams, and assign permissions for each licence.
-
Admin - The Admin User role enables management of all company licences and grants access to use all licences, except for Named licences.
To invite a user,
-
Add or paste the user's Email address in the space provided.
If you want to invite more users in this session,
-
Type or paste multiple email addresses separated with a comma (,) OR
-
Press Enter when entering an email address, then enter another email address and repeat until all the email addresses are entered.
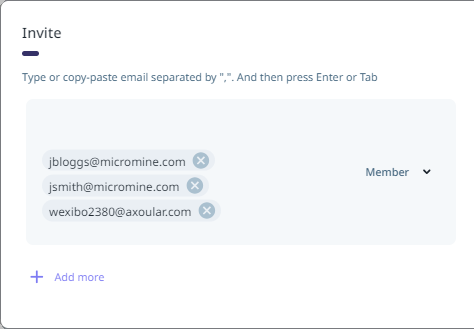
When all of the required users have been added to the invitation pane;
-
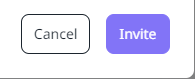
Click the Invite button to send the email invitations.
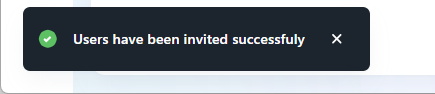
This will send the invites, and a confirmation prompt will be displayed on successful completion:
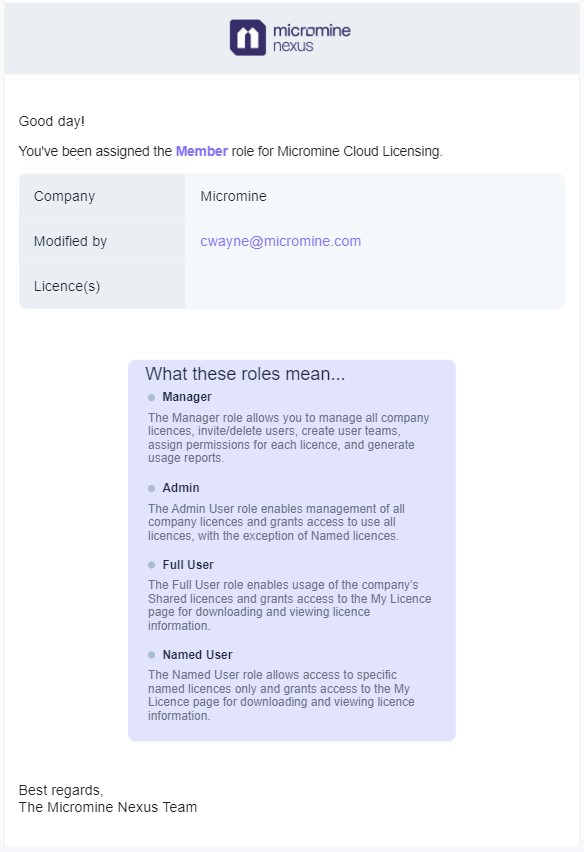
Any users invited will receive a notification email indicating they have been assigned a role for Nexus - Manage Licences.
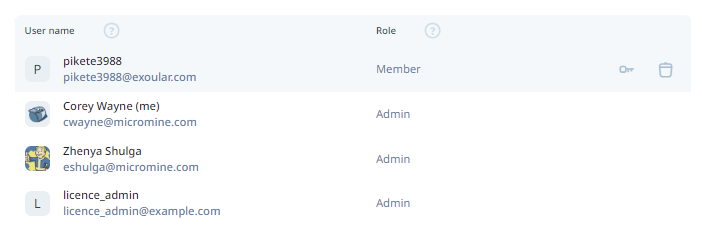
Invited users will also be added to the Users grid on the Users page:
On first login for an invited user, if their profile details are not configured, they will be prompted to enter the required information: See Nexus - Home
To manage the users listed on the page, you can:
-
Click their User Name to open their profile details and update them.
-
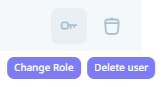
Hover on the row for their listing and select either:
-
Delete user to delete their profile, or,
-
Change role to modify their assigned user Role.
-
Change Role
The Change Role option is used to modify the assigned Role for a user. To do this,
-
Hover on the row for a user in the Users grid:
-
Click the Change Role icon.
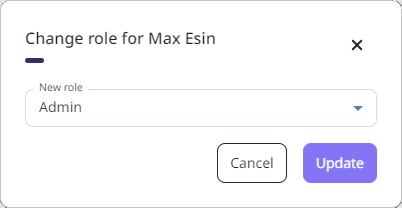
The Change Role form opens with the current role displayed:
-
Use the New role drop down to select the applicable role for the user.
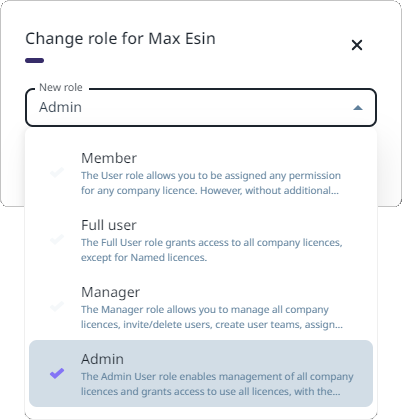
Available Roles are defined in the drop down, as well as above.
With the new Role selected,
-
Click the Update button to apply the change.
The role is updated and an automated email will be sent to the user to notify them of the change.
The users on your system can be organised into Teams you create for grouping and permissions.
To add users to the Teams you create, click the Manage Teams button to open the Teams page. For information on using the Teams page to create and manage teams, see Teams.