Drawing Vectors
The following tools allow you to draw vectors in your Animation view (For more in-depth conceptual information, see: Rule Steps and Logic (Vectors)).
Bearing & Grade Vectors use the step before and you can set both properties using the ellipsis [...] button and drawing on your Animation Preview.
Generally make sure your Snap option is Snap to Segment or Snap to Point on Segment.

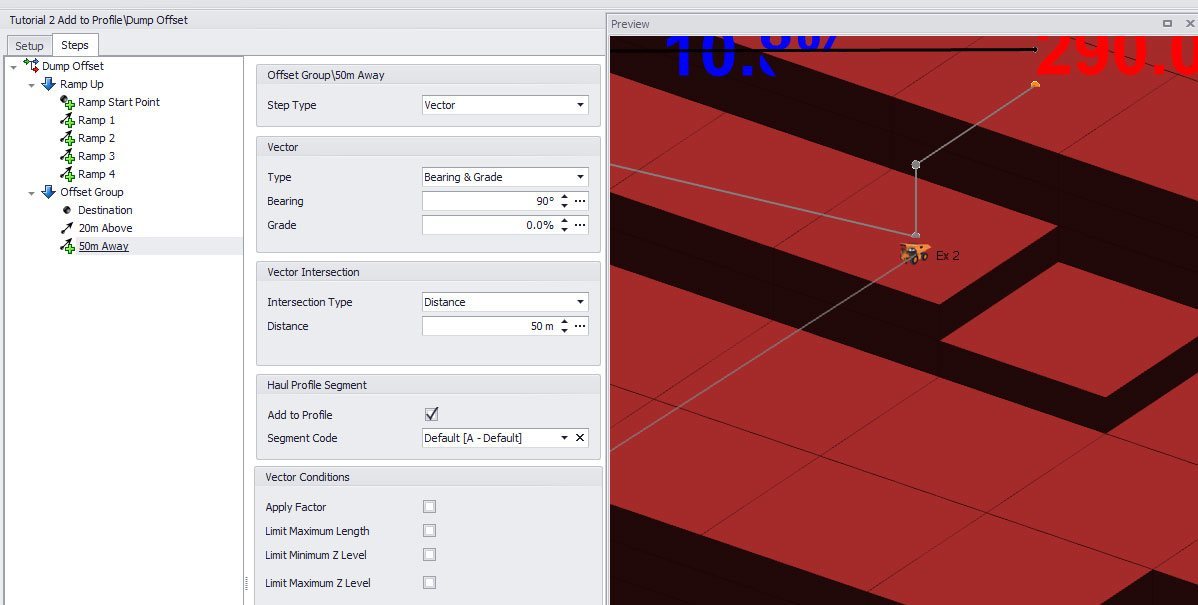
Vector Intersection: Distance
A simple and commonly used vector intersection, the distance intersection is commonly used for offsets (50m towards face, 20m above) where the distance is static.
Vector Intersection: Z Level
When you've got a vector that is travelling through the Z plane (up or down) you can intersect it with a Z level (stop at a roof or floor). For a dynamic ramp we might ramp down and intersect with the Z level of our Source Node. This also works in reverse for climbing a dump ramp.
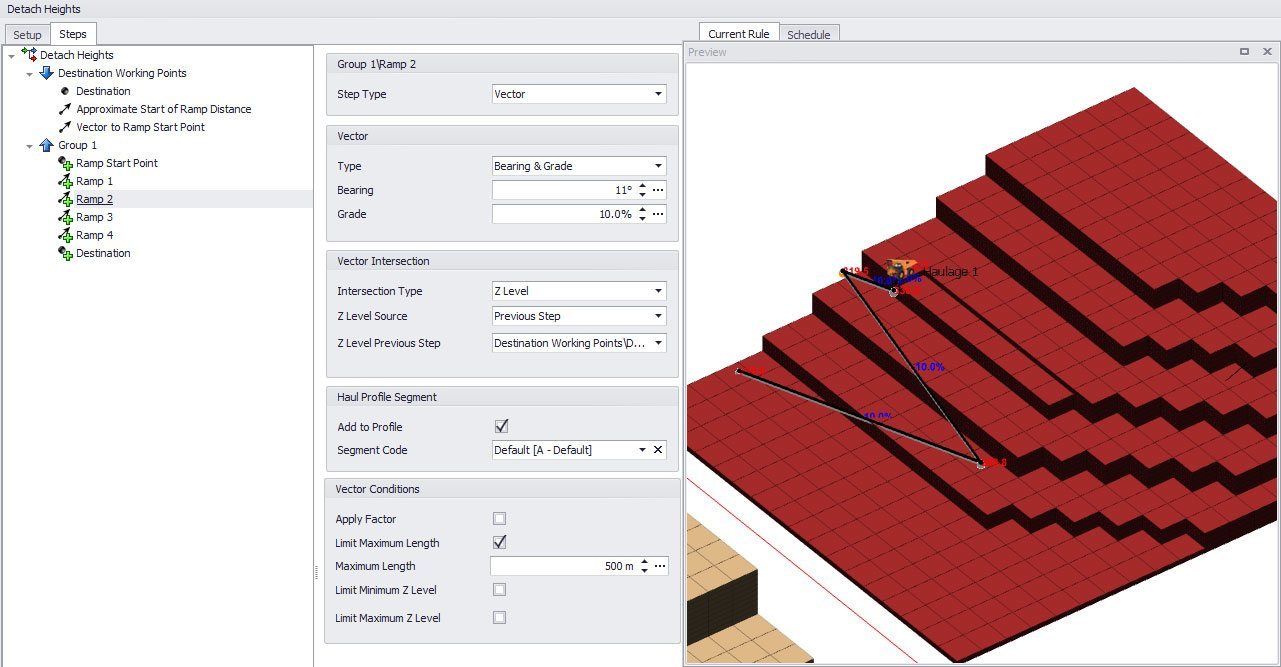
Note: If your vector has a 0% grade, the application will show an error message as you can't intersect with a Z level if your Z level isn't changing.
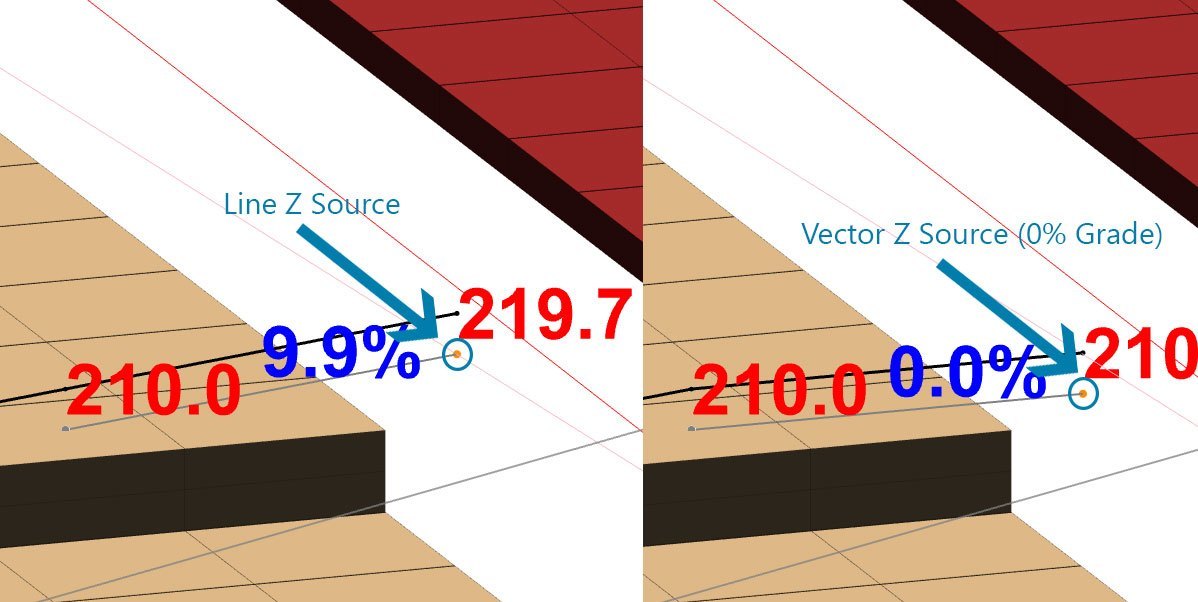
Vector Intersection: Line (Two Points)
Vectors become more interesting with our next two intersections. The first, a "Two Points" intersection, creates a line from two points (that can be centroids, previous steps or entered manually). When your vector intersects with this line, it ends.
You get two choices with what the Z Level Source of your final vector position is. The default is "Line" which overrides the Grade you may have set earlier and takes the Z level from the line you drew instead. A common use of this is where you know the line of the top of your ramp out of pit is going, but the topography is on an incline or decline. By setting a "Line" Z Source type you can set a top of ramp consistent with your topography.
The second Z Level Source you can set for this intersection type is "Vector". That means no matter what Z Level your line is on, your vector will intersect with the Z level that is consistent with the Grade you set earlier. A common use of this is heading towards the edge of a pit which is deepening over time. See a comparison of the two Z Level Sources below.
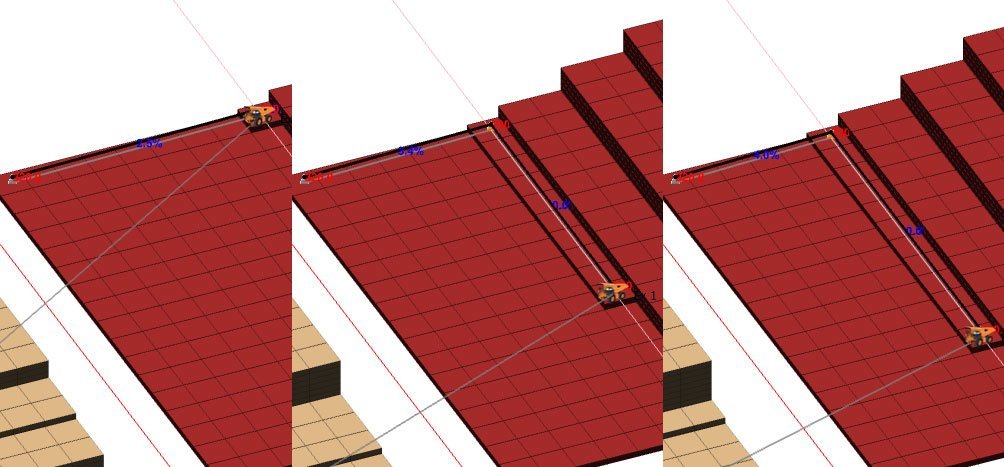
Vector Intersection: Point and Vector
Similar to "Two Points", this vector intersection type generates a line to intersect with. However only one point is required, the line is generated instead from a bearing and grade. For example this can be particularly useful for a road whose length varies on the destination node. In the screenshot below by creating a point and vector line intersection at a 90 degree angle you can see the distance always lines up with the dump face.
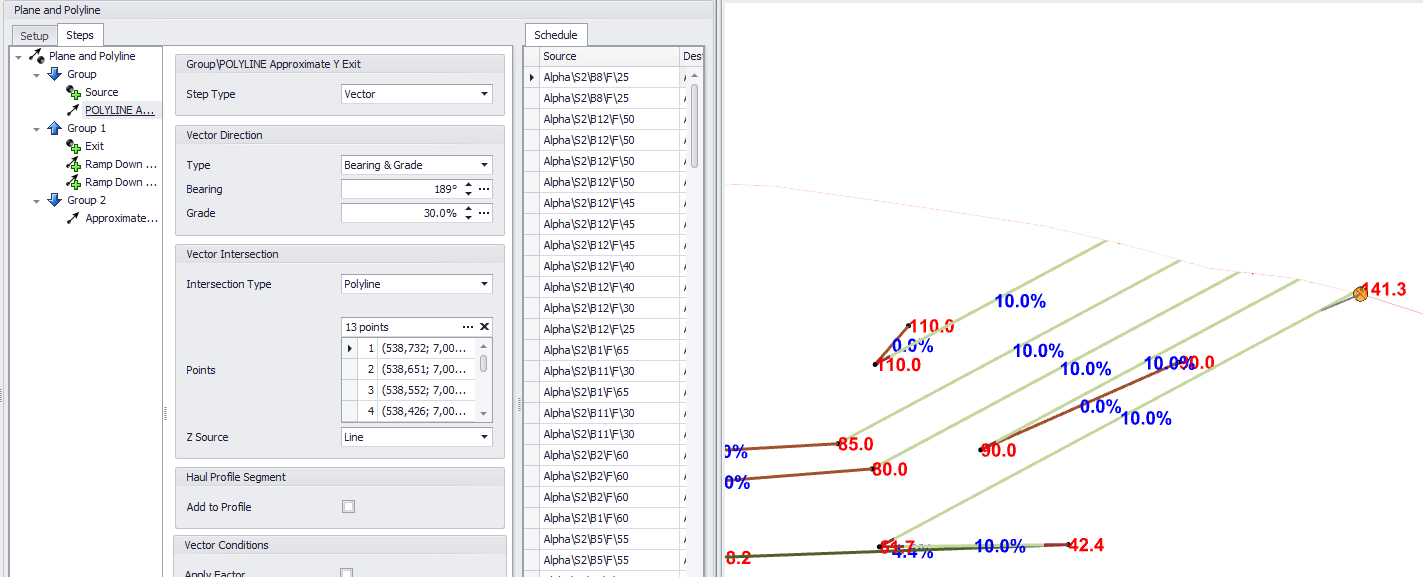
Vector Intersection: Polyline
When more than two points are required, you can use an unlimited number of Entered Points to create a Polyline. This can be useful for a Step which is targeting an inconsistent terrain line like in the example below where five different Output Schedule Steps are shown for effect.
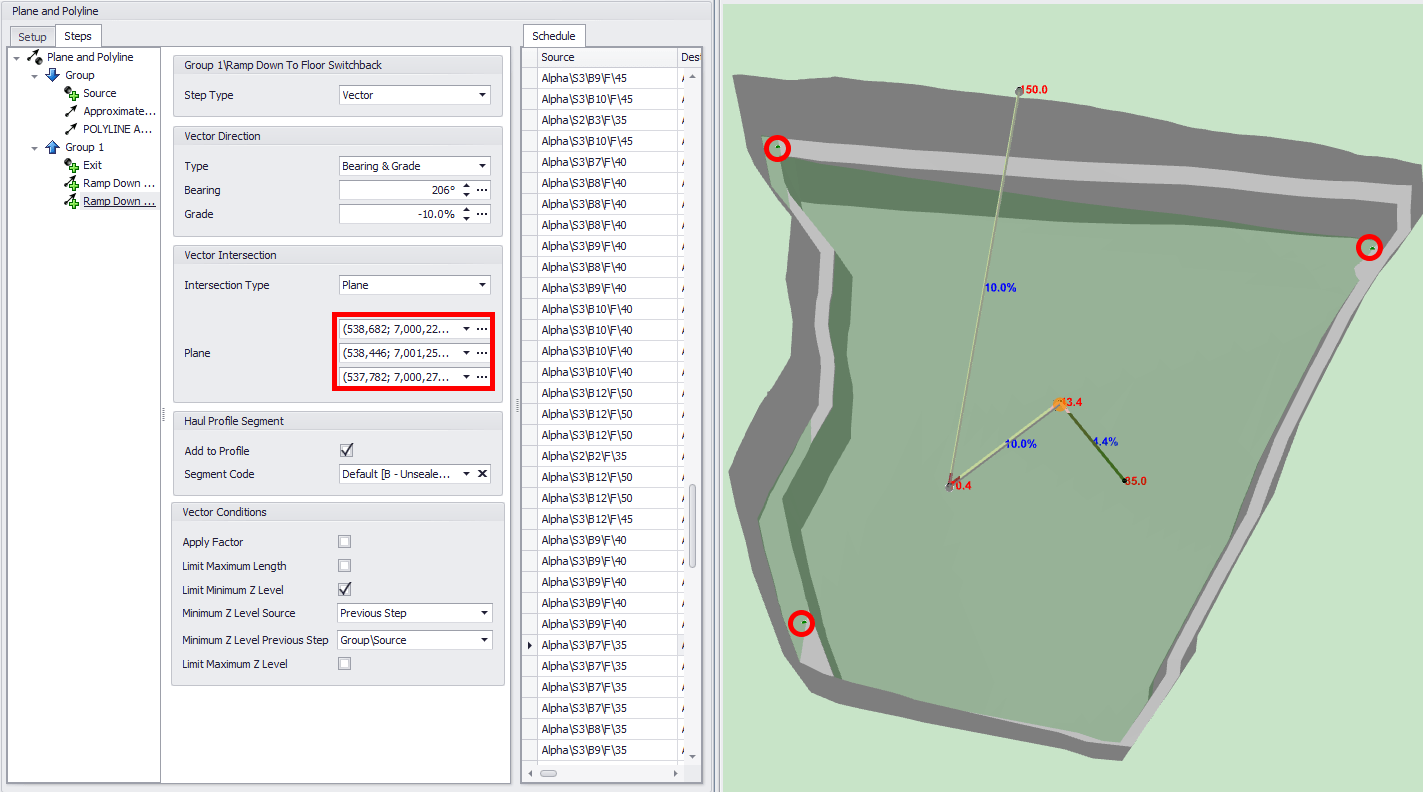
Vector Intersection: Plane
Plane Intersections require exactly 3 Entered Points to form a plane and are particularly useful when you have a sloping pit floor. If you think of Z Level Intersections as a ceiling/floor (horizontal) and Line/Polyline Intersections as (vertical) walls, think of Plane Intersections as anything in between like a steep hill.
What happens if my Vector DOESN'T intersect?
A vector that doesn't intersect essentially becomes a null vector (it goes nowhere and duplicates the point from the step before). This is actually really useful! You can get creative with what are essentially conditional vectors such as "only move to the right if further left than point X" or "ramp EITHER up or down to a Z level" by stacking vectors on top of each other (see examples in the tutorial file). In the Z Level intersection example above we have multiple ramps that intersect with the Z Level of the dump centroid. However, once the Z Level has been intersected, no more points are generated.
Vector Condition #1: Limit Maximum Length
It's not the first Vector Condition available but it's probably the most common and the easiest to understand. A Maximum Length limit will do exactly that! In the example file there is a ramp which climbs towards Z Level but is limited to 500m. Turn off the Vector Condition to see the result. This condition is most commonly used in ramping up or down an area of limited length.
Vector Condition #2: Limit Minimum (and/or Maximum) Z Level
The Minimum and Maximum Z Level conditions behave almost the same way as a Z Level intersection. For the major difference, think of the Minimum Z Level as a floor and the Maximum Z level as a roof. You cannot start above your roof or below your floor, if you do so you create a null vector (0m distance) for the whole step. So if your Maximum Z Level is 300m and your vector starts at 305m and grades down towards 300m, instead of intersecting with the 300m Z Level you will have a null vector.